UnityApp Updates
With this update, Admins can send their communication to Groups, Classes and Services with many options.
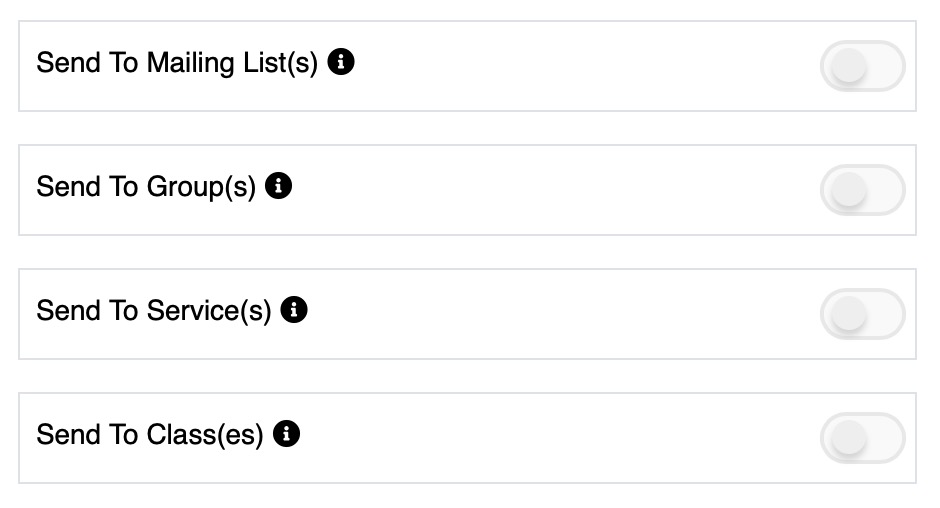
These options are also available in the permissions table to be granted to individuals that are not admins.
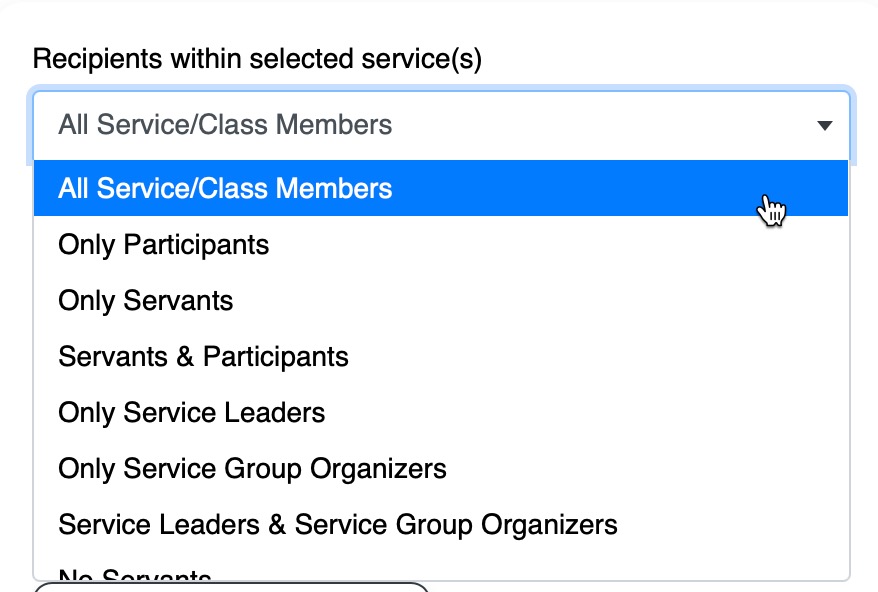
When selecting to send to Services or Classes, you are given many options to customize the list of recipients of your communication
Mail Logs
Admins can now see the list of sent emails in a simple Mail Logs table accessible in the Communications Menu
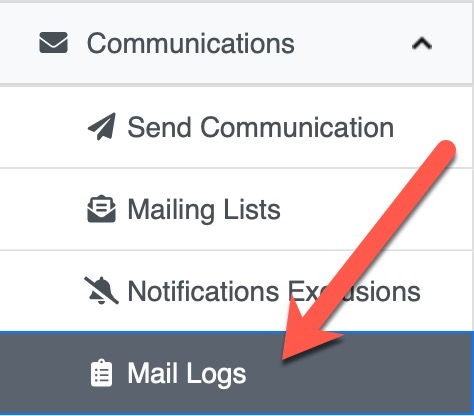
This table gives you the ability to review sent emails details and list of recipients as well as quickly re-send the same email to the same recipients or modify it entirely if needed.
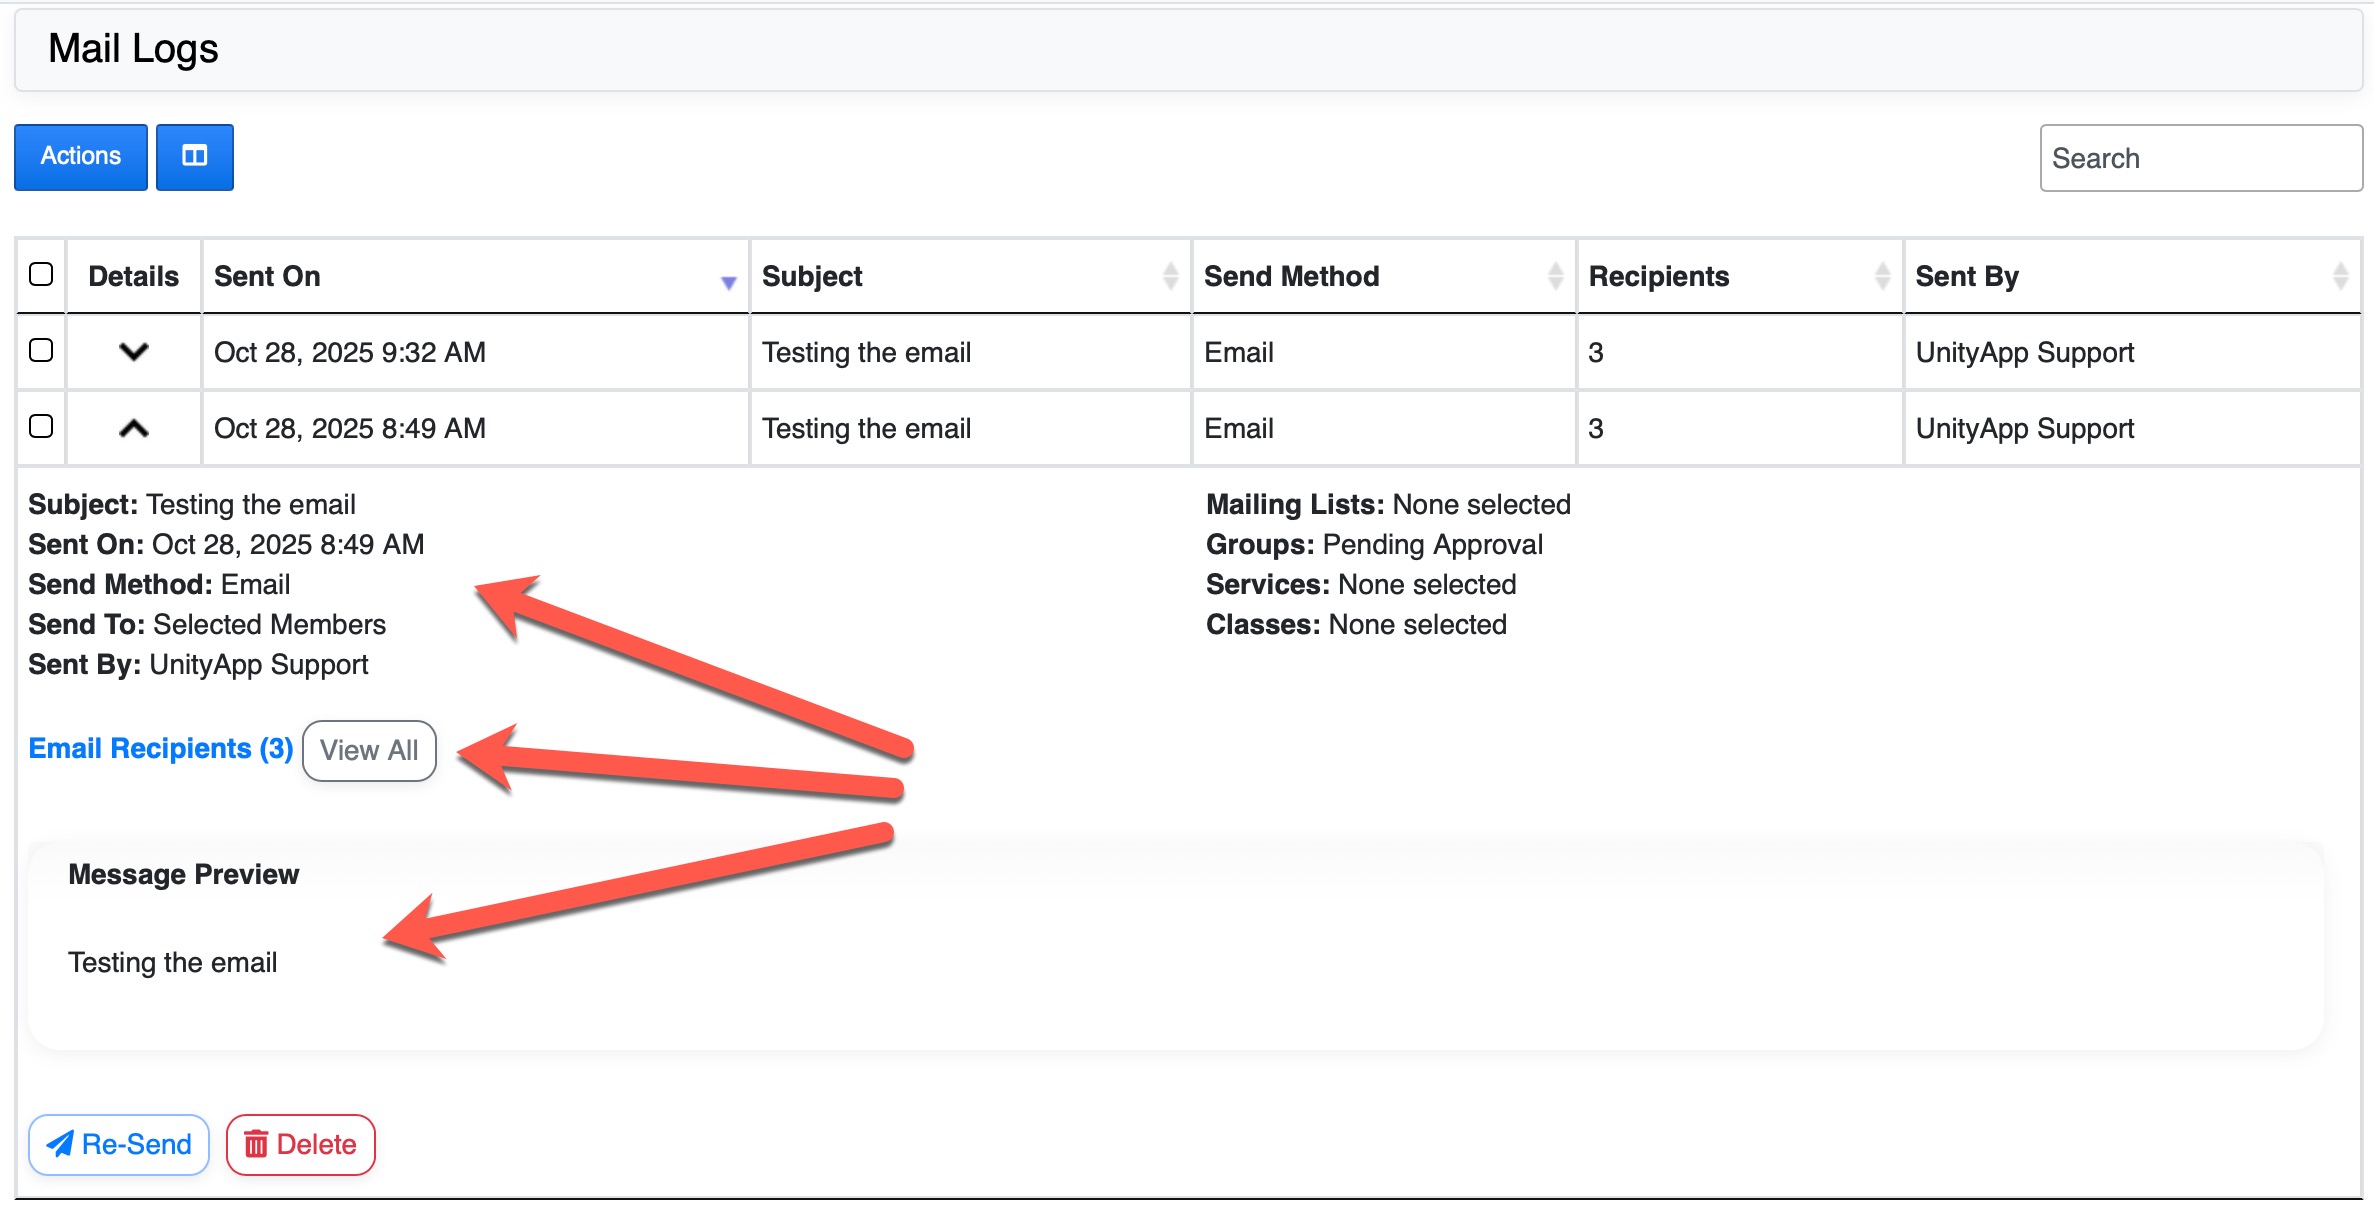
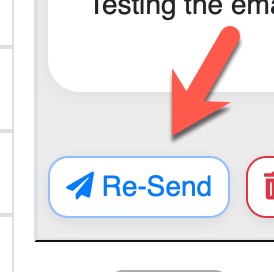
This re-send feature gives you a kind of a Template holder for emails that you can reuse and quickly apply modifications as needed.
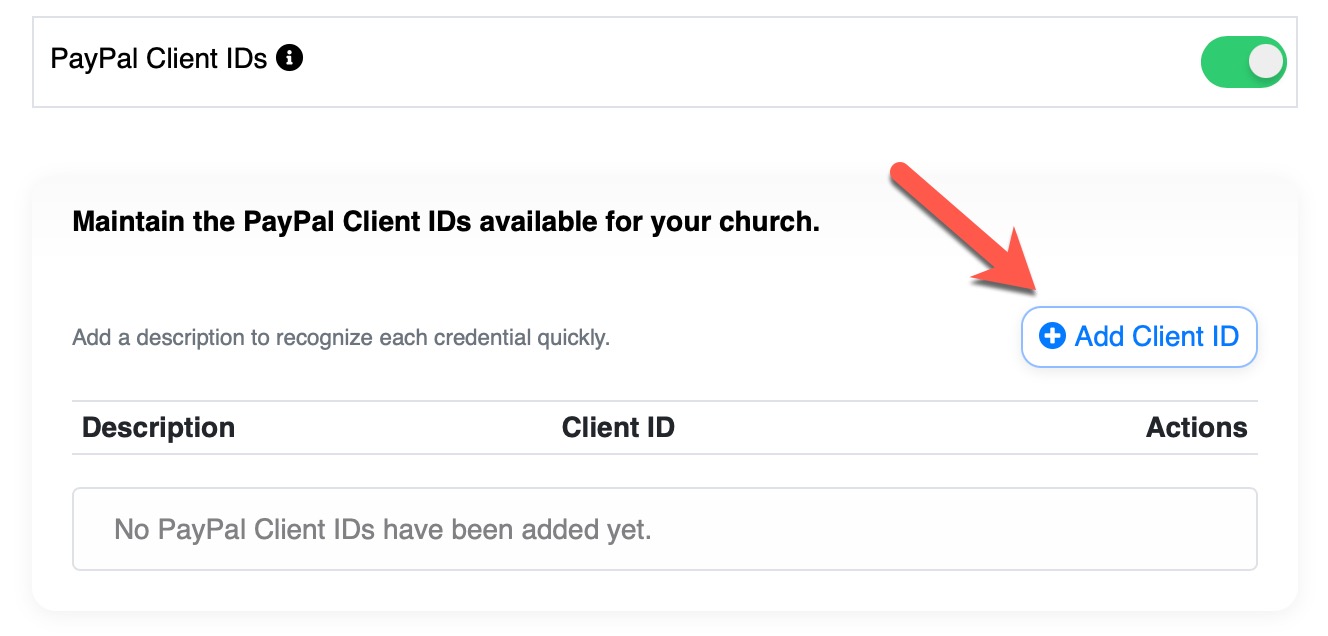
Admins now have the ability to add multiple Client IDs for usage in any event.

Then you add the client IDs:
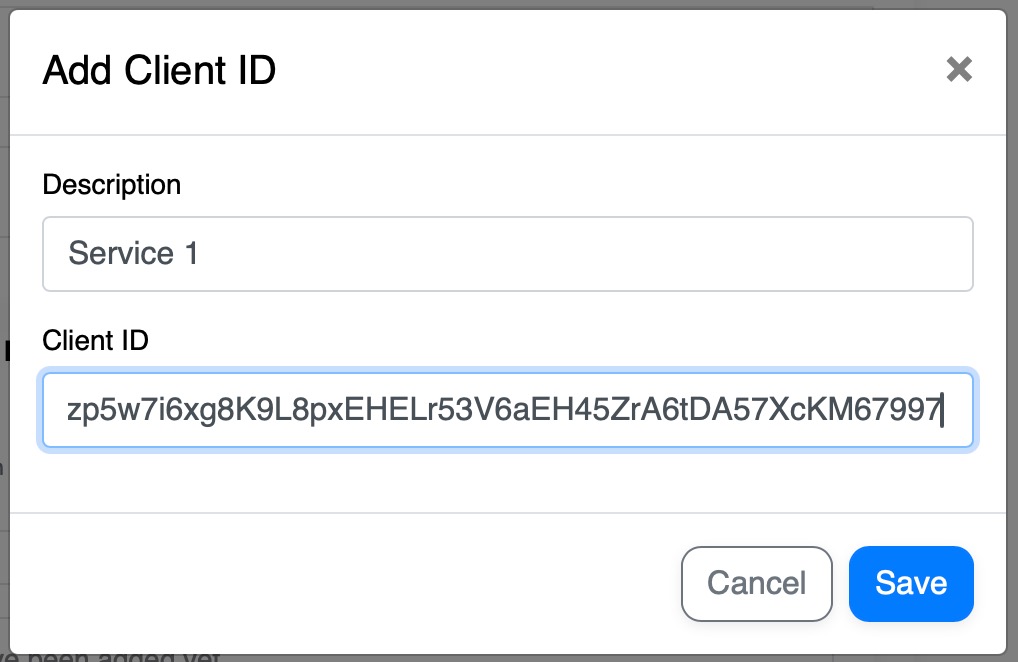
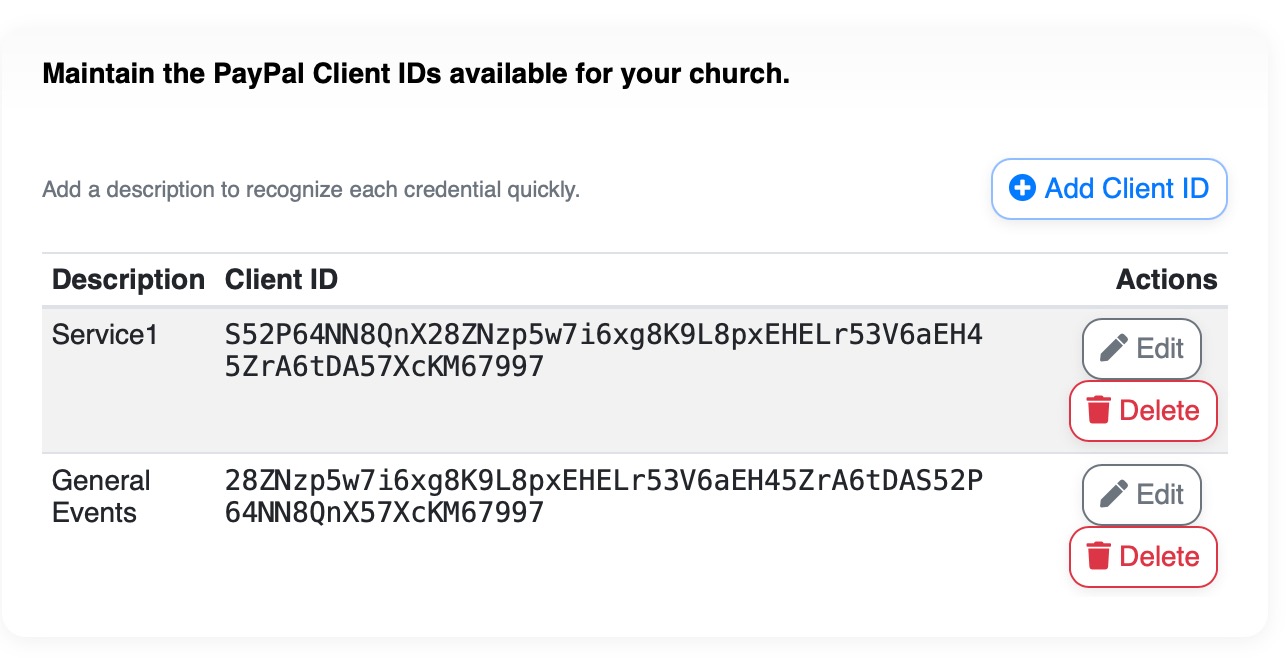
And once added you can now see these IDs as a selection in any event:

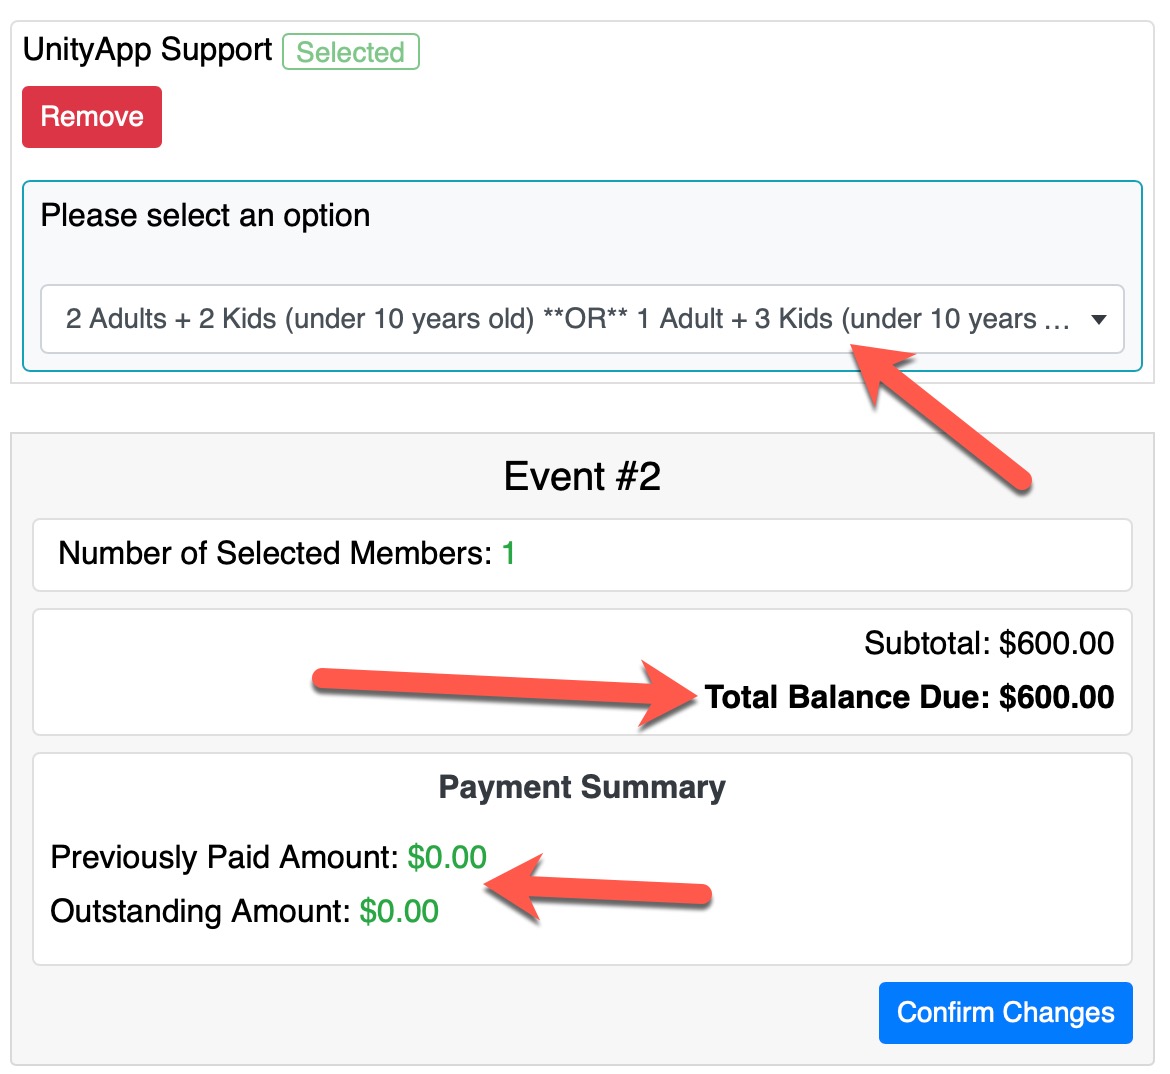
This update introduces (by default) the concept of Reusable Event Credit/Refund for any event with a multiple cost selection (1 or 2). If the setting of Disable editing was not enabled, then the users may edit their previous selection and will be allowed to retain any refunds as reusable credits in the same event for them or for other family members.
When a member booked an event with a multiple cost selection dropdown (see image below) they can edit their selection with this new update (if it was not disabled by the admin for this event)
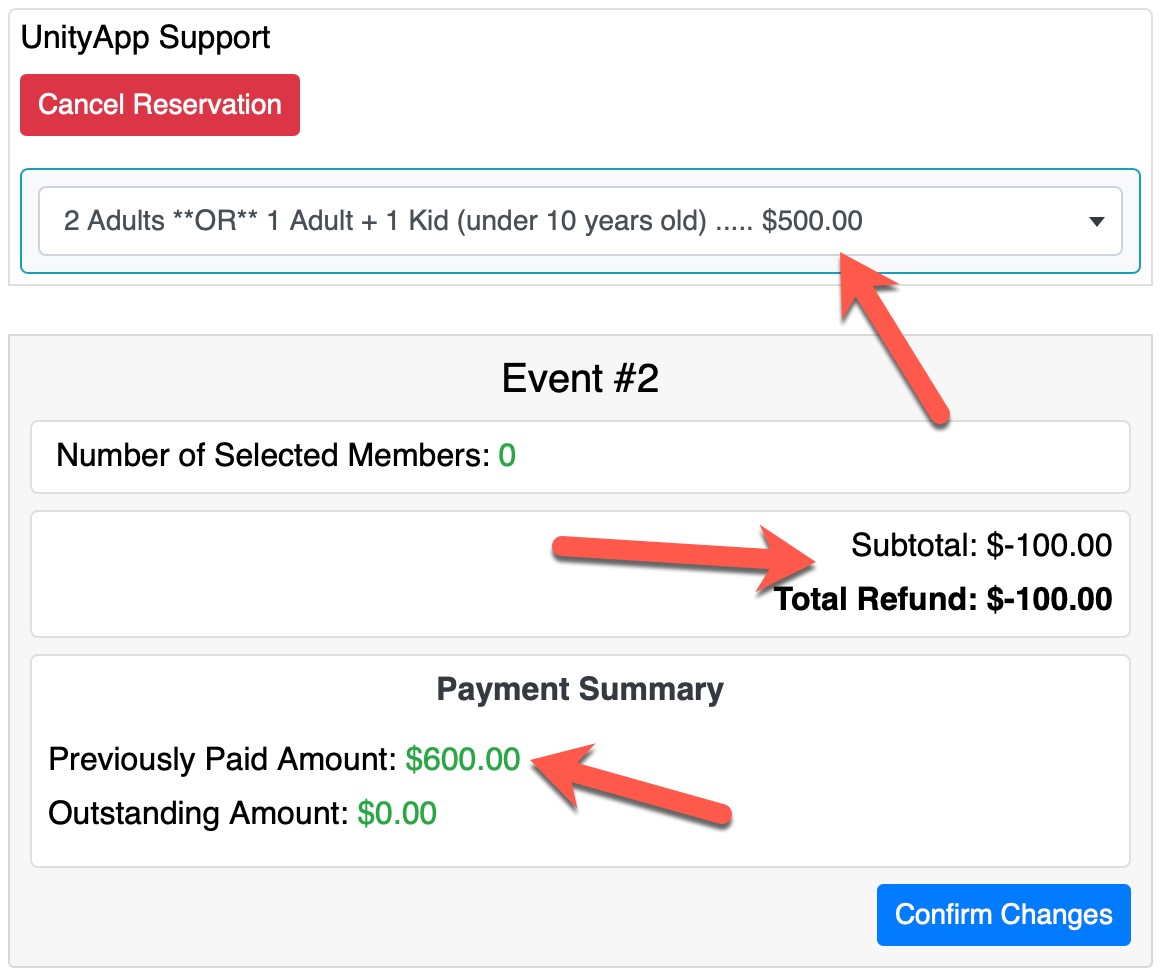
Once paid, they can change their selection and in this example be refunded a certain amount (the difference between the old paid amount and the new selection)
Then they can use that refund balance to reduce the amount for a second family member in the same event
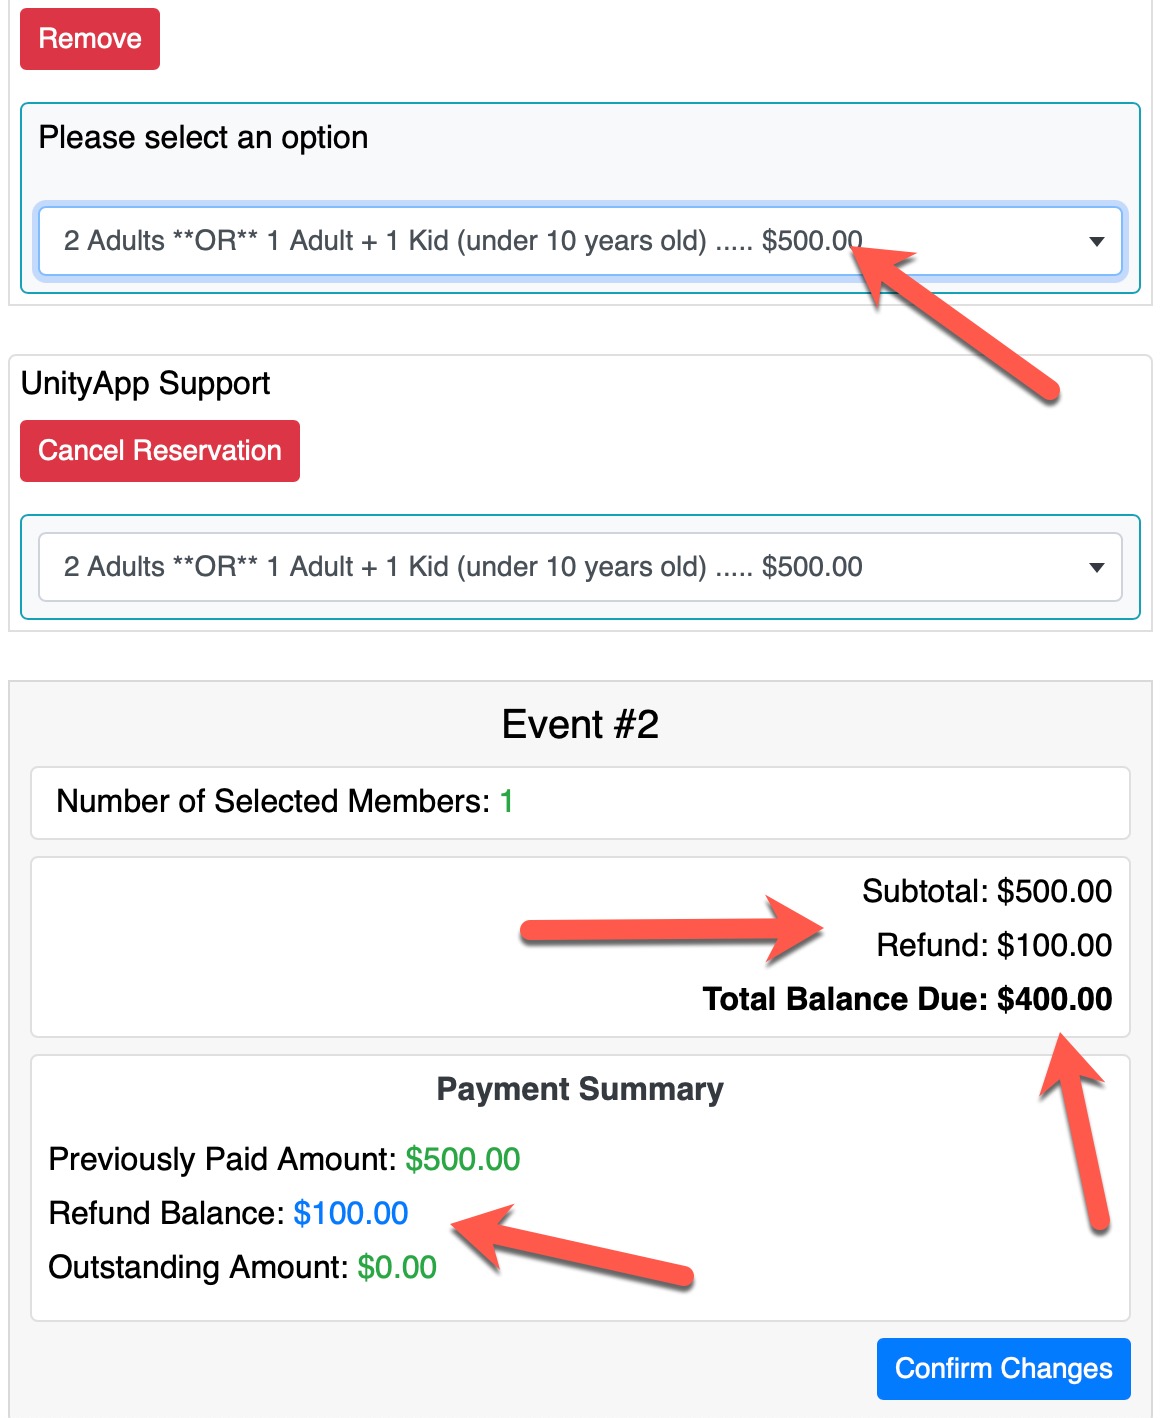
Therefore they don't overpay, no need to cancel and re-book and the accounting doesn't have to worry about refunding an amount that would anyways be used for the same event for another family member.
Servants, Service Leaders, Service Coordinators, UnityApp Admins and Priests can now enable the Service Upcoming Birthday Notifications!
How it works
Every Saturday at noon, those that have access to this option and that have enabled it, will receive a notification by email with the upcoming birthdays of their service participants and servants for the next 7 days. For the UnityApp Admins and the Priests they will get (if enabled) the birthdays of all services participants and servants of their church.
How to enable it
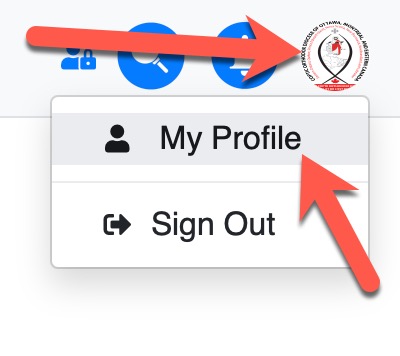
Login to Unity and go to your Profile Page (top right round icon)
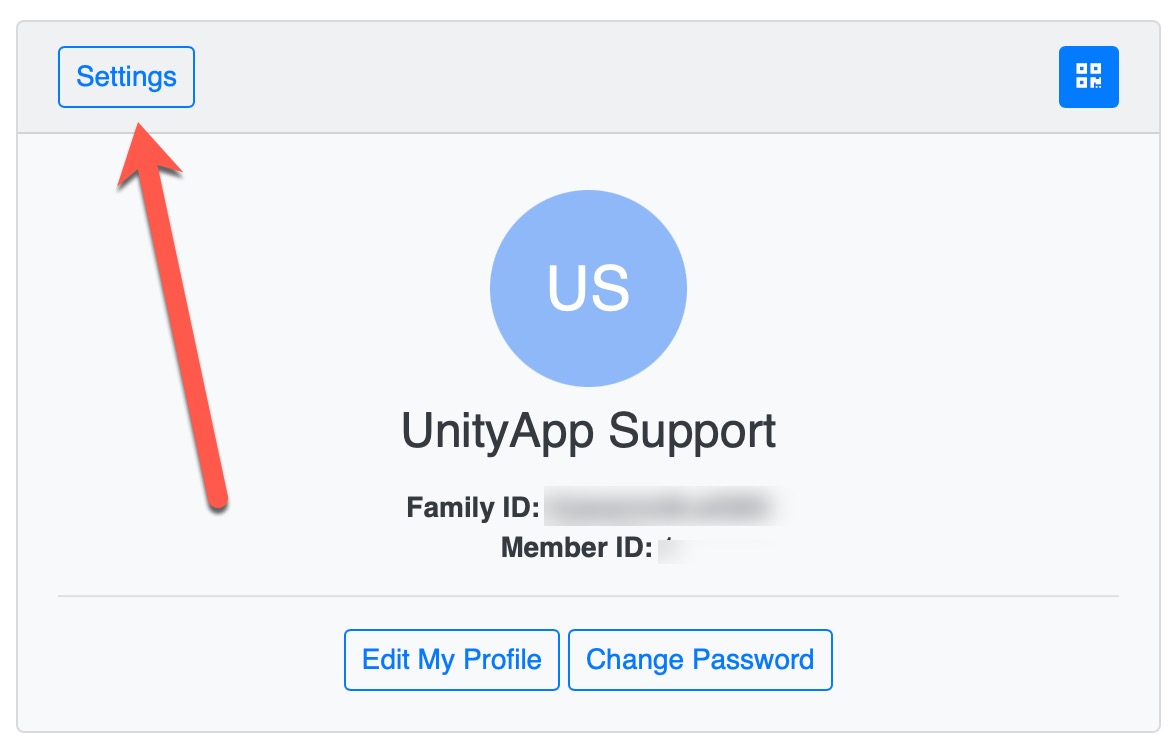
Click on the Settings (top left corner of the profile page)
Scroll down to the Service Settings and click on that section
Turn on the Birthdays Notifications which will send you the email on the next cycle (next Saturday at noon)
.jpg)
If you need the birthdays right away and can't wait until the weekly Saturday email, simply click on the green button "Send Me Upcoming Birthdays Email Now".

You will receive the email and you will get the list of participants and servants of your service (or all services in case of priest or admin)
You also have a "Add to my Calendar" option next to each birthday which will automatically add the event with the person name and phone number to your calendar

Important Notes
1. At least the day and month must be present in a member profile to be in the birthdays list.
2. If participants or a servants are part of more than one service, they will only be shown once in the list. (the service shown will be randomly selected)
3. You can stop receiving anytime these notifications by simply disabling the option in your profile settings (see instructions above)
4. Only participants and servants will show in this list, not the congregation members of your church (in the use case of a Priest for example)
However, you can ask the UnityAdmin to create a "Congregation Service" in the services module and add all members to this service as participants.
This update gives Event Admins (set by the UnityApp Admins in the events) the ability to add Guest Members, Servants and Deacons to any event even if these gusts don't have an account.
Allow Add Guest Permission
As a UnityApp Admin, you can edit the role of Servants in any event and give them the correct permission to add Guests.

Add Guest Member
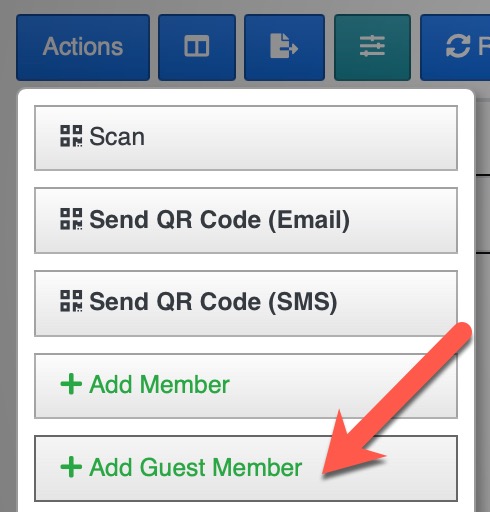
With that permission set, they will be able to see a new option in the Actions button
Then they are presented with this window to enter the details of the new guest
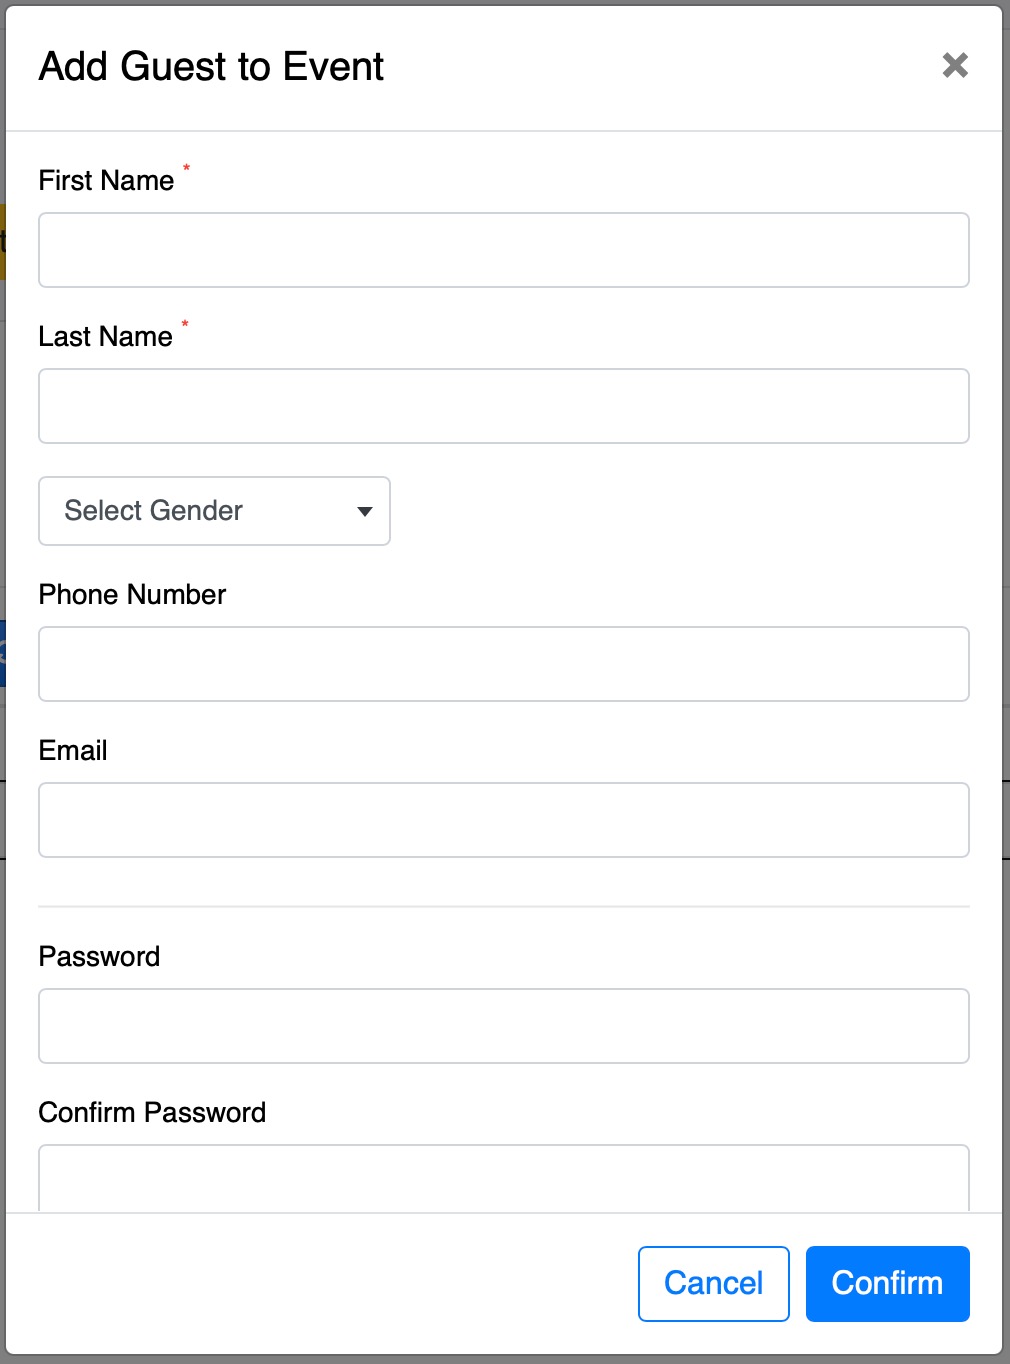
The 3 mandatory fields are the First Name, Last Name and Gender. The rest is optional however we highly recommend to at least add the phone number of this guest.
You can also add a password for this guest, or let UnityApp generate a random password and you can set the options to send it by email to this guest and force password change on their first login
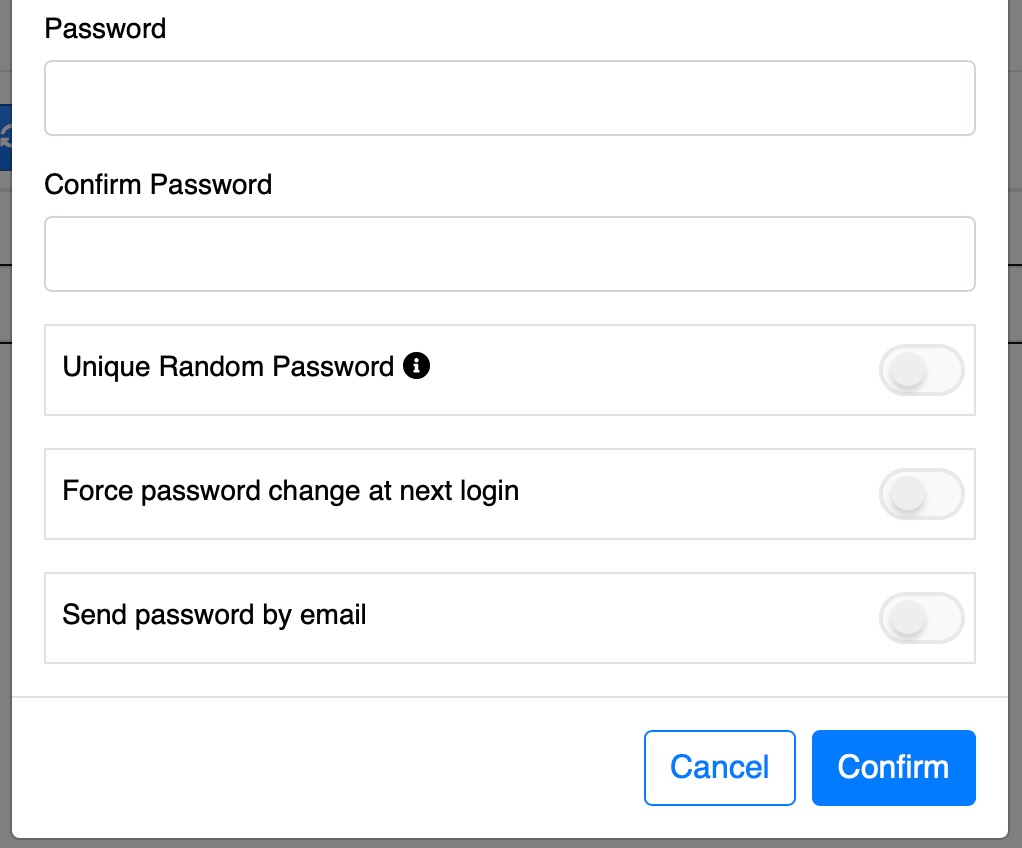
IMPORTANT NOTE
If you generate a password and send it to this guest they will be able to login with their email and that password on UnityApp and they will see any available event in your Church as any other member. The only difference is that they will be FLAGGED as Guest in the database (Members List)
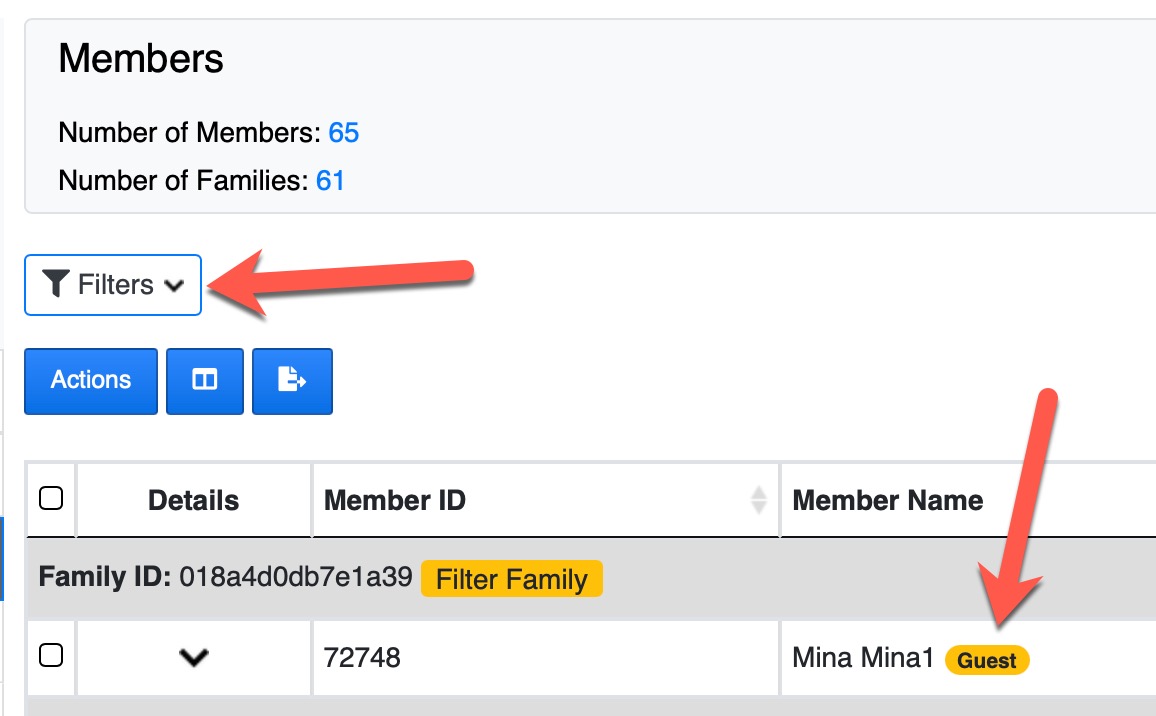
After Adding the Guest
You will get a confirmation message once the guest has been added to your Church database (as guest) and a few options
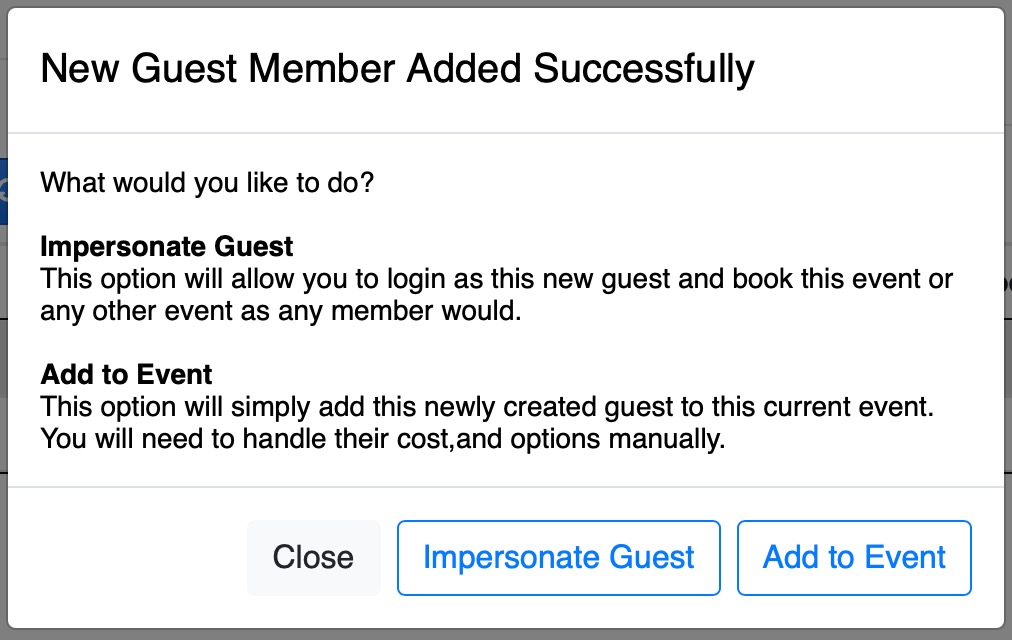
Add to Event
This option will do exactly what is described. And if you were adding a Guest Servant (or Deacon in the Deacons tab) you will be presented with the options to set their visibility and permissions just like adding a regular member as a servant for the event.
Impersonate the Guest
This option is very powerful as it will allow you to simply "login" as the guest you just created and be able to see the dashboard and all the events as any member of the congregation. This is beneficial for some use-cases where you are asking for people to register directly to the event in person without the need for them to have an active UnityApp account.
IMPORTANT NOTE
The impersonate option is only possible one time right after you add the Guest from the event option. If you disconnect or logout you will not be able to book "as the guest" without the help of an Admin.
To exit the impersonation once you completed your booking (as the guest) you simply click on the button at the top of the page or sign out and sign back in.

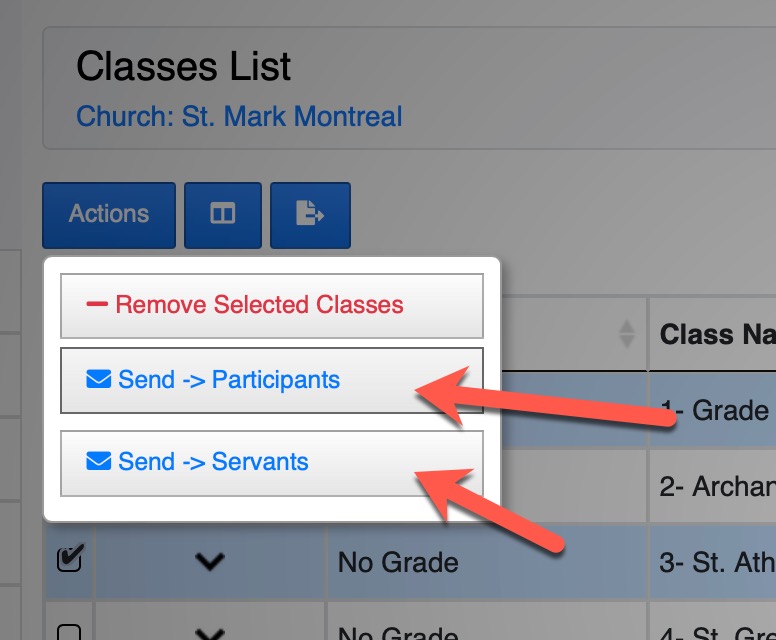
If you have access to send communication in the Service Module, you now can quickly send an email to multiple classes participants or servants without the need to list each class separately.
You can go to the Service Dashboard, then load the service page and click on the Classes Tab
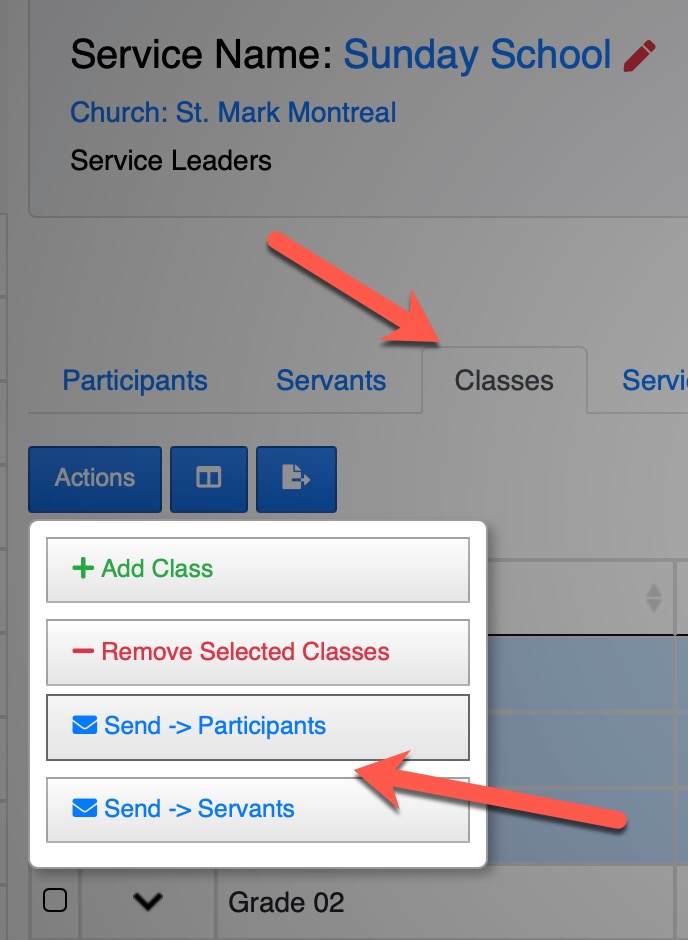
Then select the classes you would like to send communication to and then select your action. You will be presented witht he usual communication message editor and that's it!
You can also access the same function from the Service Dashboard -> See All Classes page.
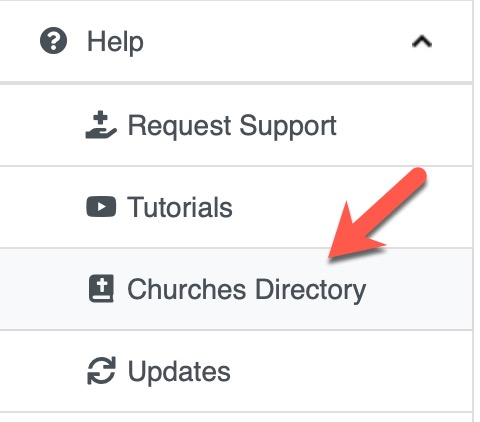
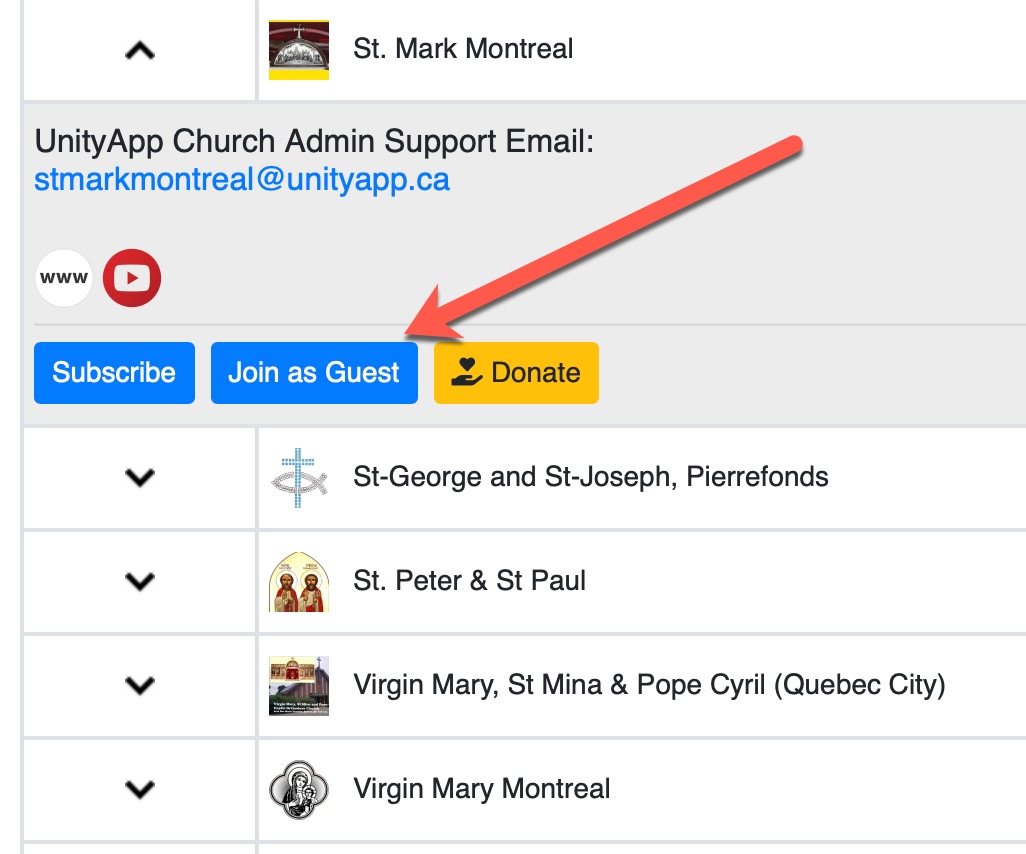
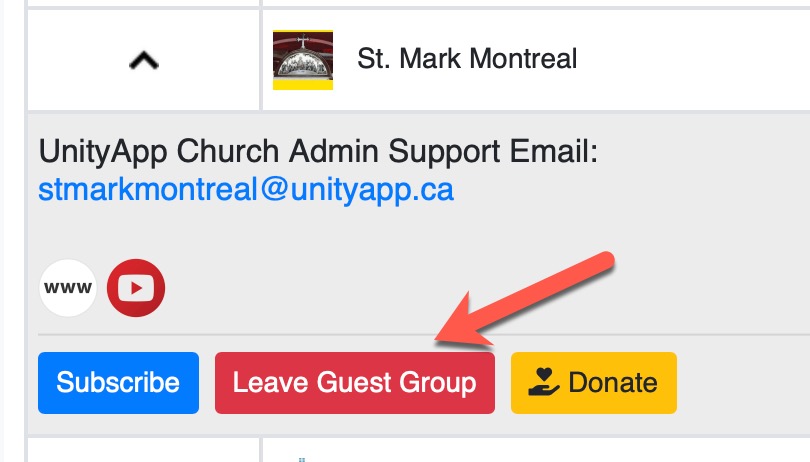
Members can now join your church as a guest by clicking on the Join as Guest button in the Churches Directory page
The user has the option to also add all their family members to this Guest Group or just themselves
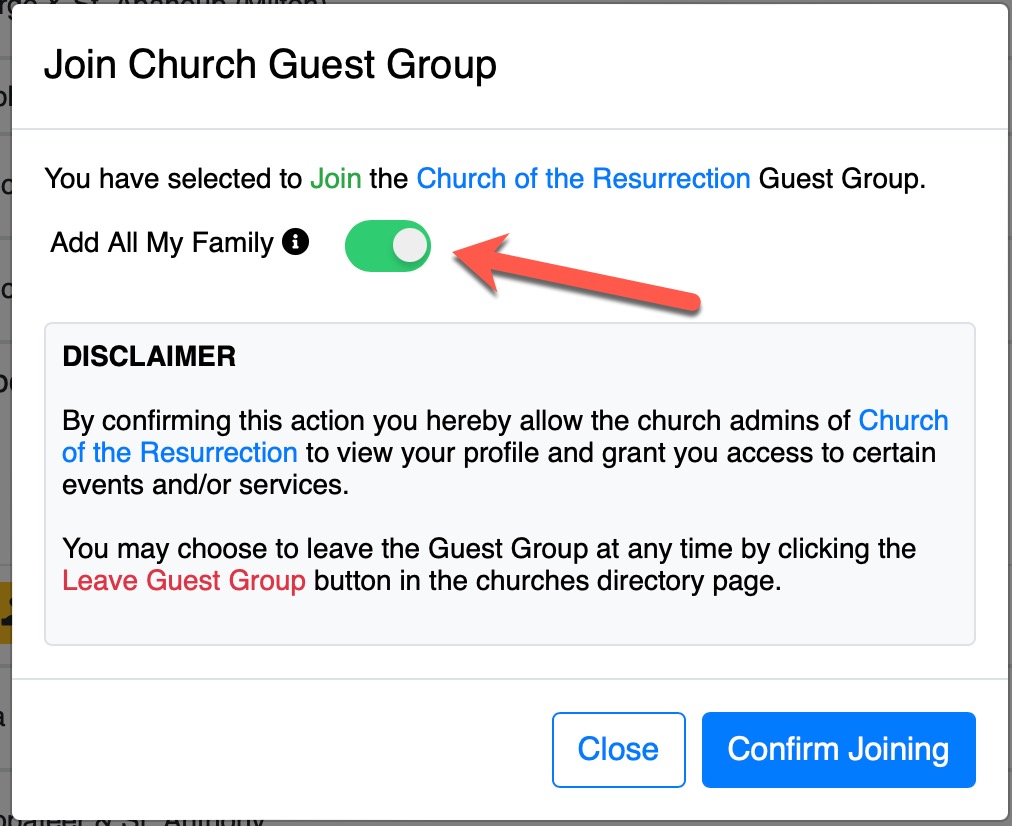
Doing this will automatically add them to the Church Guest Members group which is accessible by the admins and cannot be deleted or edited and is identified by a "System" tag

This will allow admins to add that group to an event visibility or add them as servants or participants of any service without the need for those members to switch churches.
As always, members can leave the Church Guest Group at any time.
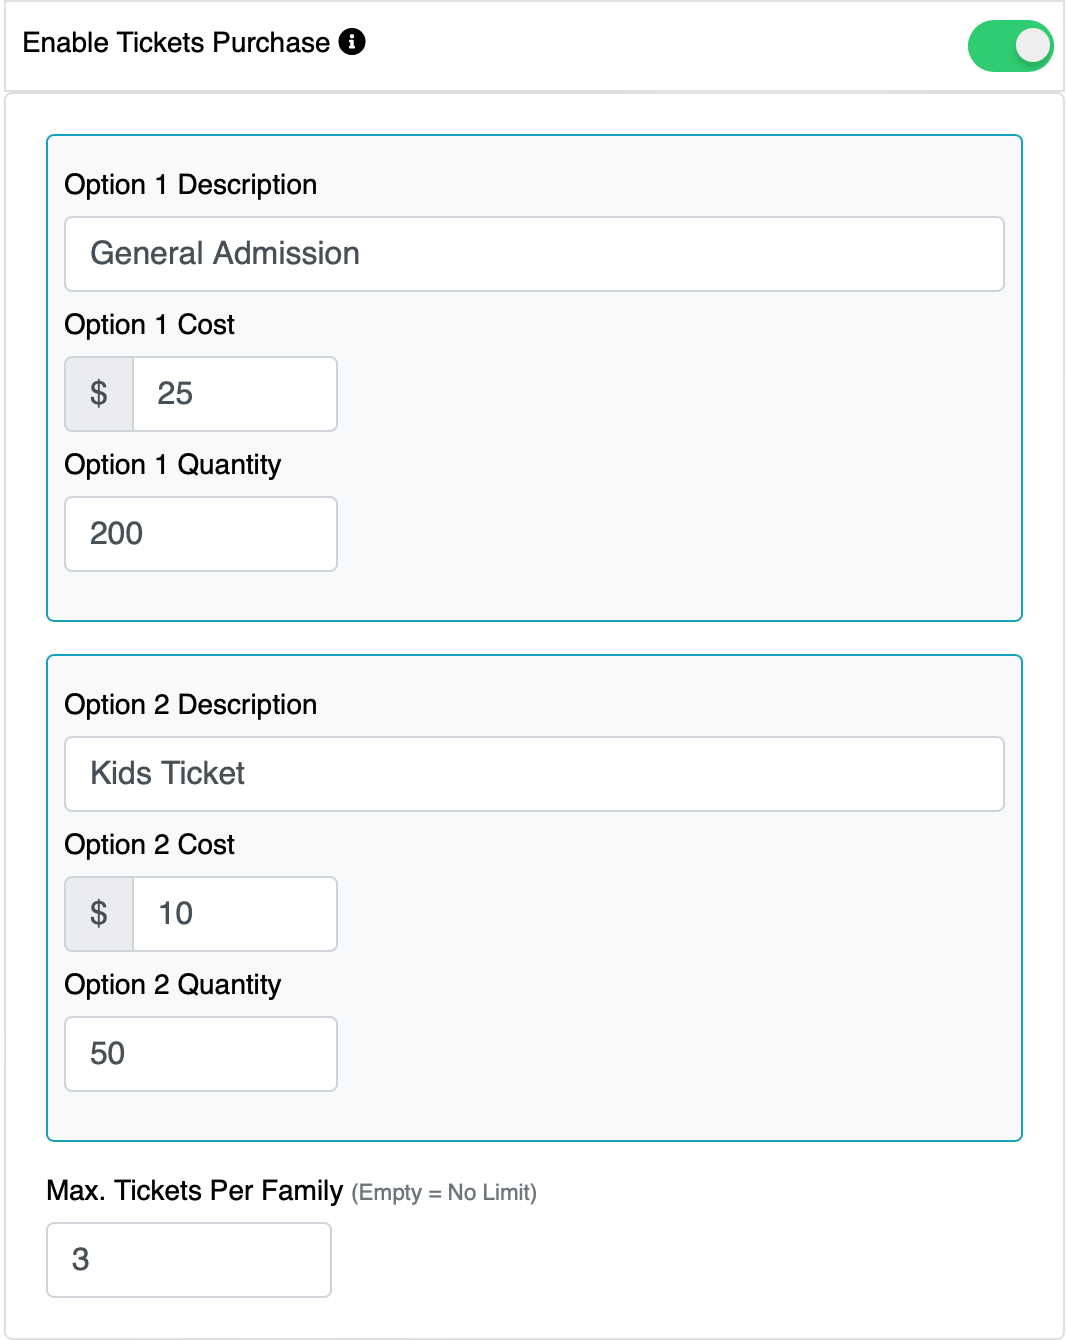
You can now enable the tickets purchase in any event

For the moment, you can add 2 options for the tickets purchase and set a cost for each option. You can enable some optional values such as the maximum number of tickets available or the limit of tickets per family.
During the booking of the event by the user, they will only see their own name (none of their family members will show)

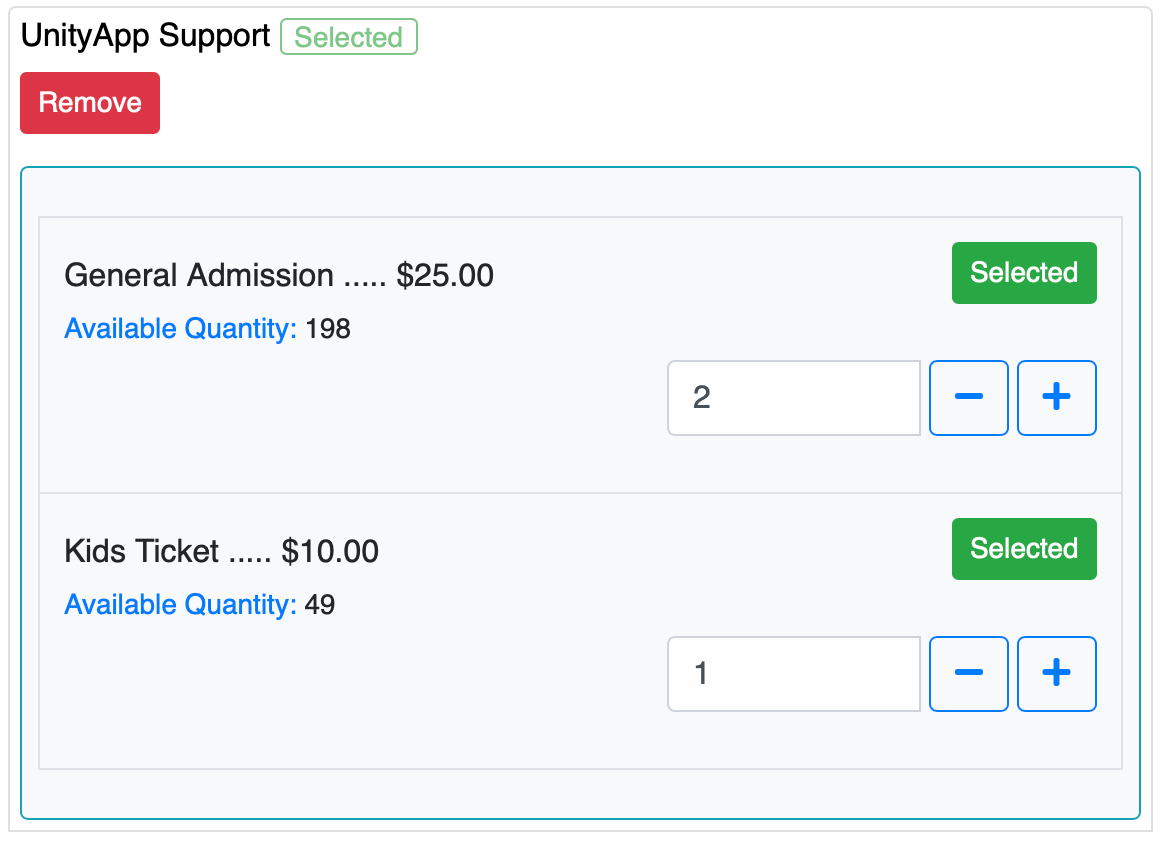
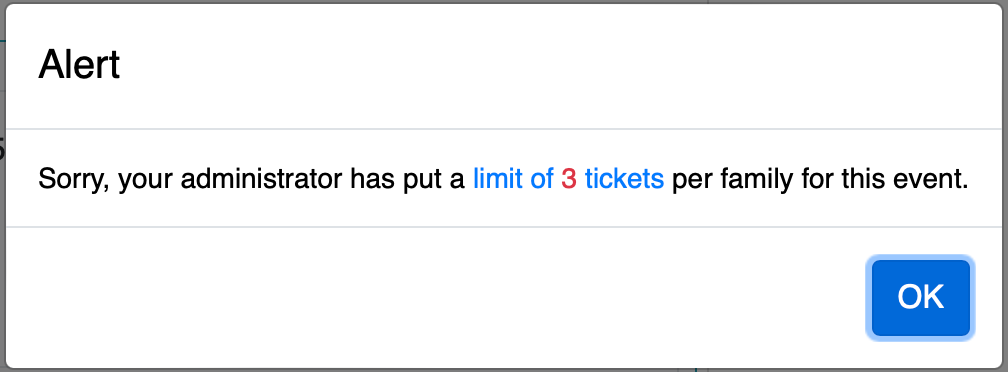
Here they can select the tickets and the values will change dynamically based on your event settings limits. Any amount over the limit will be clearly displayed to the user
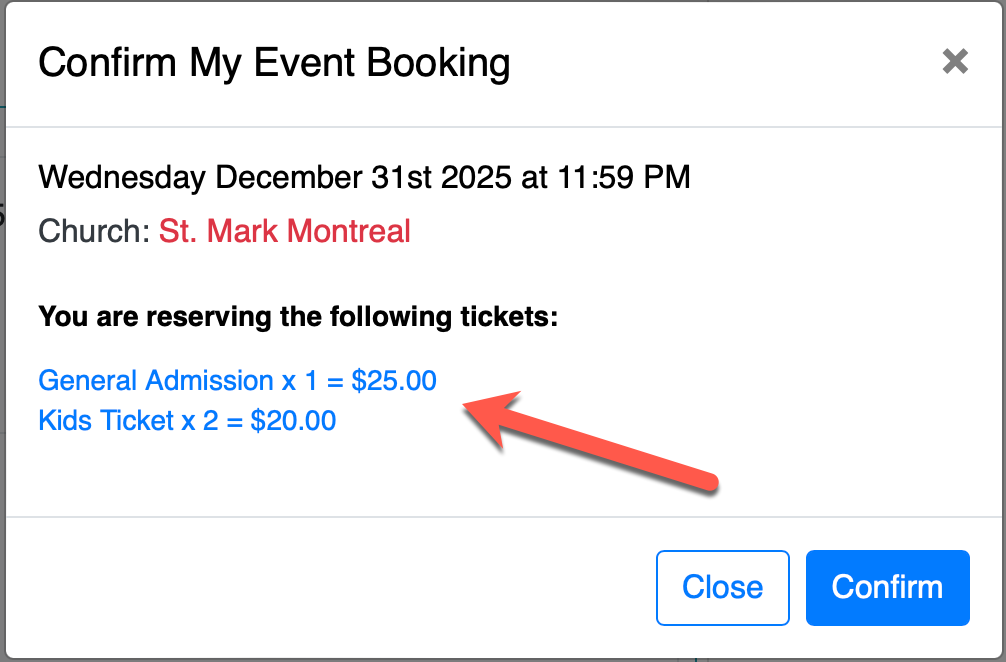
Finally when the user confirms they are presented with a summary of their purchase
Event Management
For your event management, you can enable both options to show in the table of the booked members
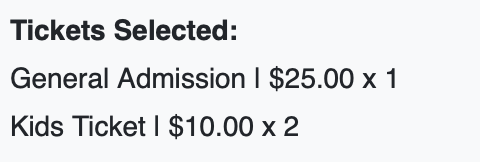
And you can also see the details of their purchase in the payment section
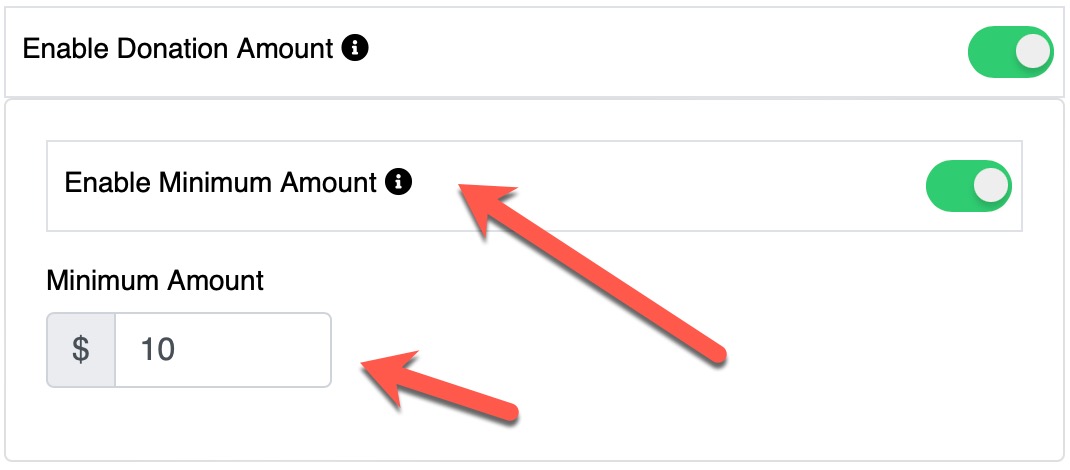
You can now add an option to any event that will prompt the user at the checkout of any event if they wish to make an extra amount for donation to the church hosting the event.

Optionally, you can also enable a minimum amount flag that will require the user to only be allowed to donate any amount equal or higher than what you set in the event settings
At the checkout, just before the payment, the user is prompted with this optional window
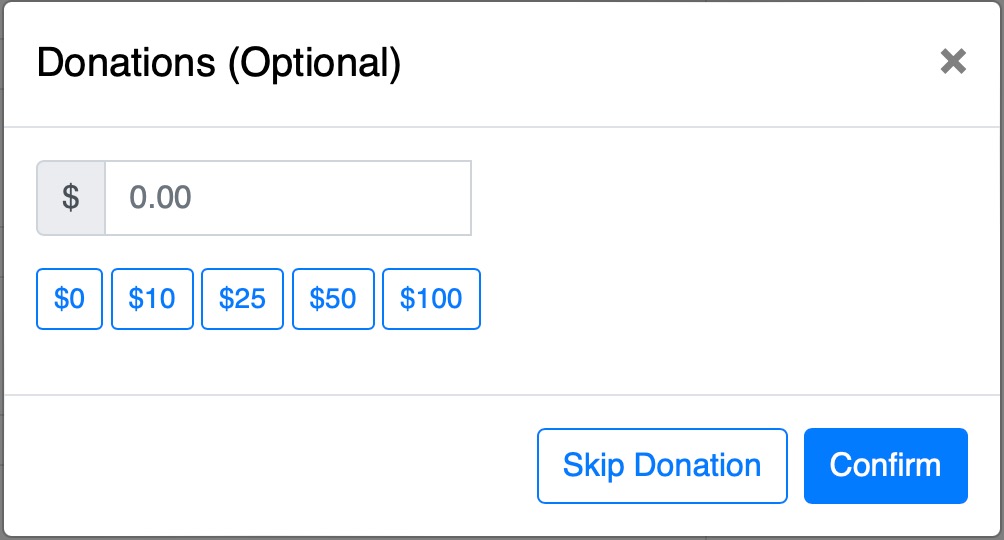
They can enter any amount, or a quick amount by clicking on the buttons below the input. Of course, they can also Skip Donation which will not add any amount
NOTE:
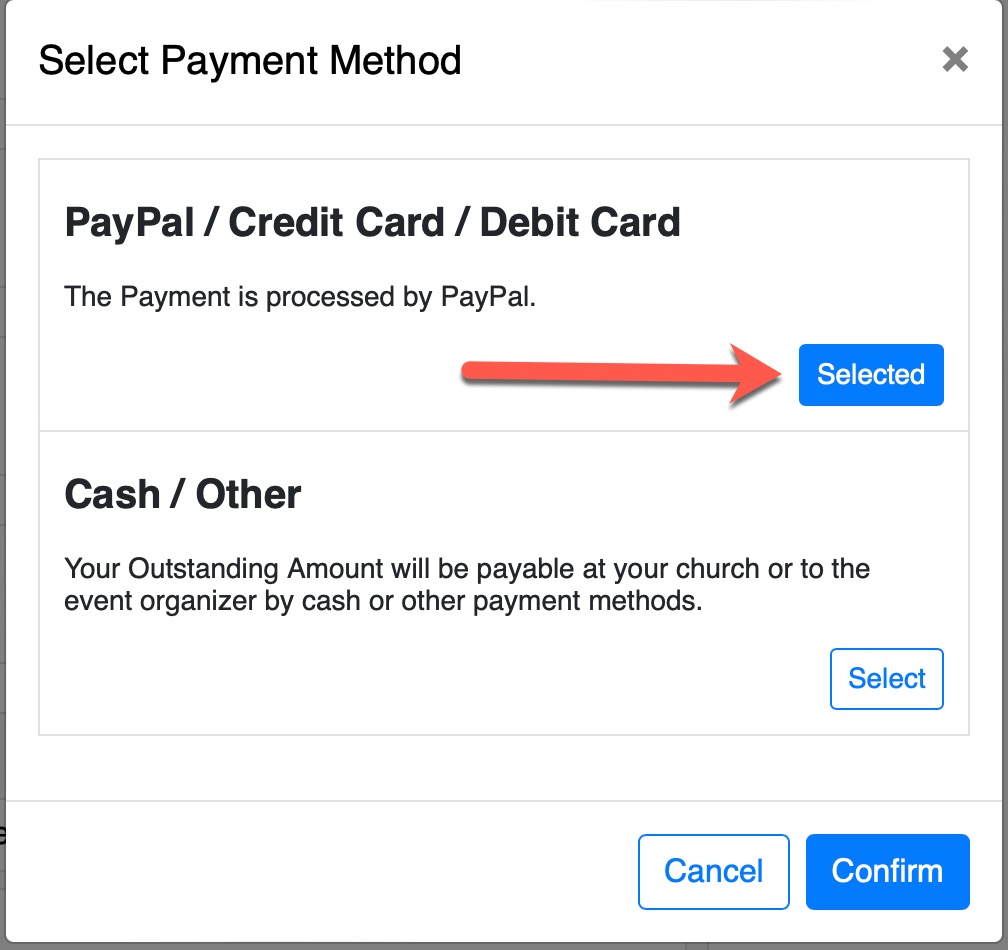
This function will only work if the payment is by PayPal. It will not trigger the donation option for the users if the user selects cash payment (if enabled in the event settings).
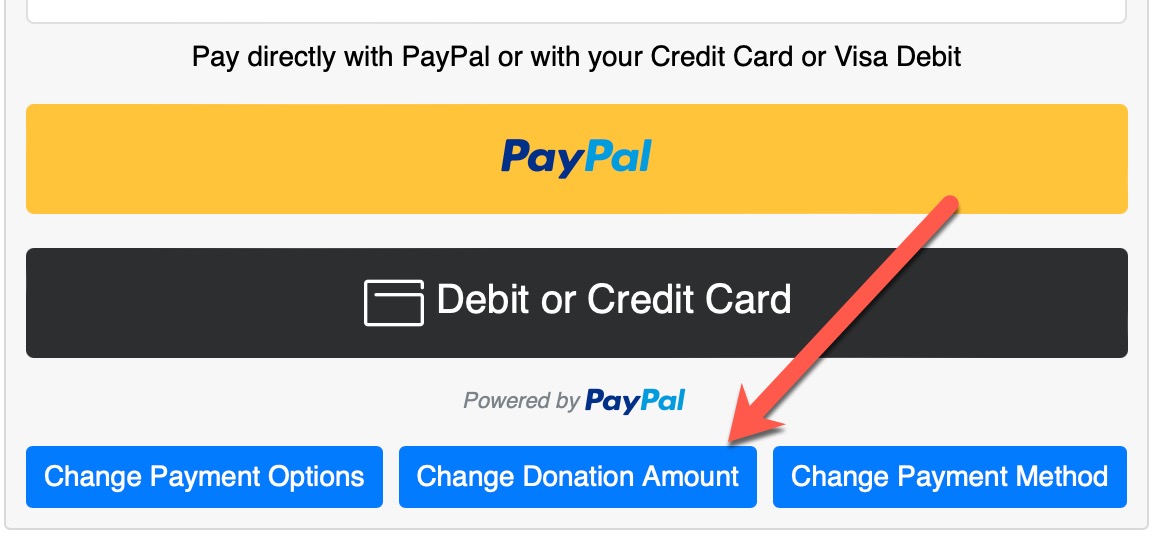
Finally if the users change their mind and wish to add a donation they can still do so before the payment by clicking on the Change Donation Amount button
Quick Tip for Admins
You can also enable JUST this option in the event to make it a donation type event.
If you access the Event Page (View Event) at the very top where you have the event Category Name and the link to the event registration button, you now have access to also view and download the QR-Code to the event registration page.

When you click on the QR-Code icon, it will show you the unique QR-Code that if scanned will take the user to the event registration page directly after they login.
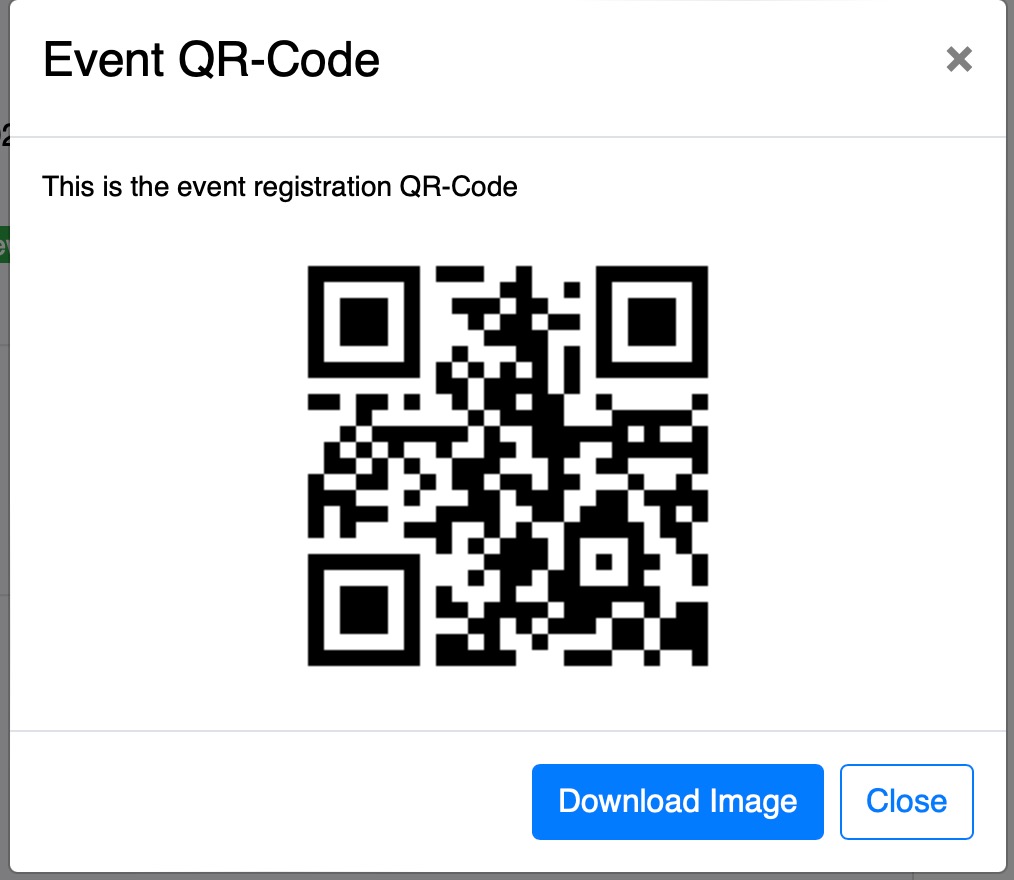
You can also download the image as a PNG image file. This will allow you to put this QR-Code on any poster to have users quickly scan it to be redirected o the event on UnityApp.
This update introduces the new and long awaited feature to send communication by SMS (Text Messages). Please read carefully as there are a lot of important information and technical notes.
Twilio Setup and Cost
We currently have integrated Twilio's API and you must create an account on their platform to be able to use their service.
- Go to Twilio.com Signup Page and create your free account.
- Then follow their guides to purchase a local phone number that will be specific to your account/church
- Don't forget to register for their Non-Profit program which will give you 100$ credits and a 25% discount on the total cost
Once your Twilio account is ready, you will need 3 thngs in order to plugin Twilio with UnityApp:
- Your Twilio Phone number
- Your Account SID number
- Your AUTH Token
UnityApp Setup
You need to enter these in the Admin page -> General Settings -> Global Church Settings in UnityApp.
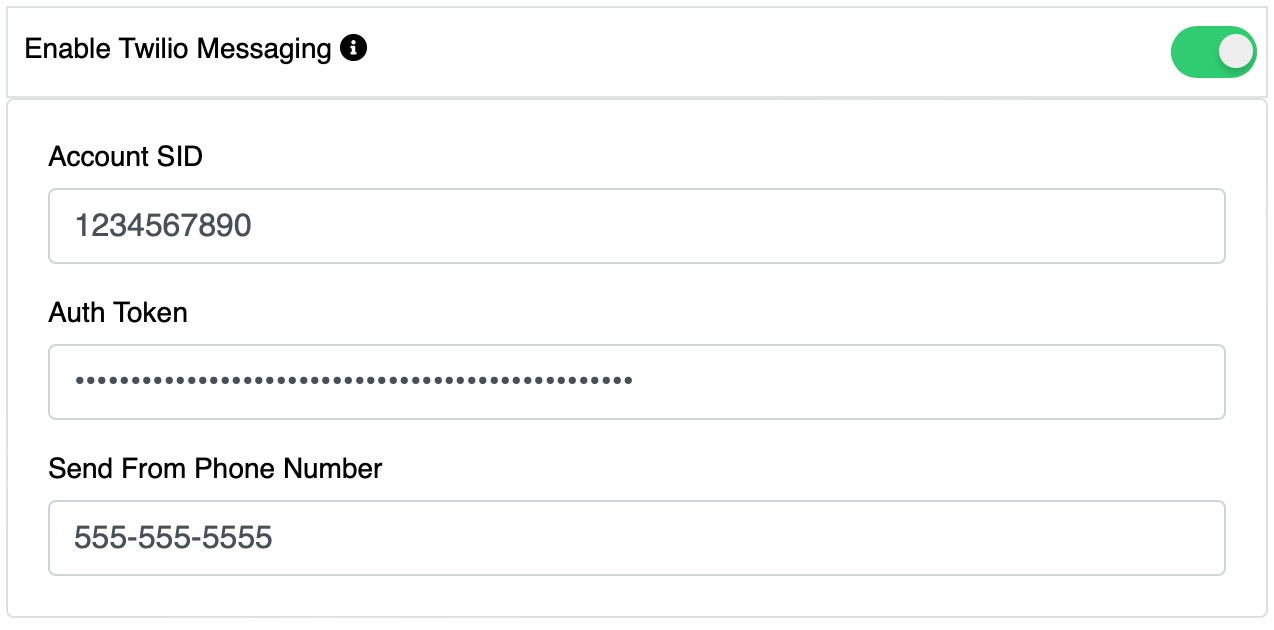
You also have a quick info next to the option giving you the first step to check Twilio's page
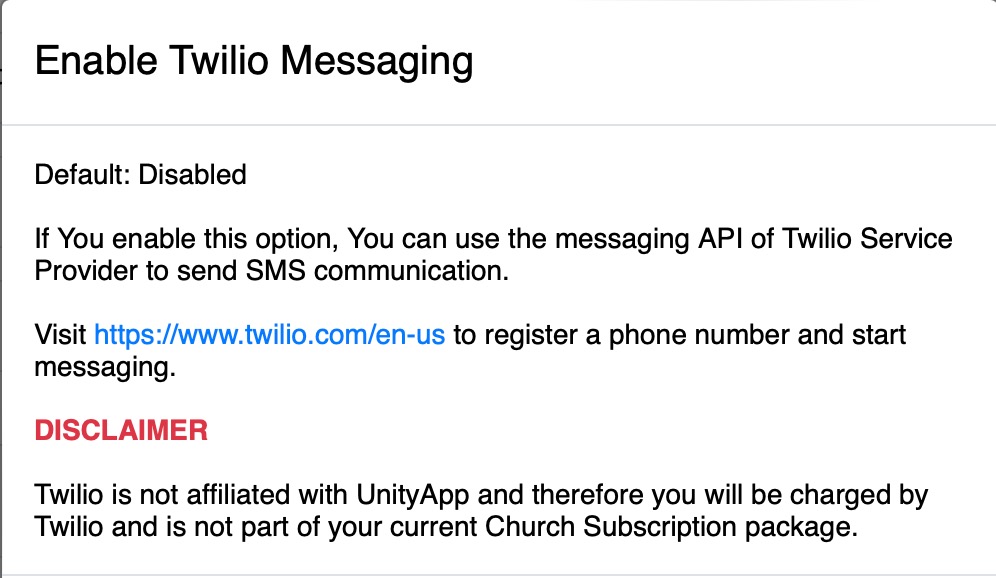
IMPORTANT
At this point, only UnityApp Admins and above will be able to send SMS communication without any special permission.
In order to give permission to anyone to use this feature you must create a new custom role and enable this option

This Permission will allow the users that have it to see the following dropdown when they are sending communication across the system
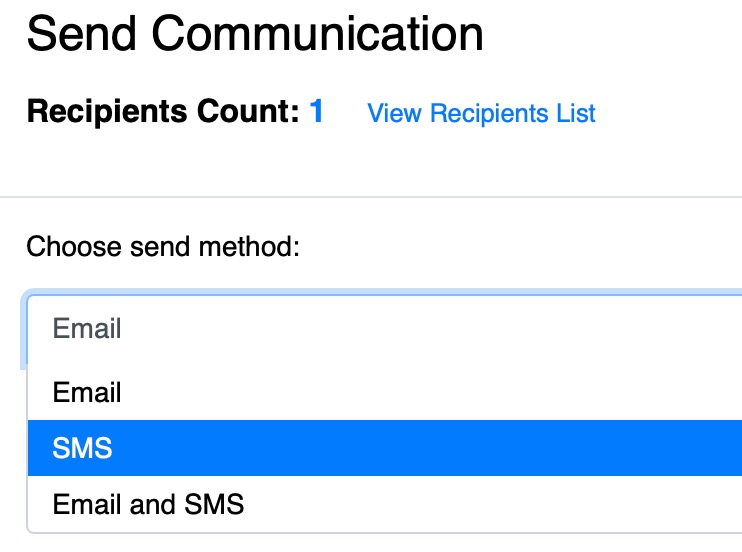
The newly added options are:
- SMS
- Email and SMS
All the options of communication apply here as well.
For example, you can enable to send to the family heads if the email/phone number is empty in the selected members profile.
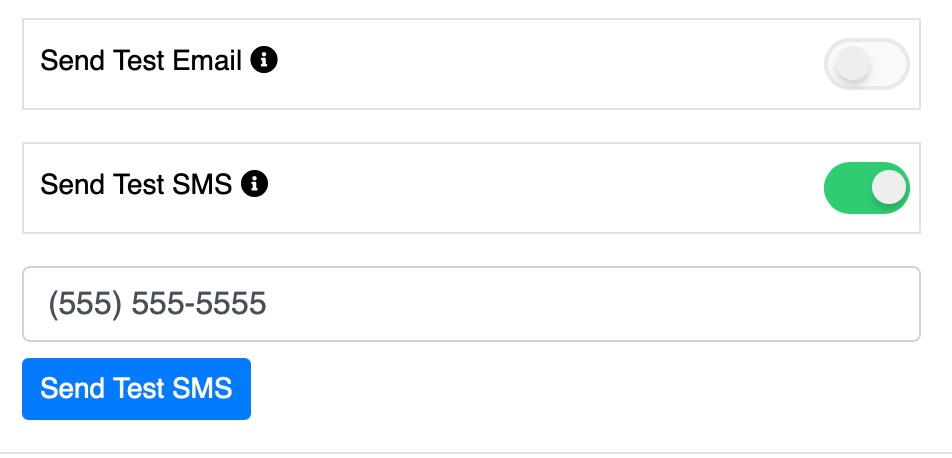
The new feature also gives the ability to send a TEST text message to your own phone number before sending to the selected members (at the bottom of the communication window)
Finally the option also allows you to send the Event QR-Code by text message
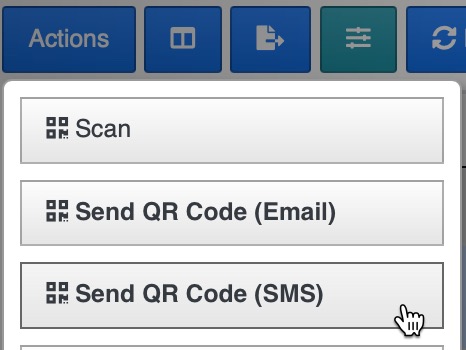
Important things to remember
1. All costs are through your Twilio account and UnityApp will not charge you for using this feature.
2. Each text message will use what they call "Segments" and each segment will cost about $0.0079 or $0.00559 if you have the non-profit discount.
3. The system will bounce the message (skip) if the phone number is a land line and not a mobile phone. (A new phone field will be added soon to the profile of the users to avoid these issues in the future.
4. Currently we only use SMS which means that any image you add to the message will appear as a link to the user.
5. UnityApp and Twilio are fully compliant with the current internet privacy laws and therefore any user has the ability to "Unsubscribe" from receiving your messages by replying "STOP" to at least one message. To Resume their subscription they simply have to reply "START" to one of the messages.
The future of this new module
This module is the beginning for many more features such as potentially a Voice Message (Under analysis at the moment) and other carriers than Twilio which can offer better pricing and/or more features.
We also will be using this feature as a 2-step verification for better security of the system and notifications in general (with the user permission of course in their own profile settings).
We will keep you informed of any new development or changes.
Event Inventory Booking
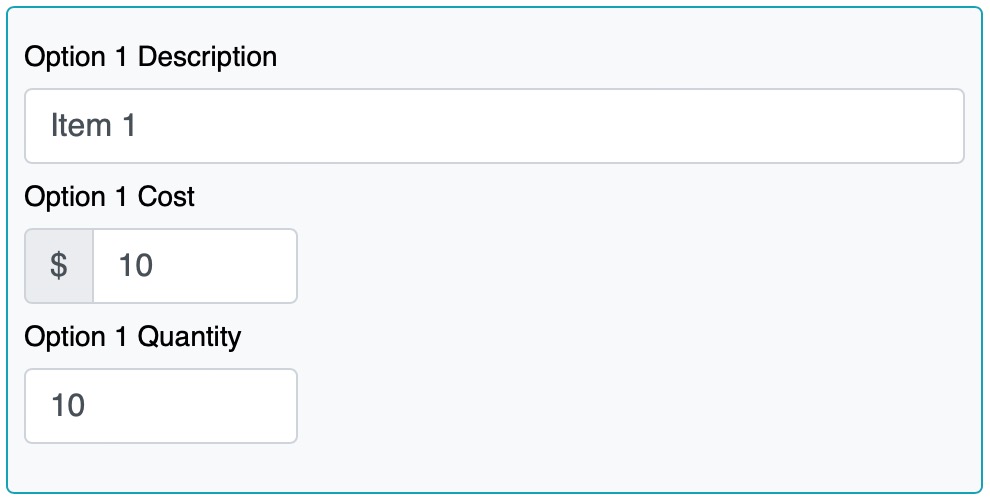
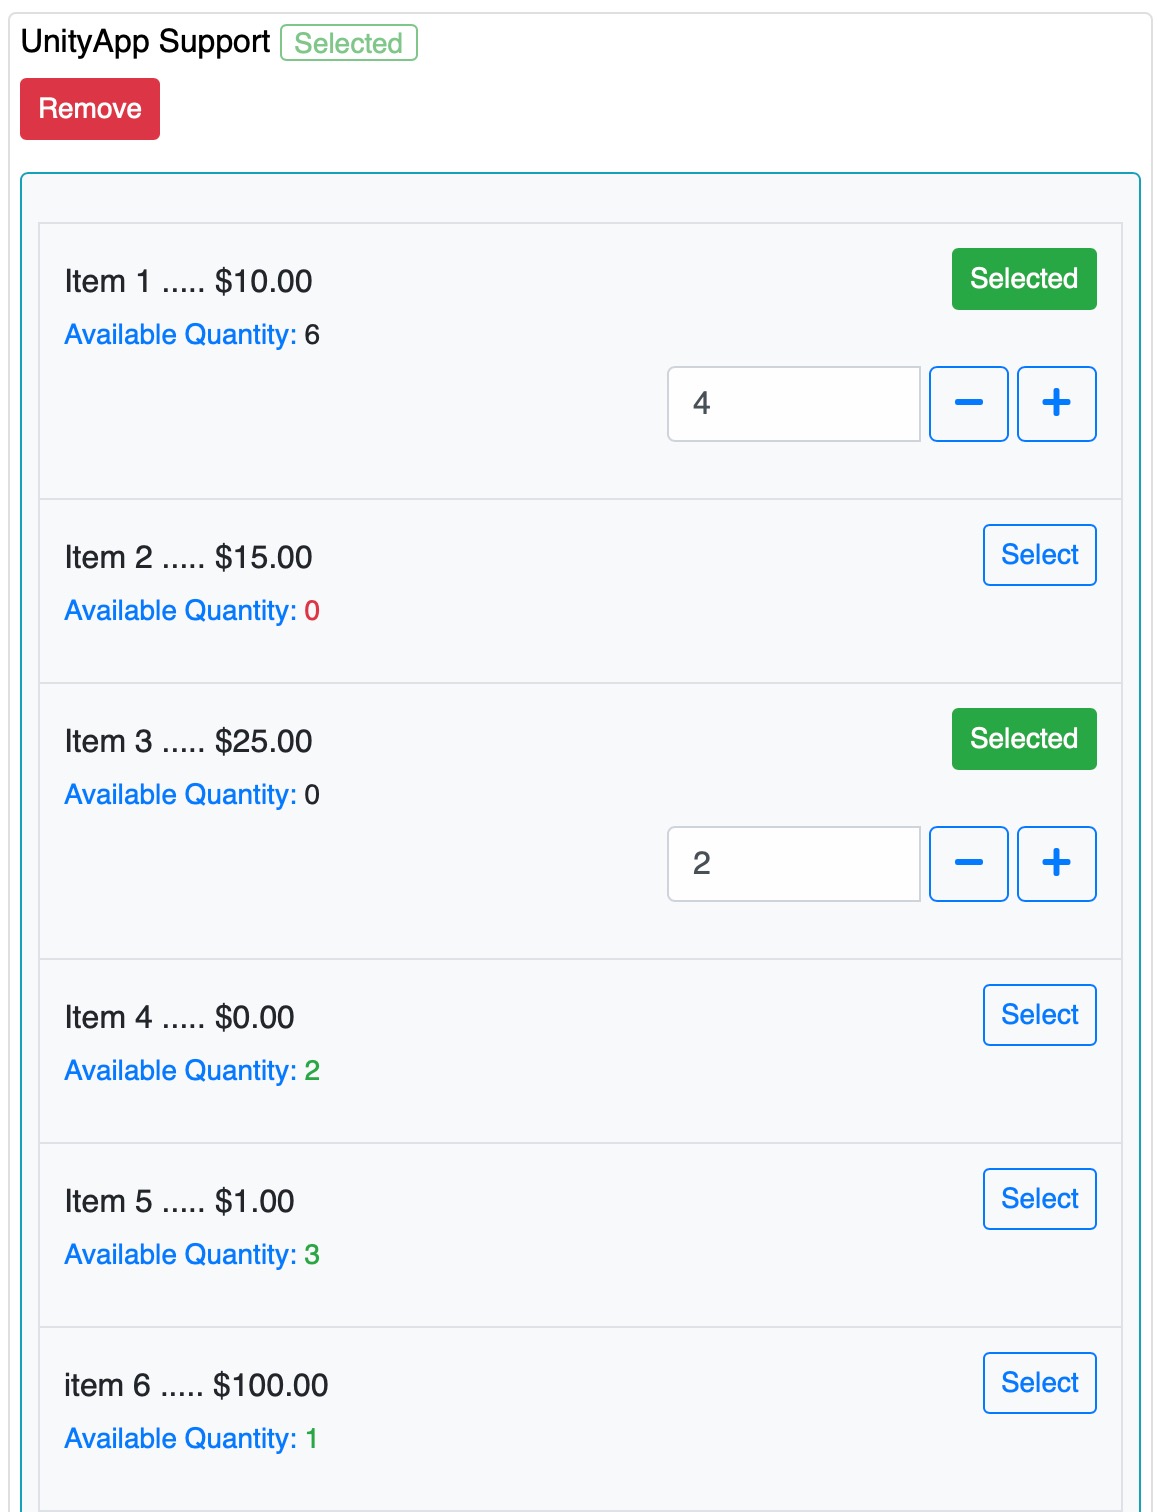
You can now enable an inventory option in any event which will allow the currently logged user to book any available quantity of items that you pre-define in the event settings.
You can set up to 10 items per event. Each with its cost and available quantity.
Each time a user selects and confirms an item when booking the event, it will automatically calculate the available quantities.
Church Donations
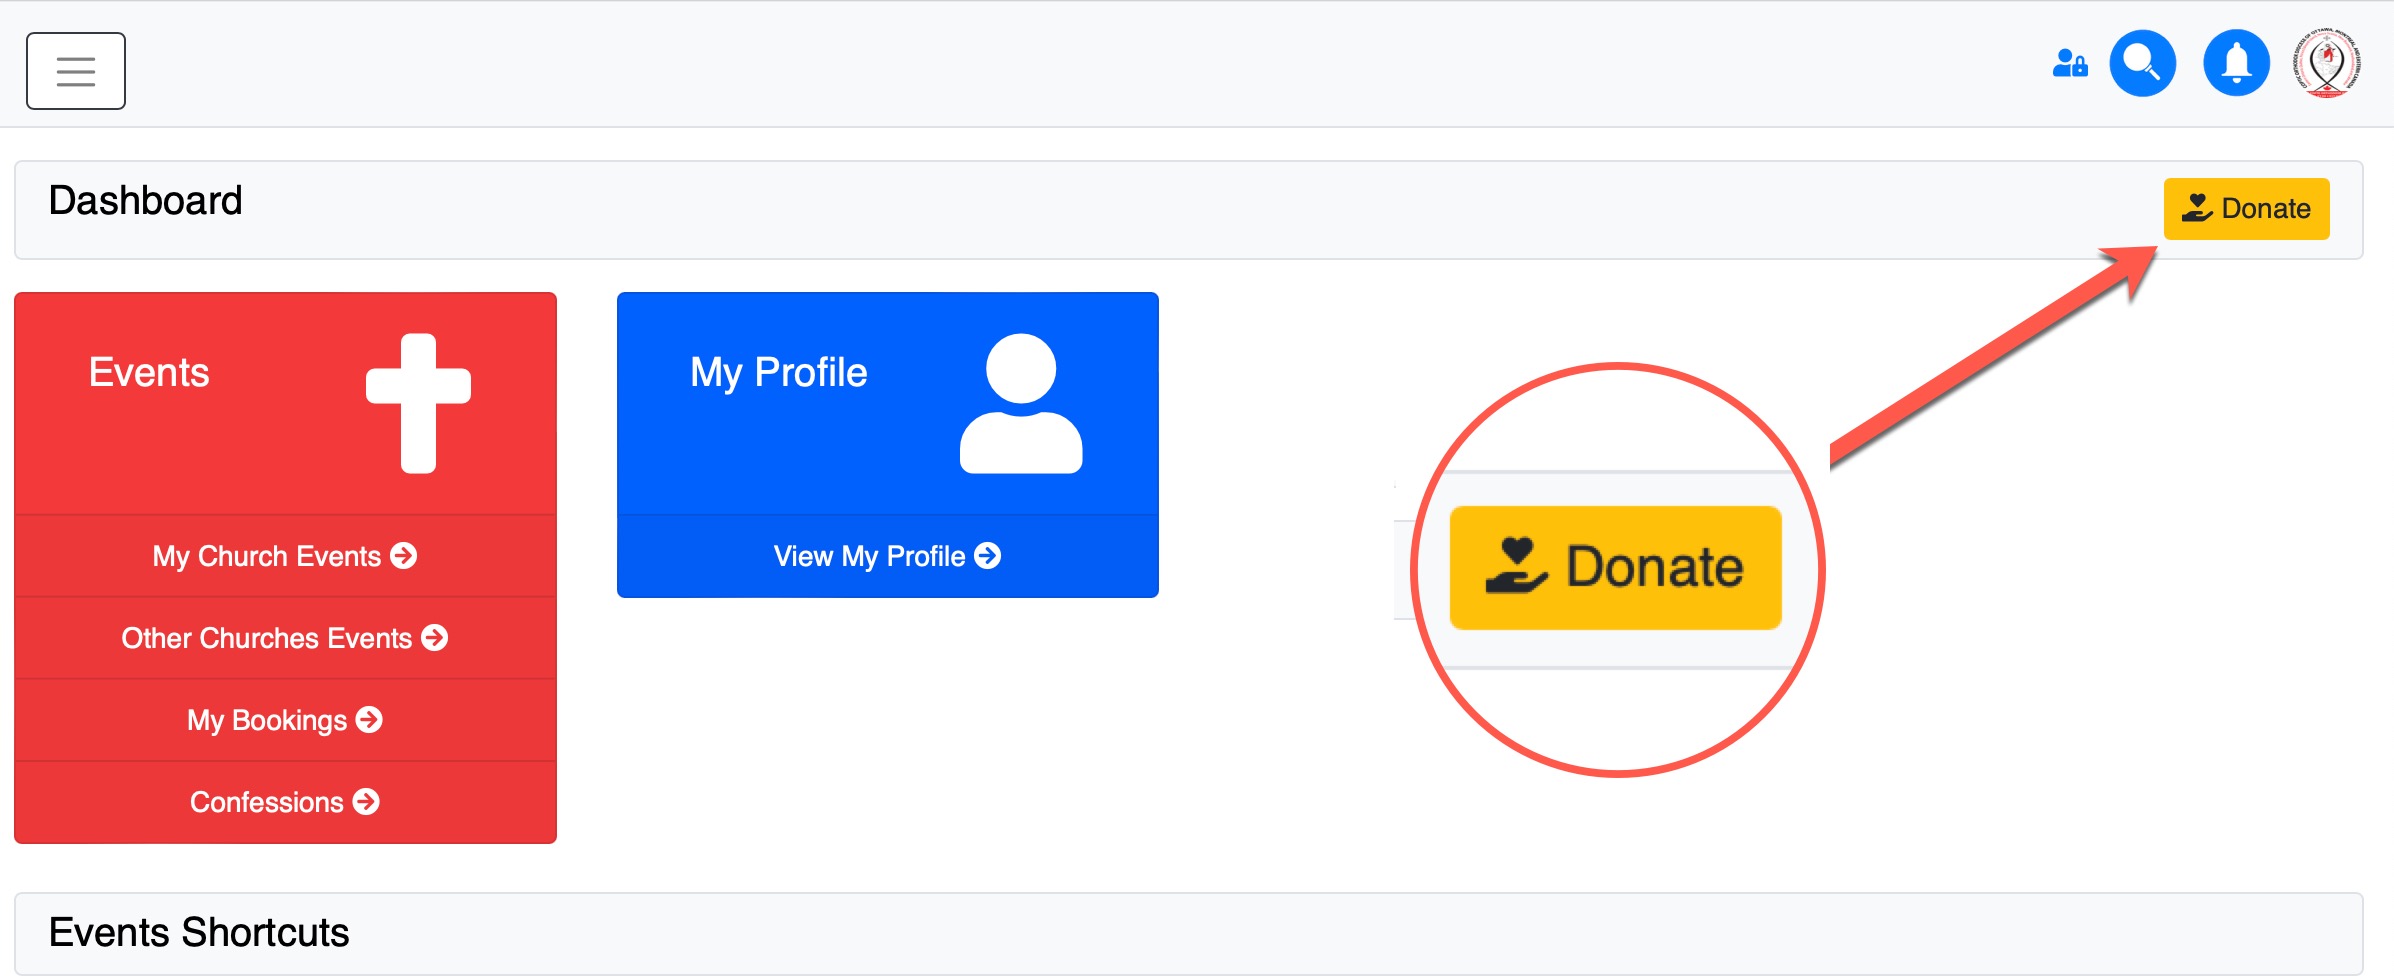
For a better user experience we have adjusted the Donation Button on the dashboard to only show the currently logged user Church.
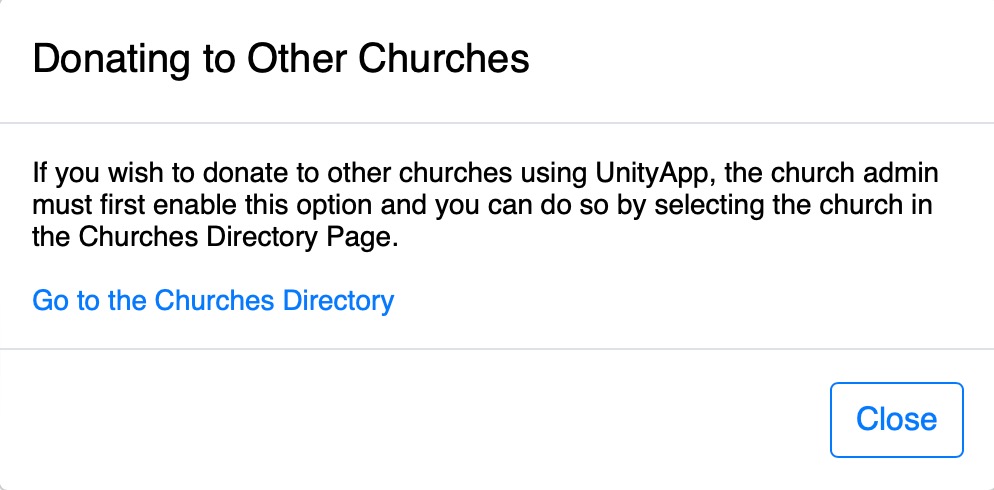
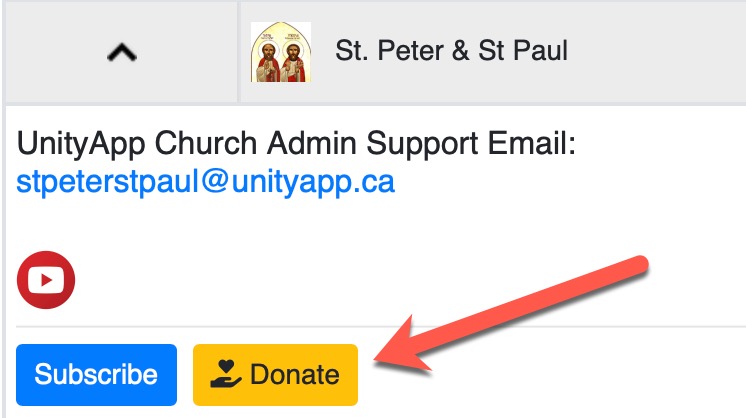
If a user wishes to donate to another Church, they can do so if that Church Admin has enabled the option in their UnityApp admin settings page. The user can then find the same donation button in the Churches Directory page
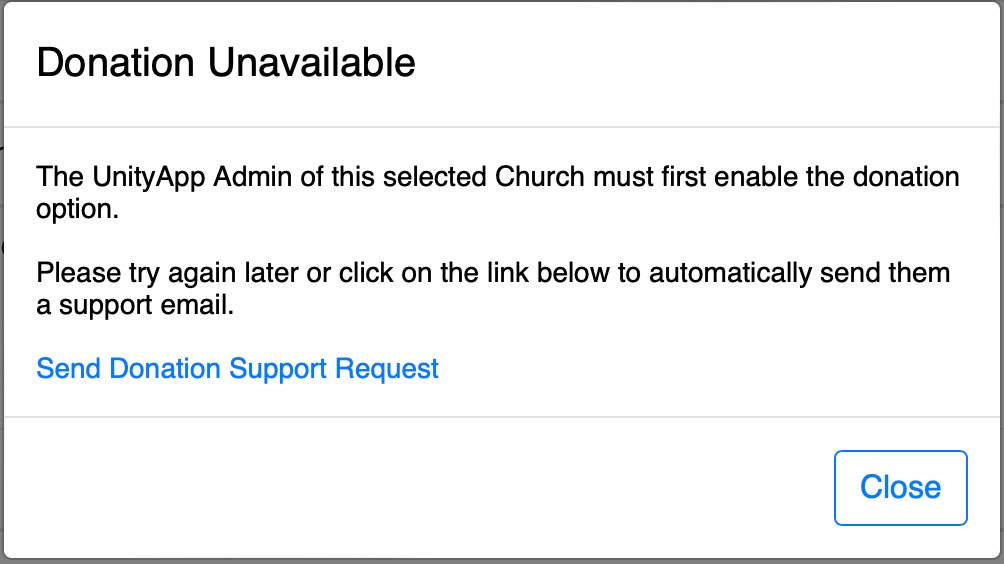
If the selected Church does not have the Donation Option enabled a message will be displayed to the user allowing them to automatically send a request email to the Church Admin.
New Donation Button
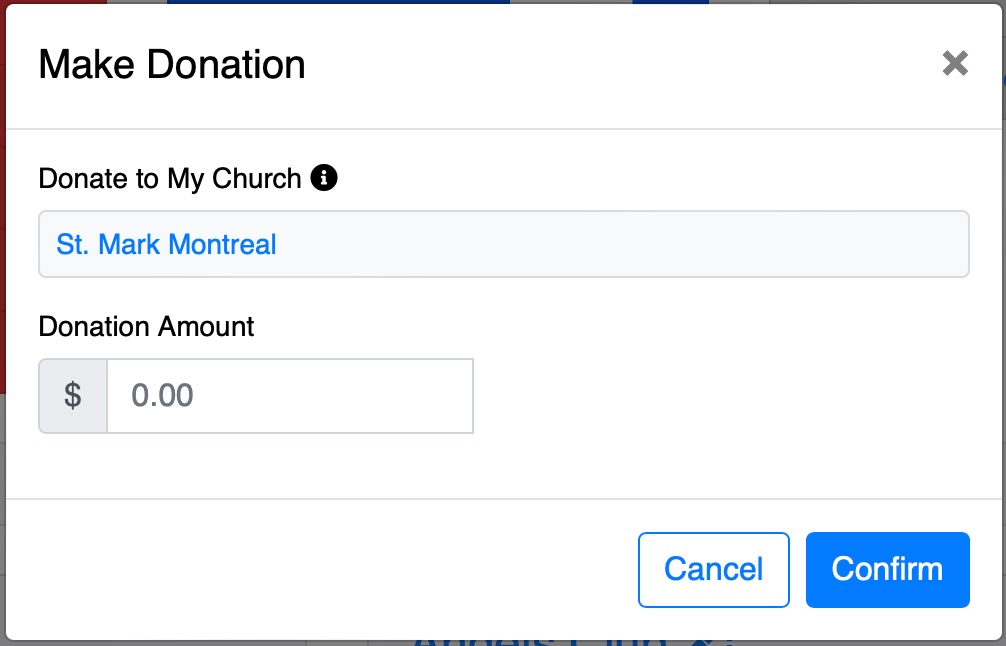
Members can now donate directly from the dashboard by clicking on the new Donate button
By default, their current church is selected but they can choose to donate to any church using UnityApp by selecting it in the list
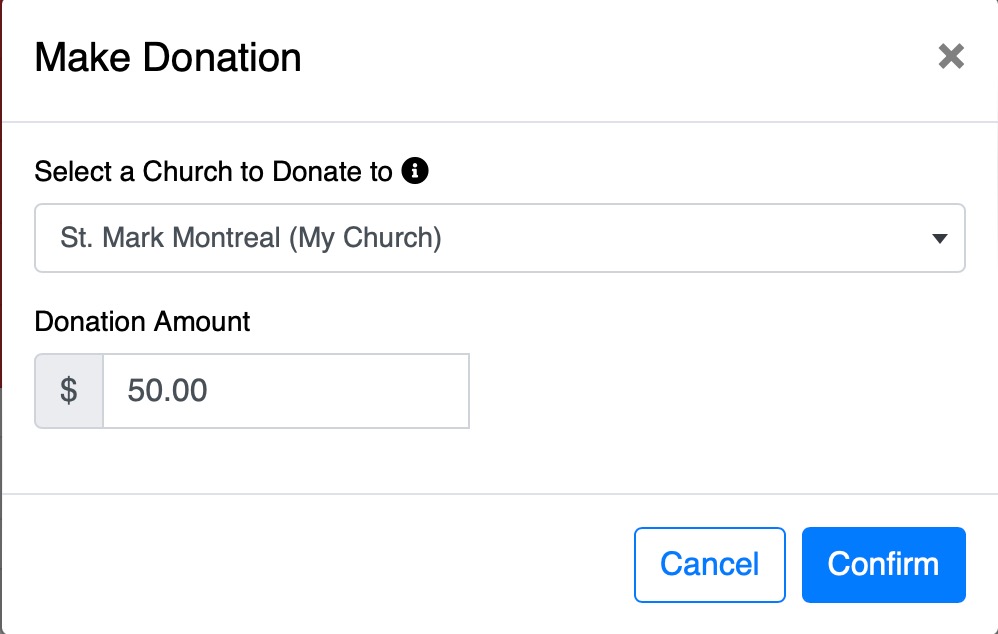
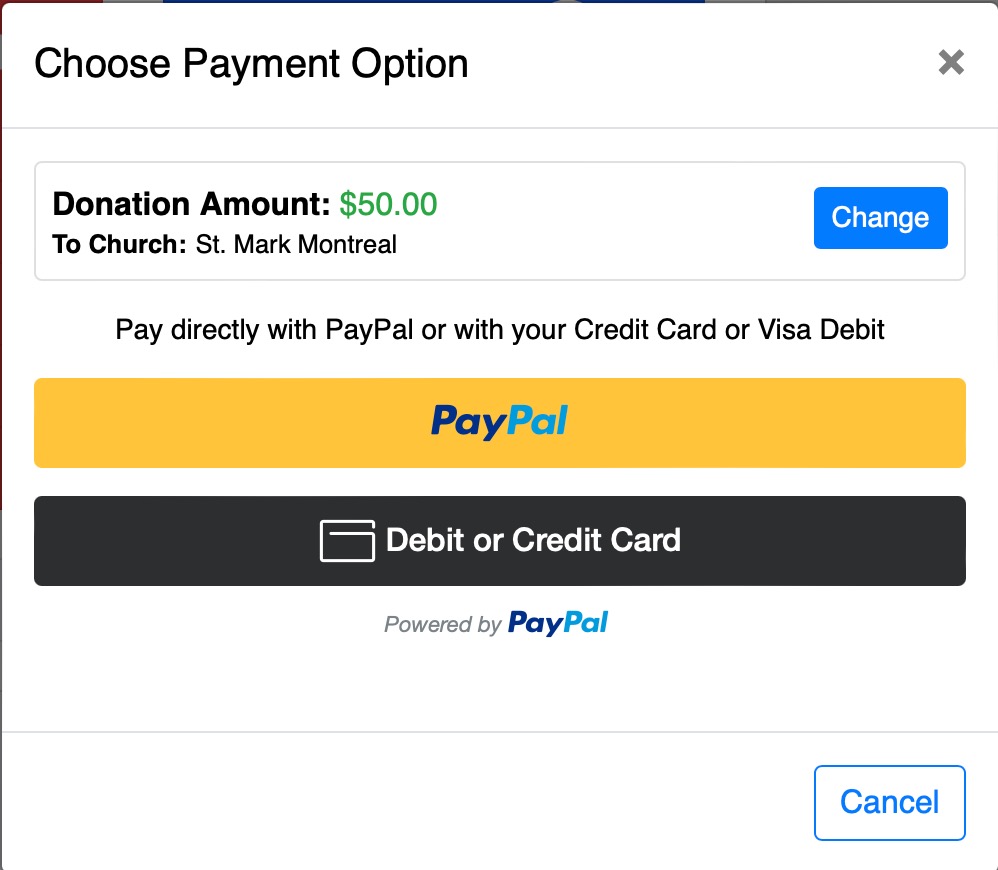
IMPORTANT NOTE FOR ADMINS:
You must enable donations in your Admin Settings -> General Settings -> Global Church Settings for your church to show in the list for your congregation members.

If you want to also accept donations from members of other churches (all UnityApp members) simply enable the "External Donations" option in the same admin settings page.

Other Admin Settings
Admins MUST enter the PayPal Client ID for donations in the admin settings as well as the Item Description which will appear in their PayPal transactions for every donation (for reporting purposes)
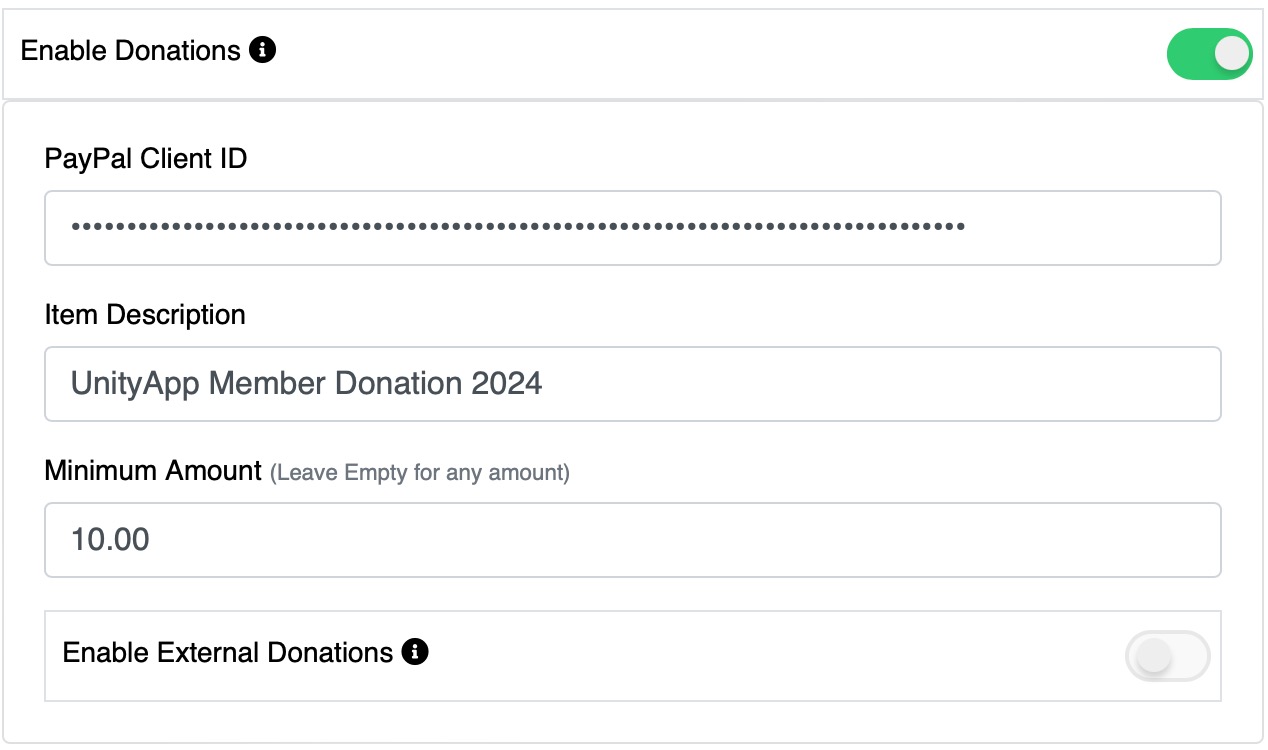
You also have the option to set a minimum amount for any donation. Leave that field empty to allow any amount without restrictions.
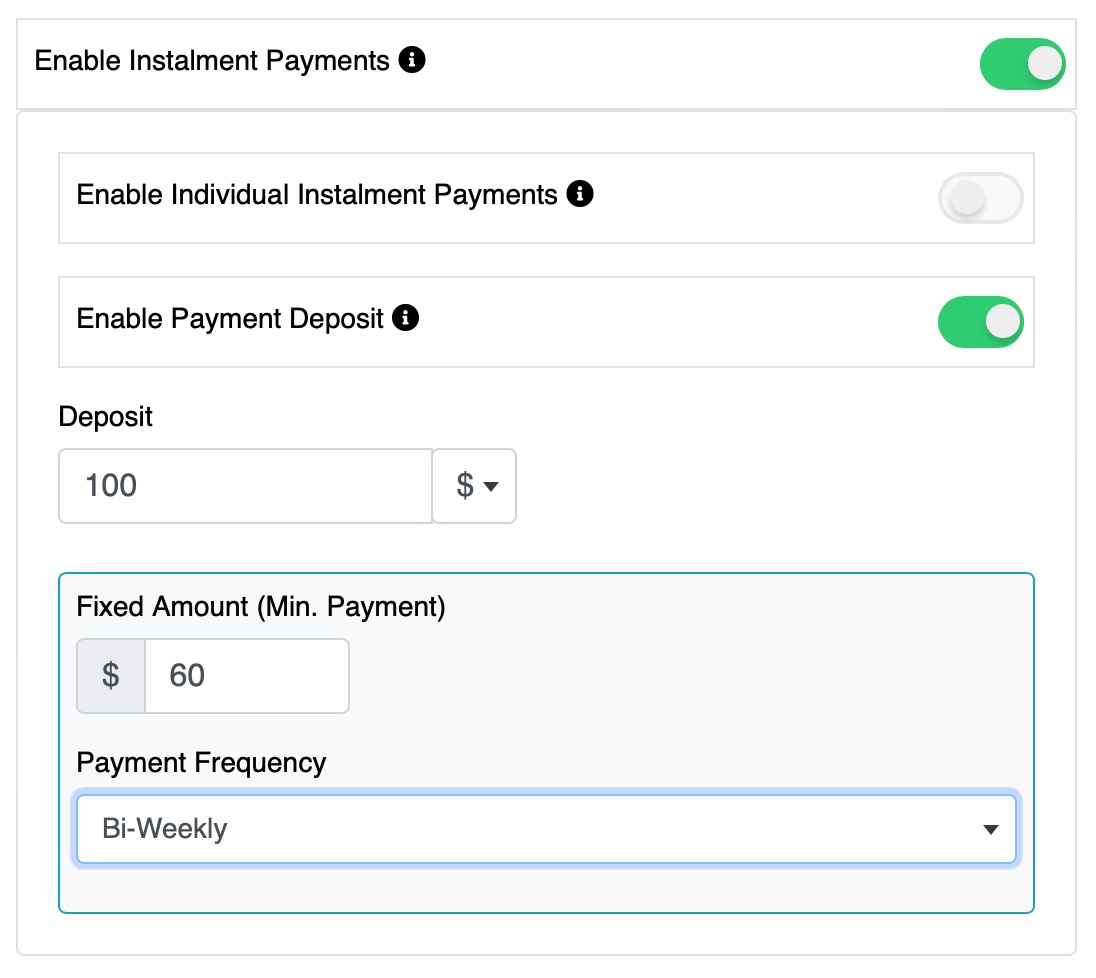
Newly redesigned Payment Instalment Feature
To give you more customization and flexibility, we redesigned the instalment payments feature in the event settings. The new settings are simplified and only need you to enable a few options to take full advantage of them.
You can define the deposit amount to be paid immediately if this option is selected by the user. And you can define the fixed minimum payment required on a set frequency (Weekly, Bi-Weekly, Monthly, Bi-Monthly)
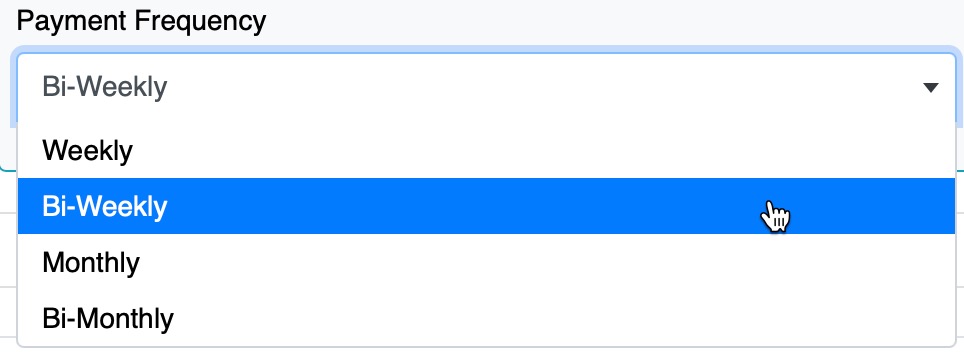
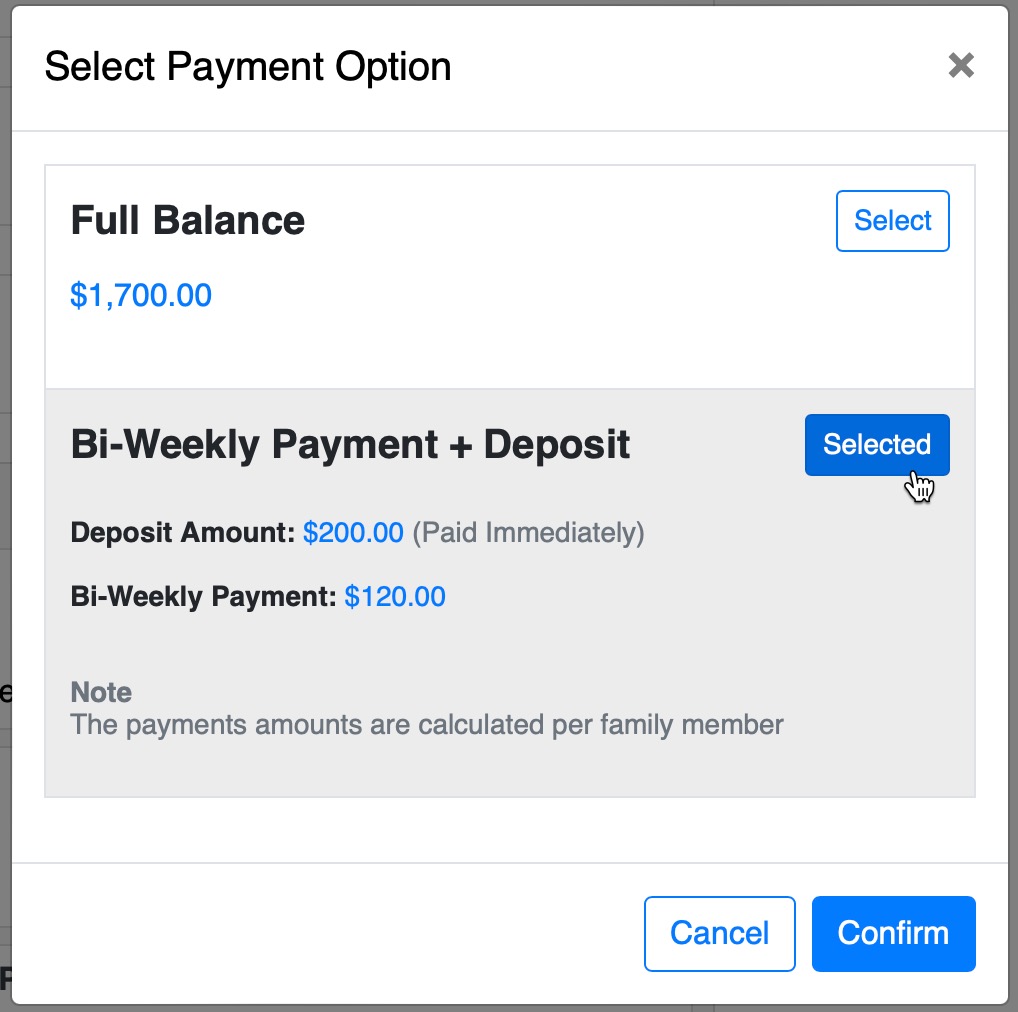
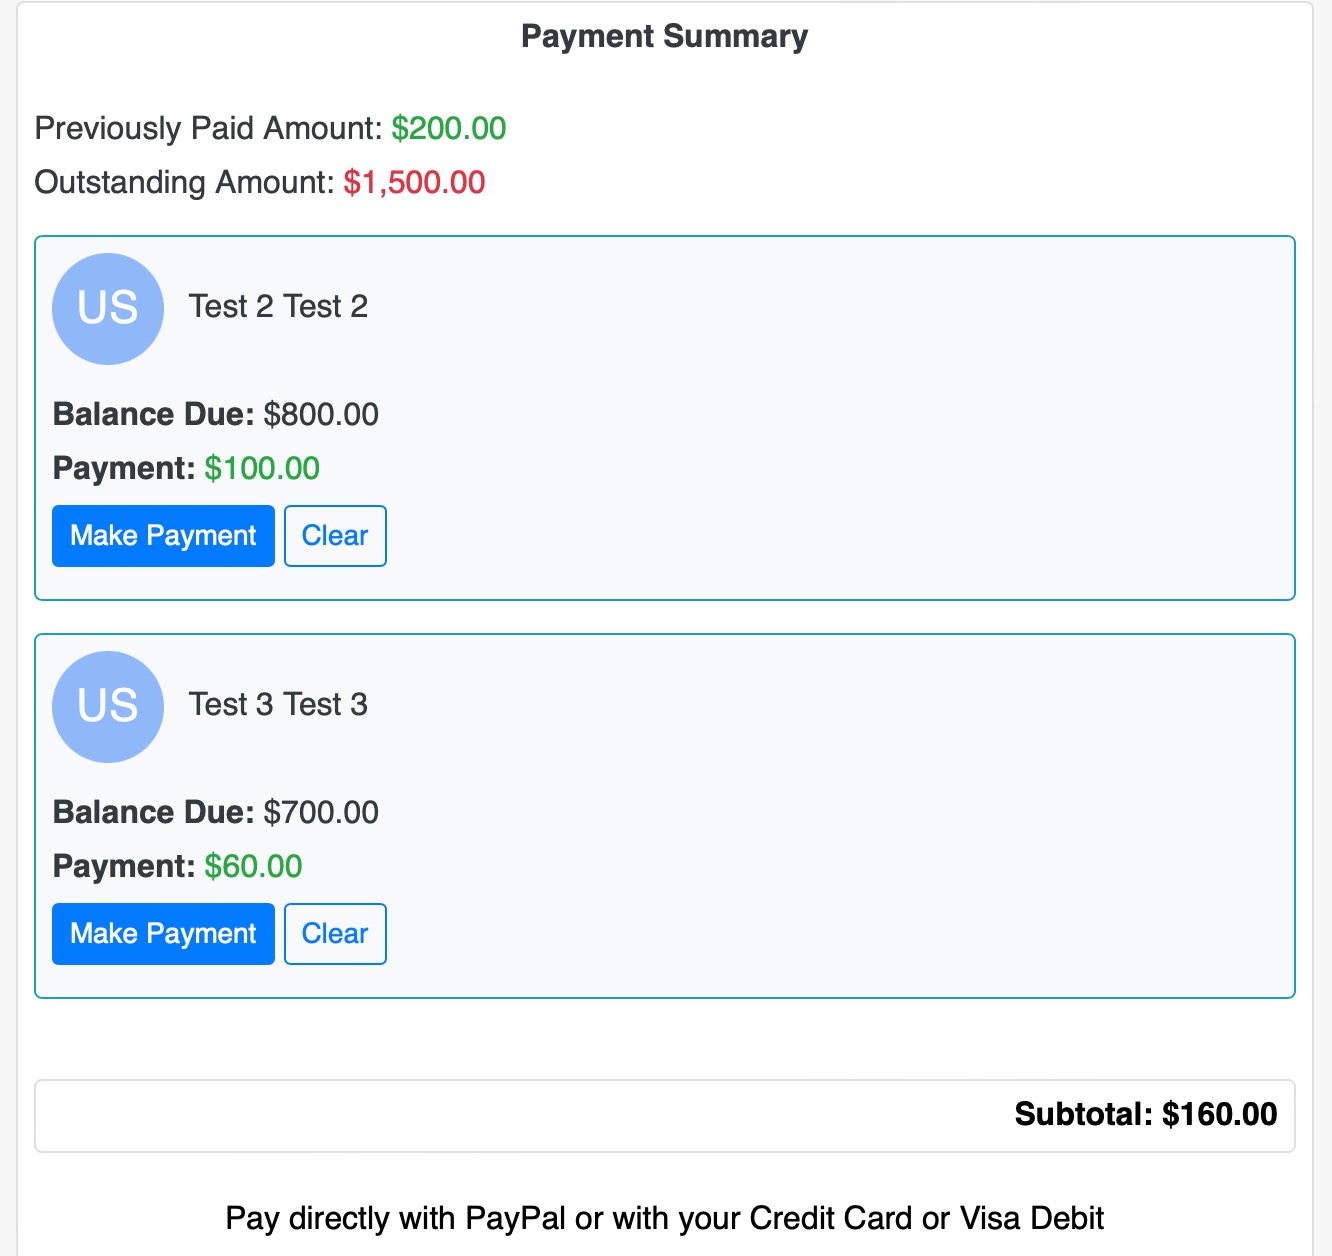
When the user is at the event payment section, they are prompted with the option to either pay fully the balance due (for all selected members) or just pay the deposit (if you set it) or if no deposit is set in the event settings, then they are prompted to "pay later" based on your preset payment frequency for this event.
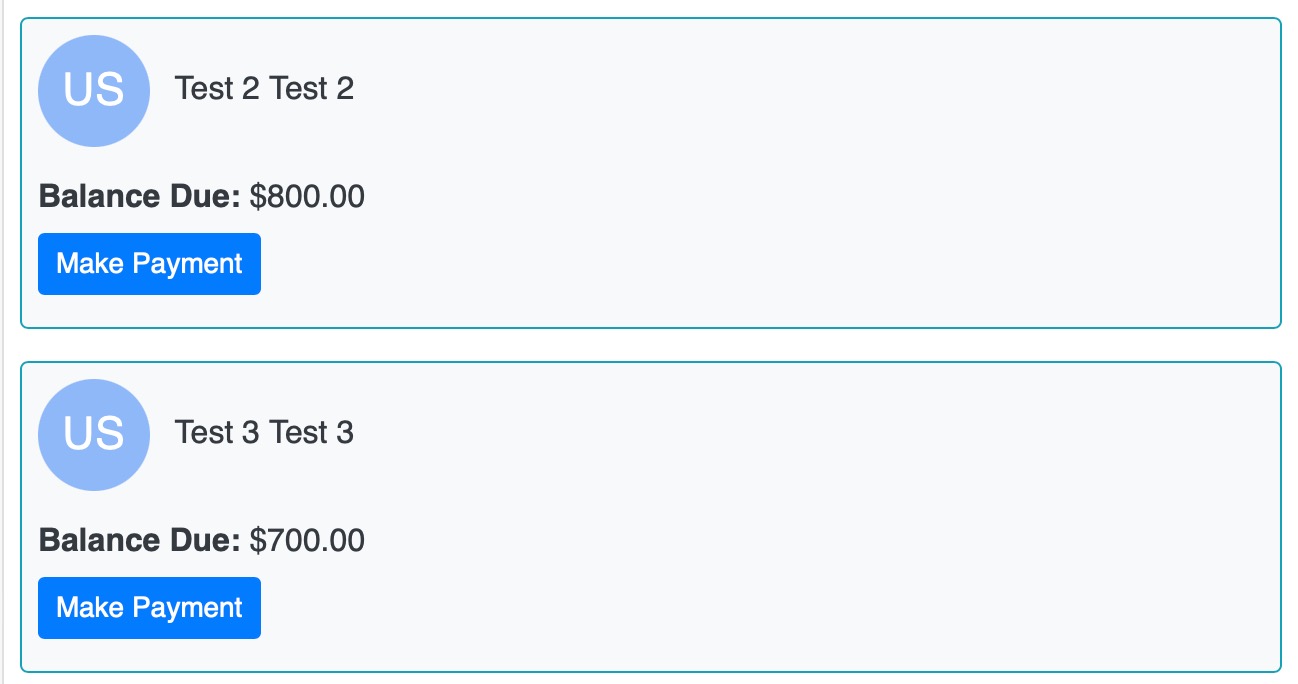
Finally, when the user is alerted by an email notification after the first period, they can make a payment to each family member registered in this event with a balance due.
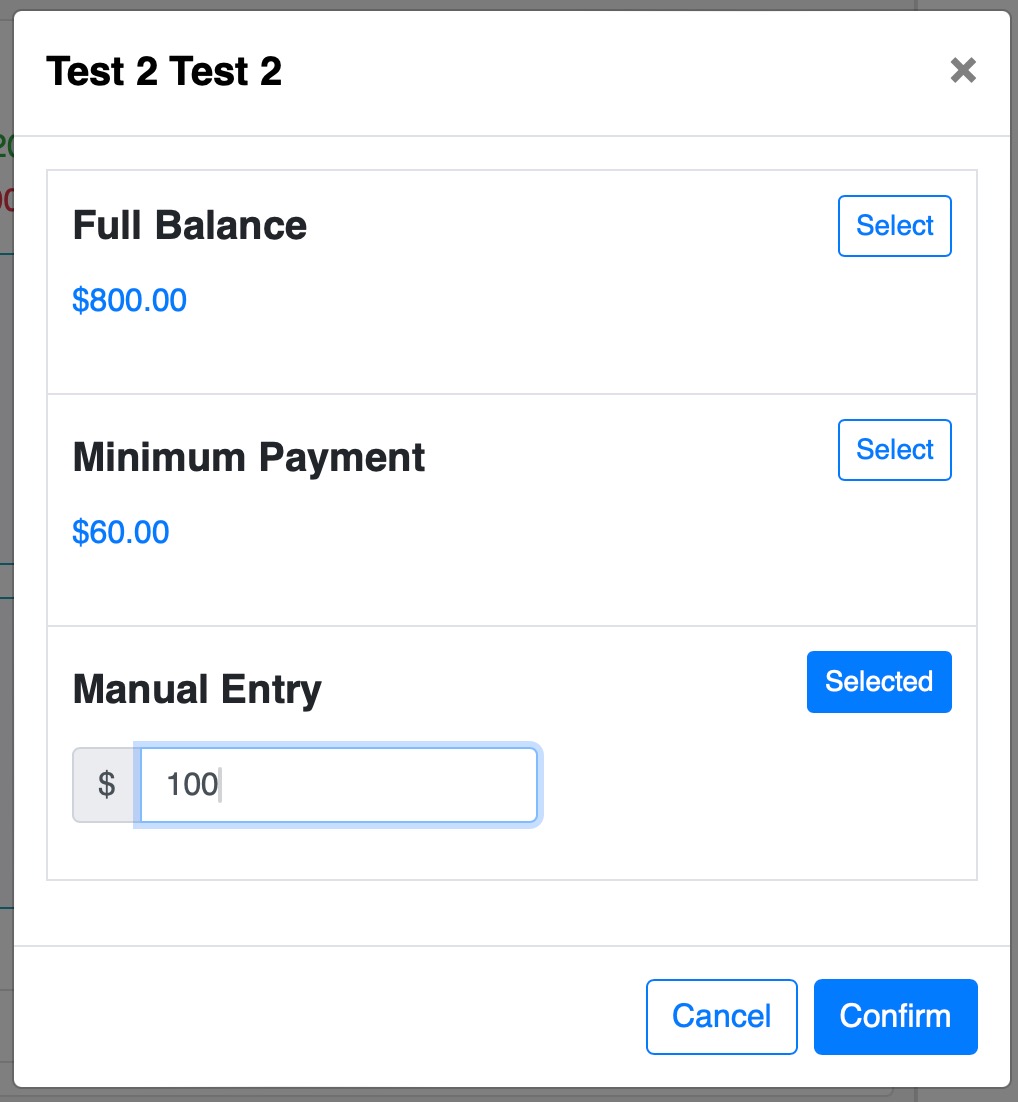
They can opt to pay in full the balance for each member, or the minimum payment (set in the event settings) or enter a manual payment of any amount above the minimum payment and lower than the balance due
Once they confirm, they can review or clear the payments made to each family member and then proceed with the payment
New Filters Added
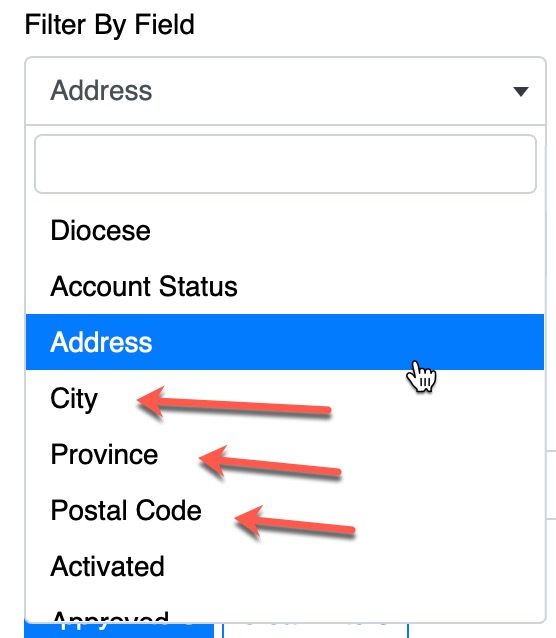
We added a few more filters for the address of the member. You can now filter by address,city, province or postal code individually.
Filters Operator
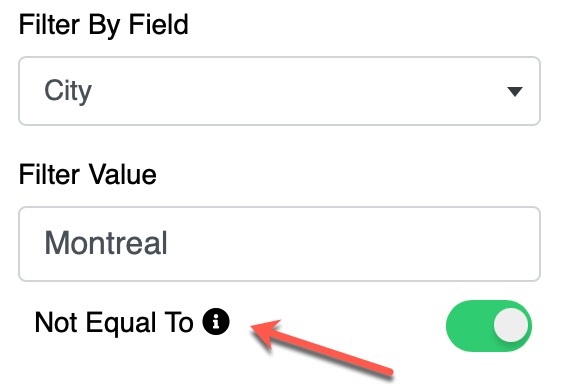
You can now enable the "Not Equal To" option to get the value that is NOT equal to the fild you are filtering.
Example:
You want to search for all the people that DO NOT have "Montreal" as their city in their address. So you search for the City filter. Then you type "Montreal" in the Filter Value box and you enable the Not Equal To option below it.
This will display all the members in the current table that do NOT have Montreal in their address.
Election Module: Manual Nominee Entry
We have added some major improvements to the election module in UnityApp. For starters, you can now enable the manual nominees entry during your nominees selection.
Simply go to the Admin page and the Elections Settings and enable the option

This will replace the member search feature with a manual entry window:
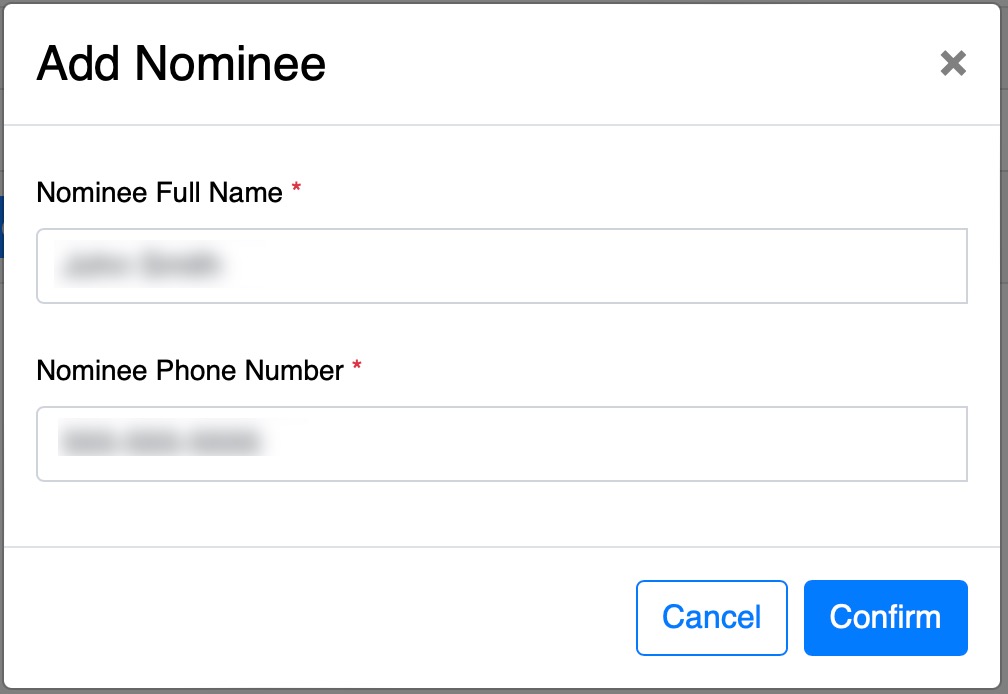
Another enhancement is to let the members have the ability to come back to the nominees page if they have not yet selected the maximum number of nominations set by the admin. The system will show them their past submitted nominations until they reach the maximum number.
Election Module: Single Voting Link
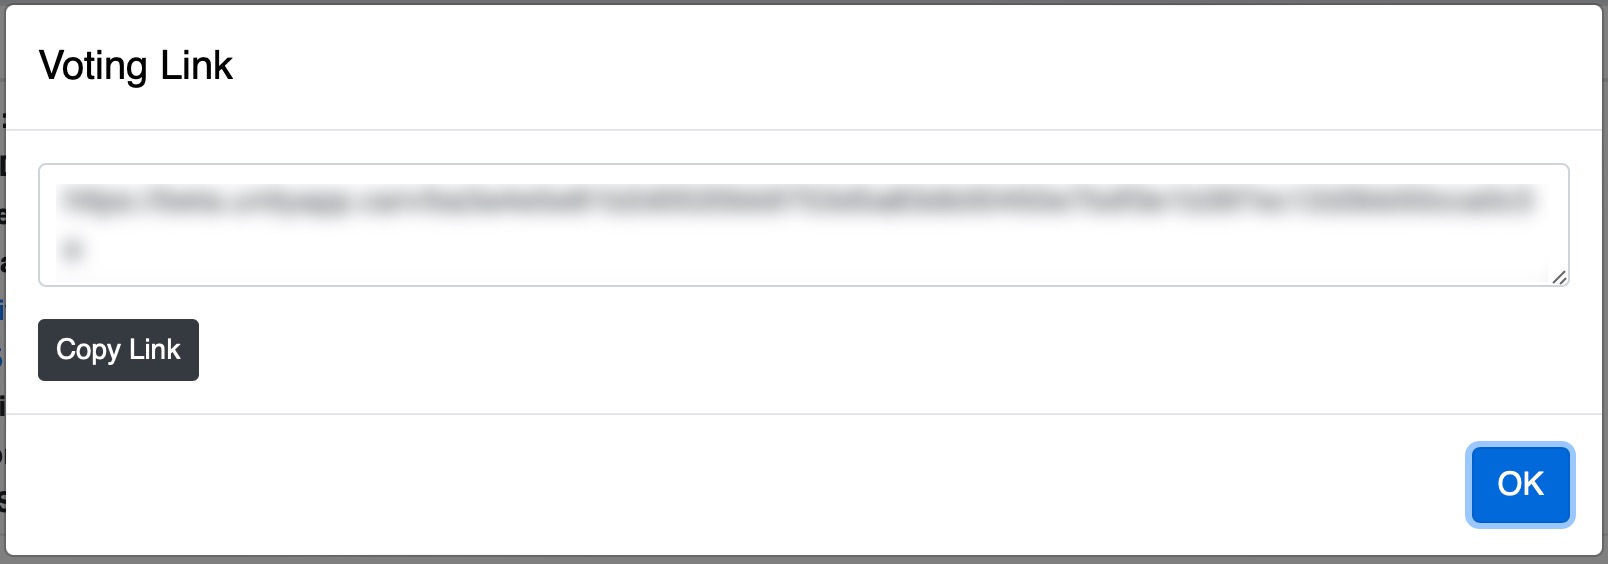
One of the most revolutionary enhancement we have made is to allow the admins to generate a single link for voting! Yes, the system generates a secure encrypted link that cannot be recreated or used more than once which will allow the user to simply click and vote!

The system automatically sends the voting link to the electors list as before by email with the instructions,

The admin can also view and copy the link manually as well
Add/Move To service
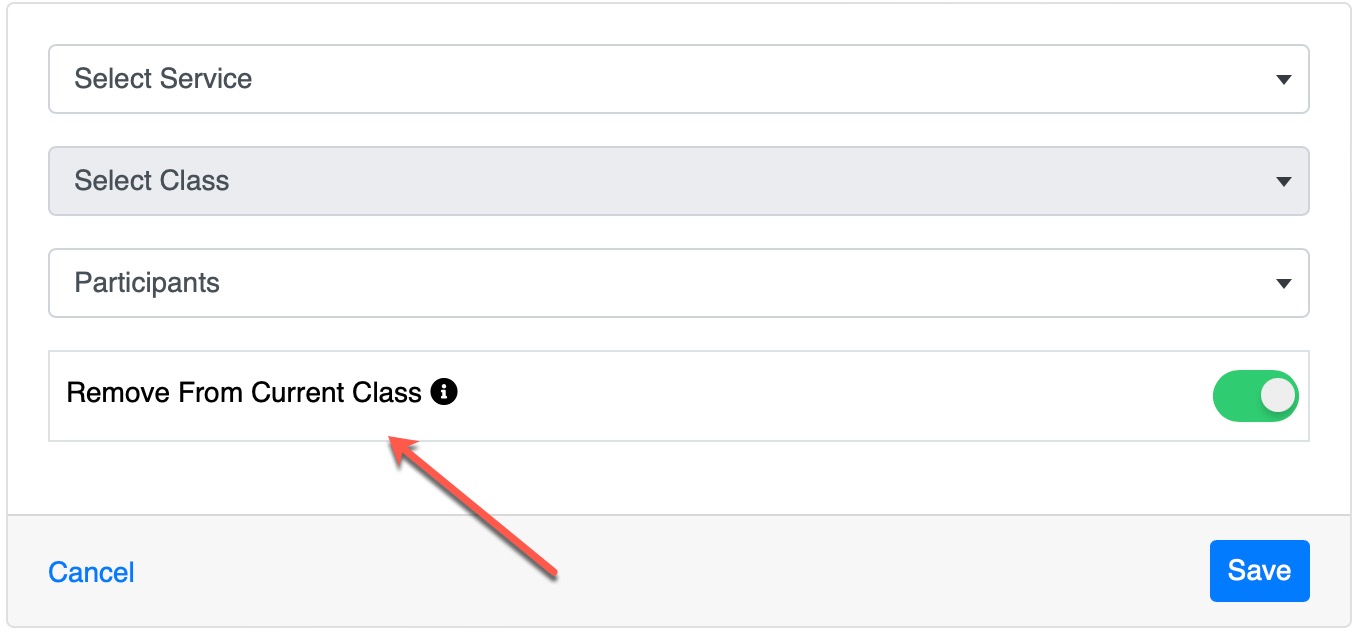
The option of adding a selected participant or a servant to any other service was already available for a while. However, you can now check the option that will allow you to move the selected participant/servant from the class/service you are currently picking them from.

This is very helpful when changing classes at the beginning of the Coptic year for example.
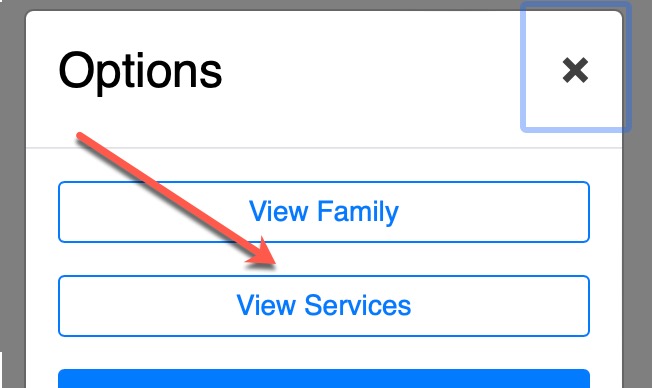
Member Options: View Services
You had the ability to see the services of each family member of any selected member across the system. You can still do this, but you now also can see the services directly from the Options menu
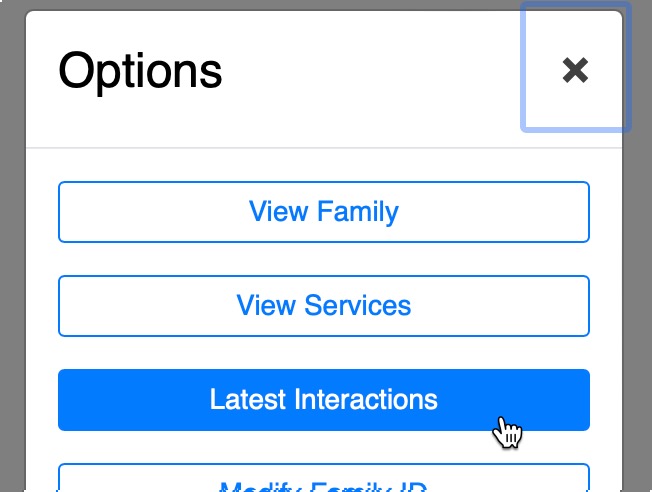
Interactions
You can now see the latest interactions for a selected member/participant/servant.
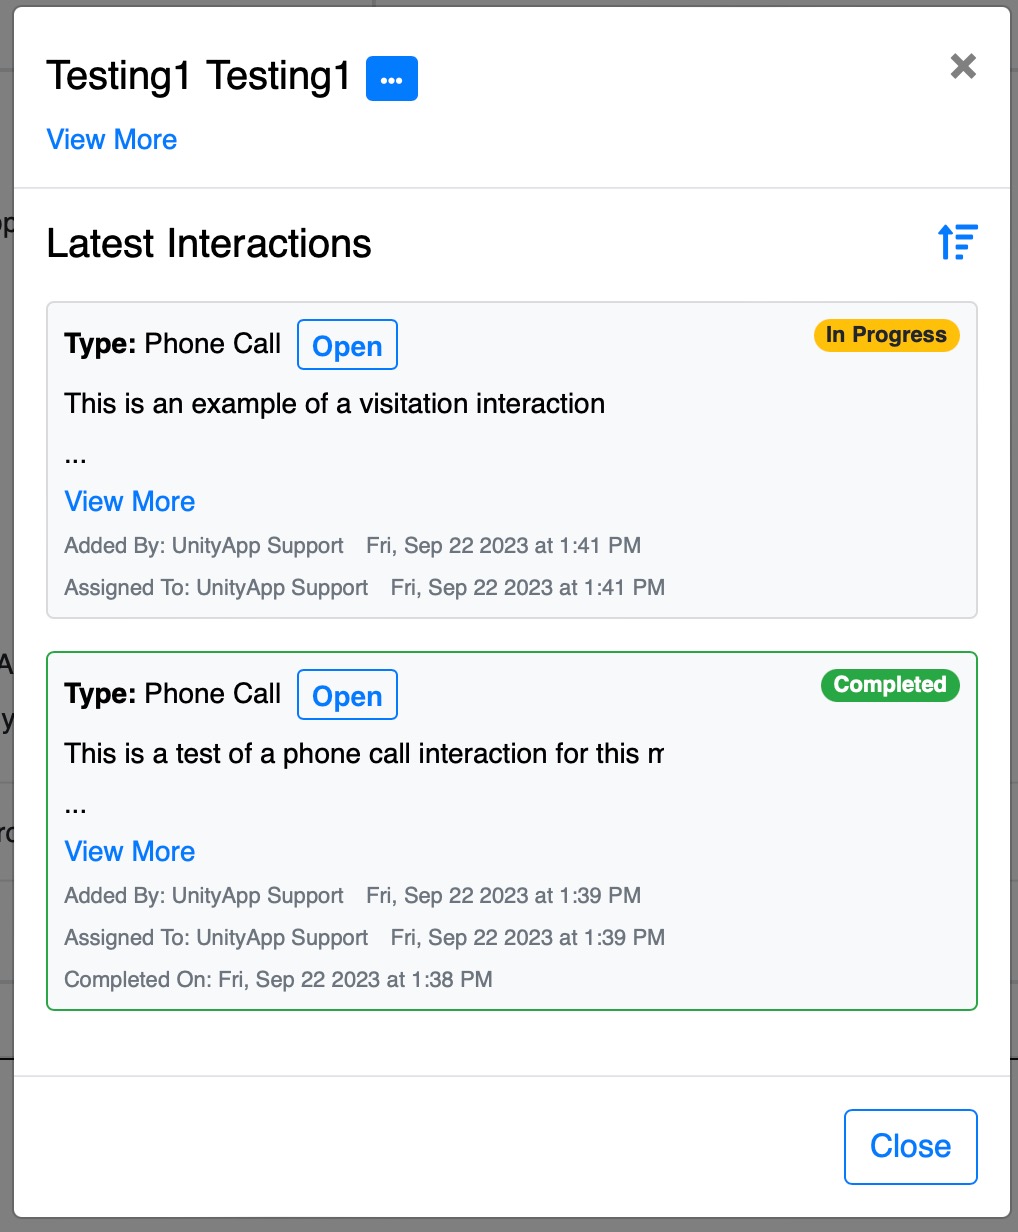
Then you can access the basic information of the interactions like the creation and completion date and the current status, but you can also click on the Open button to specifically open that interaction and access any comments or more detailed information
Service: Serving Participant
In some situations you may need to add a participant of a certain service/class to also have a servant role in the same service/class. You can now enable this feature for each service to allow you to add a participant as a servant as well.

Events: Send QR Code to participants
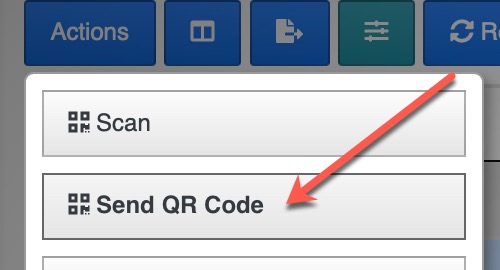
QR-Code is a feature we had for a long time in UnityApp but we could not send a QR code for an event before today. Any event admin can now send the QR-Code to any or all the selected event participants by email from the Actions menu
Events: Swap Members
You can now swap any booked member with another without losing the reserved spot or any of the information or payment that the original member has entered when booking. You must allow this feature for any event servant that needs it.

Events: Payment Links
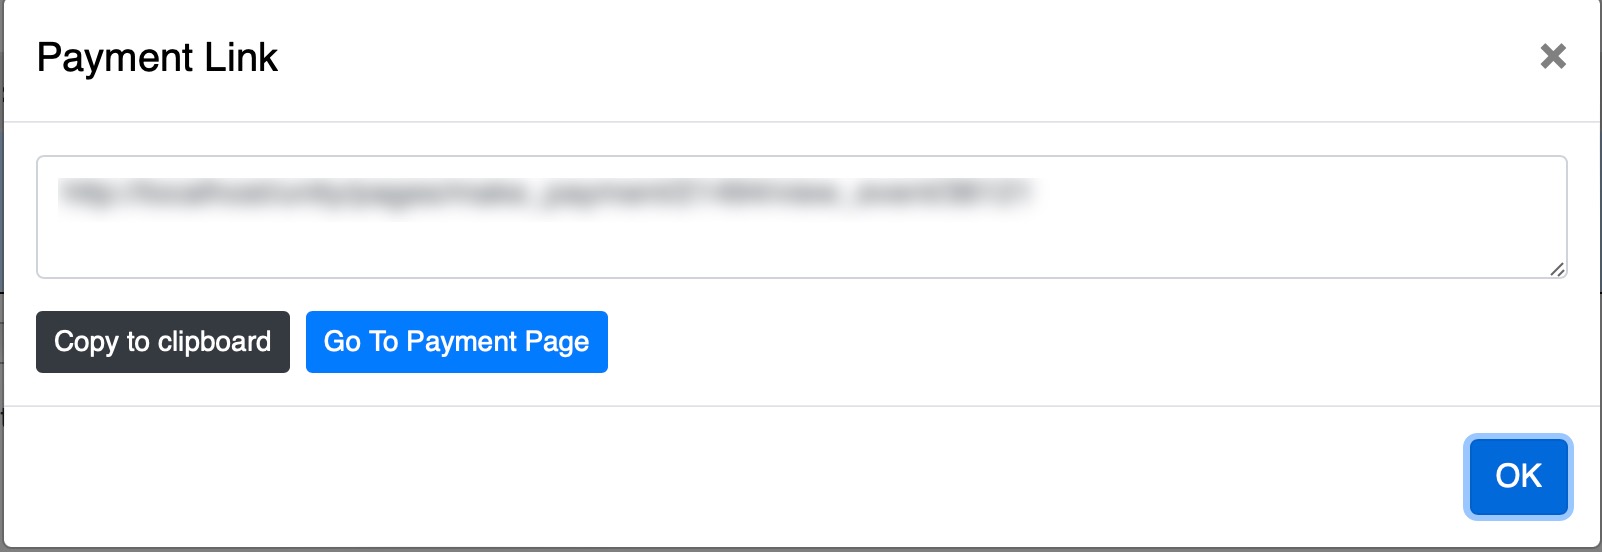
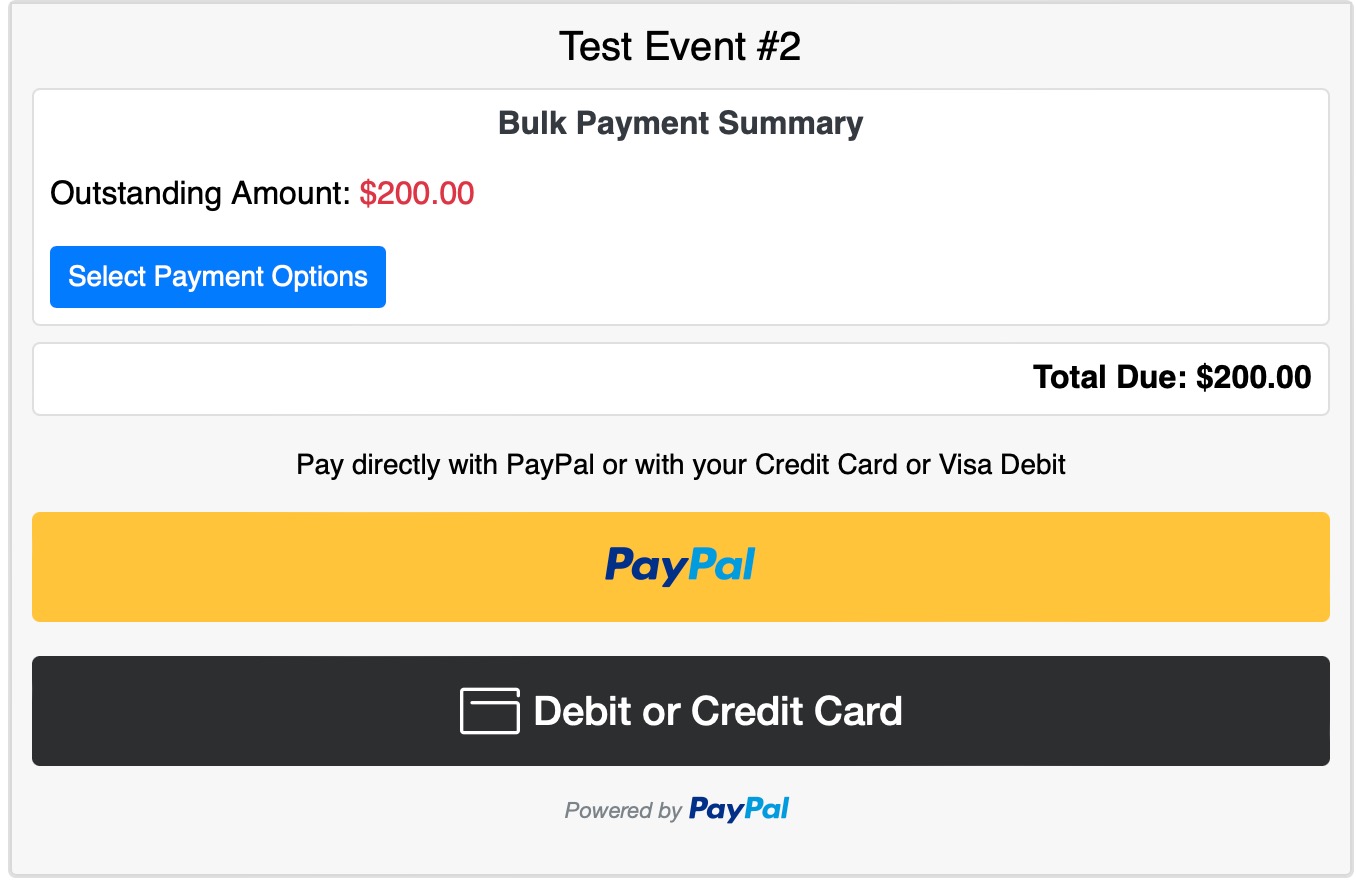
You can now generate a payment link for one participant of an event that has a balance to pay and anyone with that link can pay for the member.

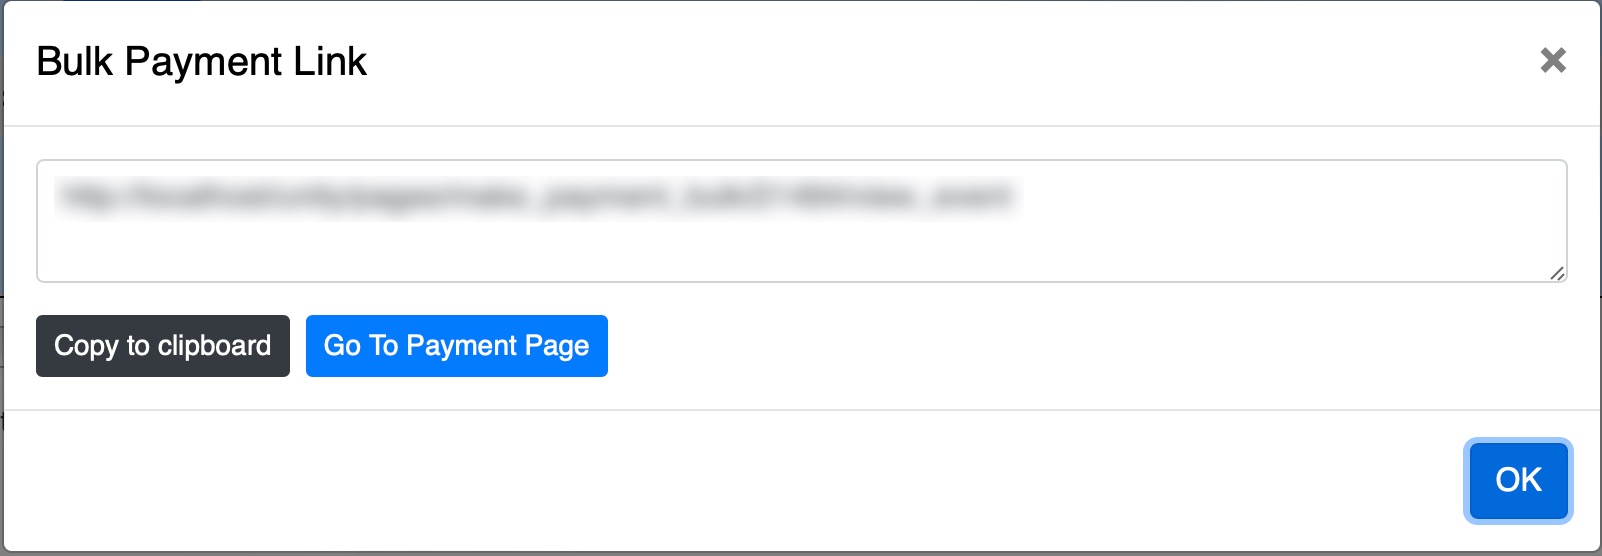
This can also be done by selecting multiple members (bulk payment)
Events: Paid Amount Total
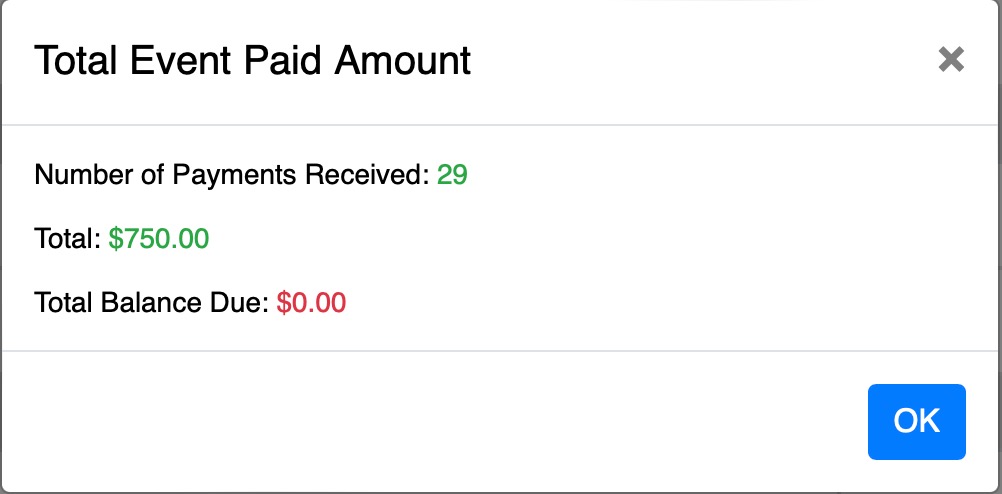
This Action button will calculate all the payments made to this event and show you the total balance due amount as well

Events Tabs
Previously, the Comments and Deacons tab were always visible in the event page. Now, they will always be under a new Tab Menu with any future tabs that maybe added
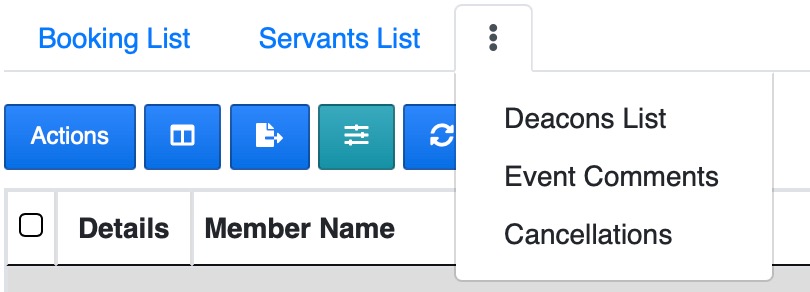
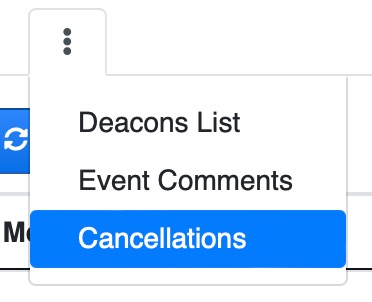
Events: Cancellations
You can now view all event cancellations in this newly added tab. It will give you all the info regarding the members that cancelled including contact, payment made and more.
Church Mailing List Subscription
Every member on UnityApp can now Subscribe to any church newsletter or mailing list! To do this, simply go to the help menu -> click on the Churches Directly tab -> and click on the details arrow next to any church you wish to subscribe to then click on the Subscribe button.
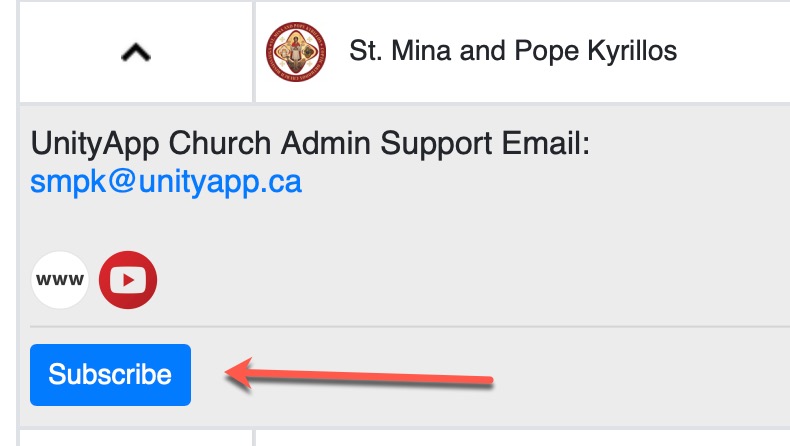
You can as easily unsubscribe.
Communications Menu
We added a new menu for all communications.
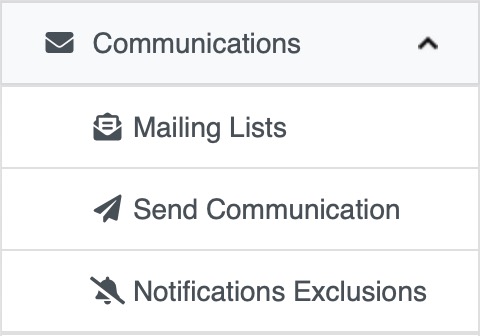
This gives us also the ability to create Mailing Lists to easily and quickly send your communication to a predetermined group of recipients without the need to select them every time.
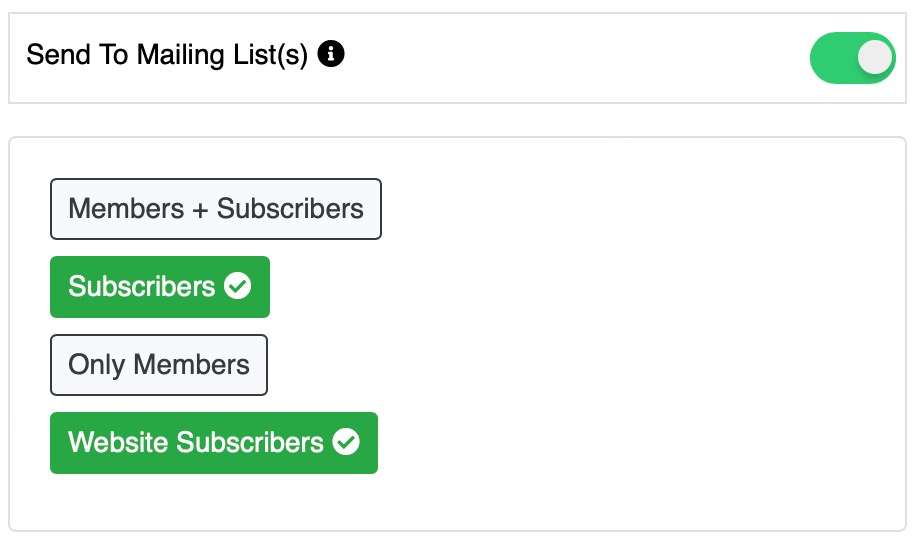
By default, the system gives you 3 automated lists:

Members + Subscribers
- It will automatically update based on all the members in your church members list page that currently have a valid email address. It will also include any subscribers from any other church that have subscribed via the Churches Directory page.
Only Members
- This will only be updated with just the members in your church members list that currently have a valid email address.
Subscribers
- This is the automated list for all the subscribers that have chosen to subscribe to your church mailing list via the Churches Directory.
Another improvement to this module is the fact that you can now select multiple mailing lists when sending a communication
And also before sending your email, you have now the ability to send a test email JUST to one recipient. (By default it's your own email but you can edit the address)
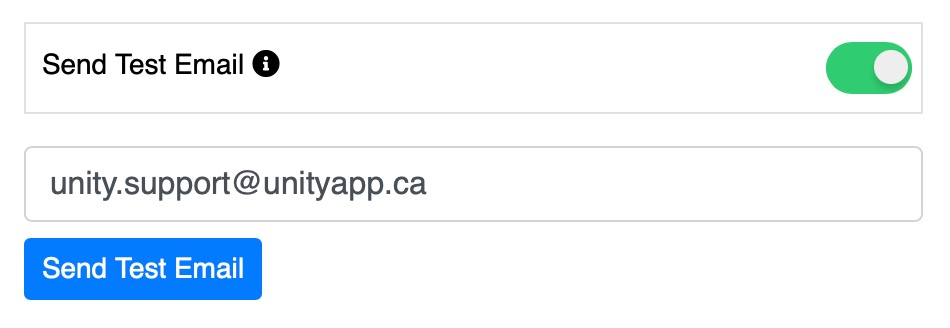
Note that sending a test email will not close the main window of the new email you are composing giving you the ability to edit the email before sending without the need to re-compose it
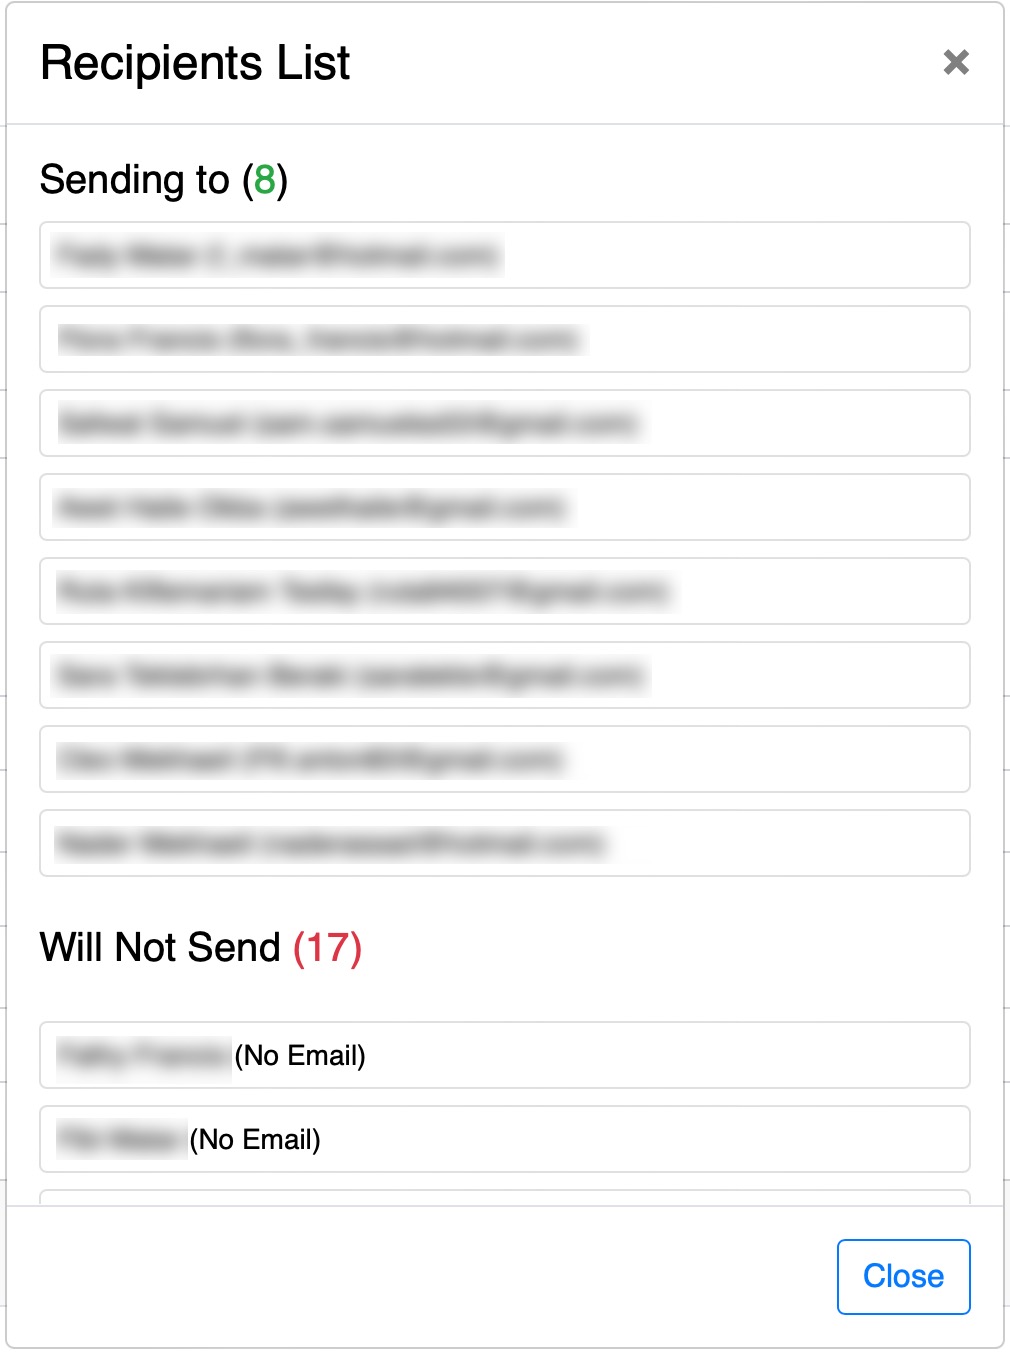
The top recipient list at the top of the window has also been improved to show you the count of the recipients and those who will not receive the email due to a potential empty address.
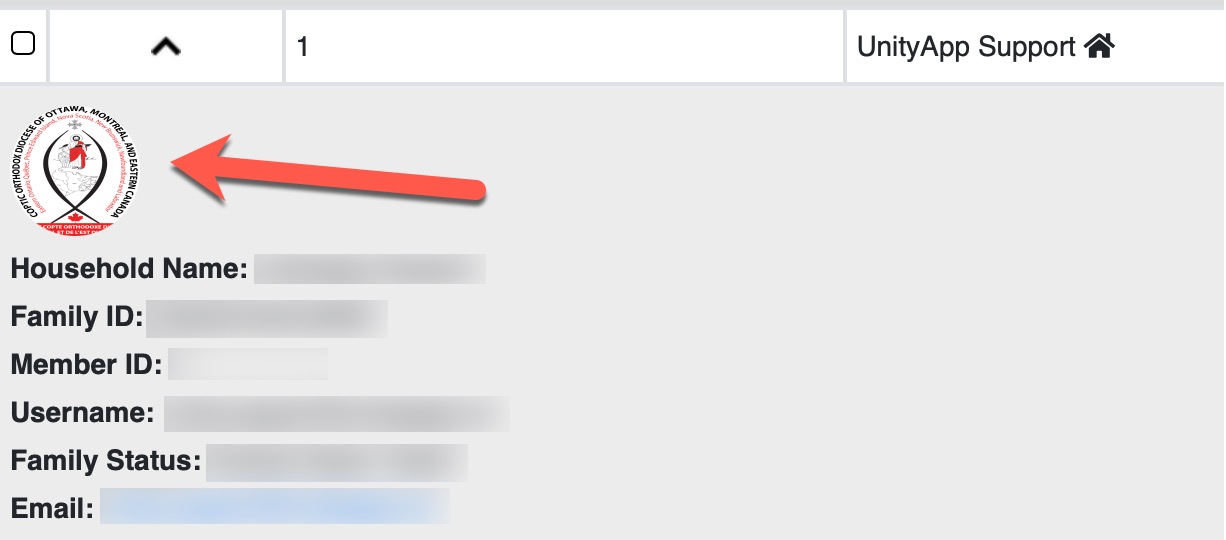
The photo upload feature is not new but it was only possible to see the uploaded images in the attendance page. Now, we have added the same option in every participant and servant list as well as the members page.
Keep in mind that you can only upload photos if you have the permissions required.
Camp Discounts
We have gathered the discounts options in the same location and added a background to each section for distinction.
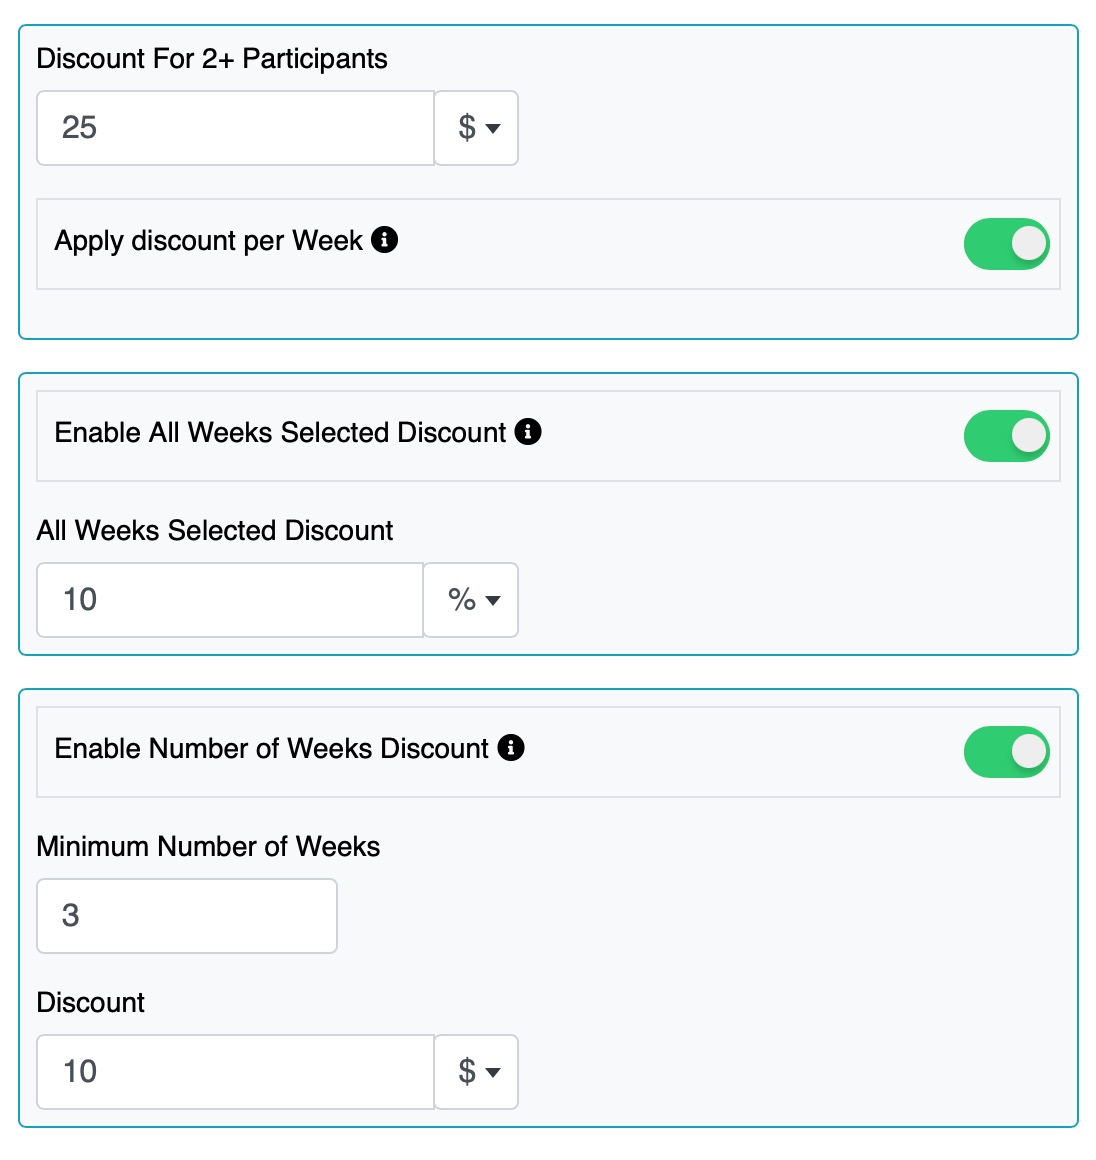
Balance Due or Refund
You now can see the text changing in the bottom section depending on the amount due or if it's a refund you will read Total Refund for clarity.

Apply multi-participant discount per week
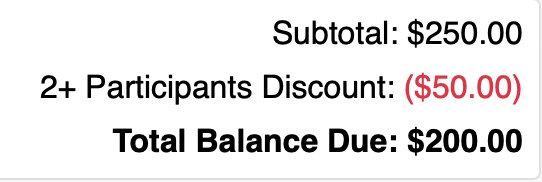
You have the option to apply the discount for multiple participants (siblings) one time only (default) or on every week selected by the second+ sibling.
.jpg)
The discount total will be calculated in the bottom section of the form
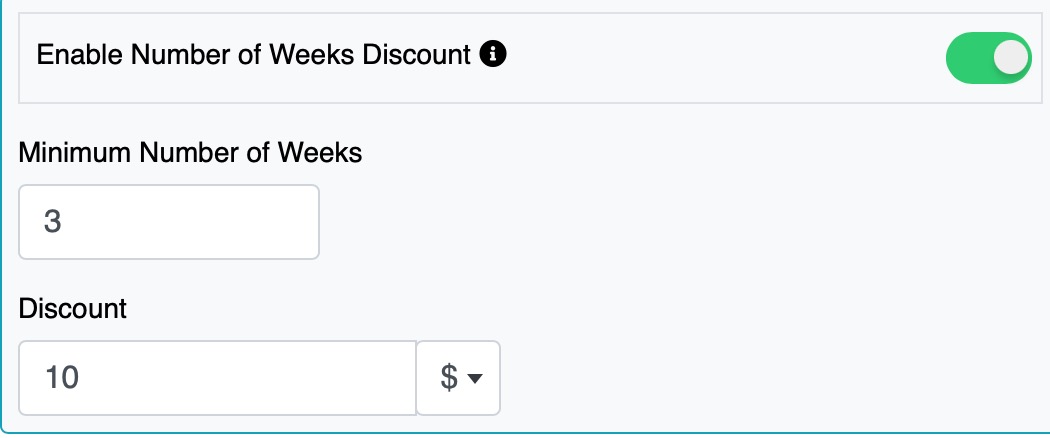
Discount per week
This new option allows you to select a minimum number of weeks to be selected for which a discount will apply for any participant.
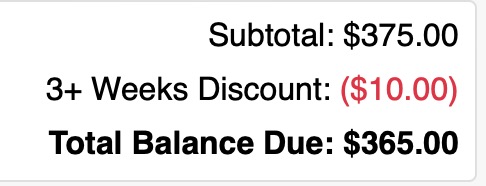
The discount is calculated in the bottom subtotals section. The number of weeks will change depending on the number you have selected in the event settings.
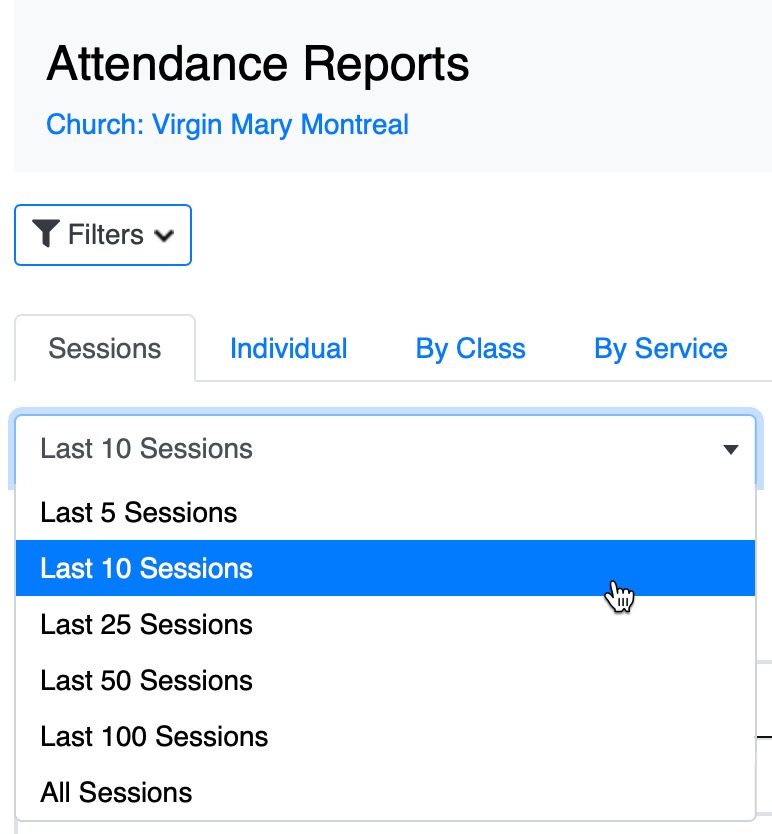
Attendance Reports: Sessions Tab
Added new tab filter to reduce loading time and give you more control over the data being loaded and displayed
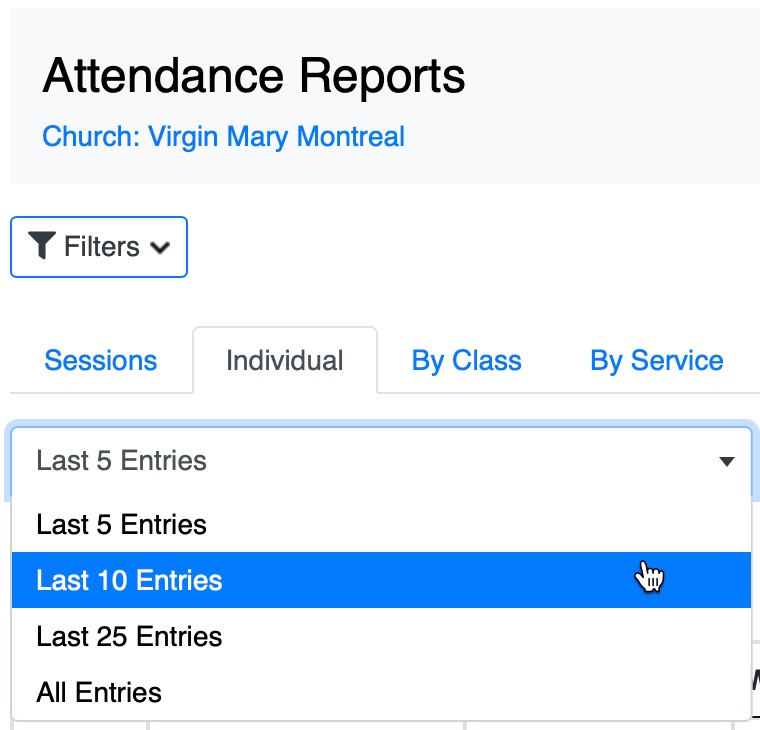
Attendance Reports: Individual Tab
Added new tab filter to reduce loading time and give you more control over the data being loaded and displayed
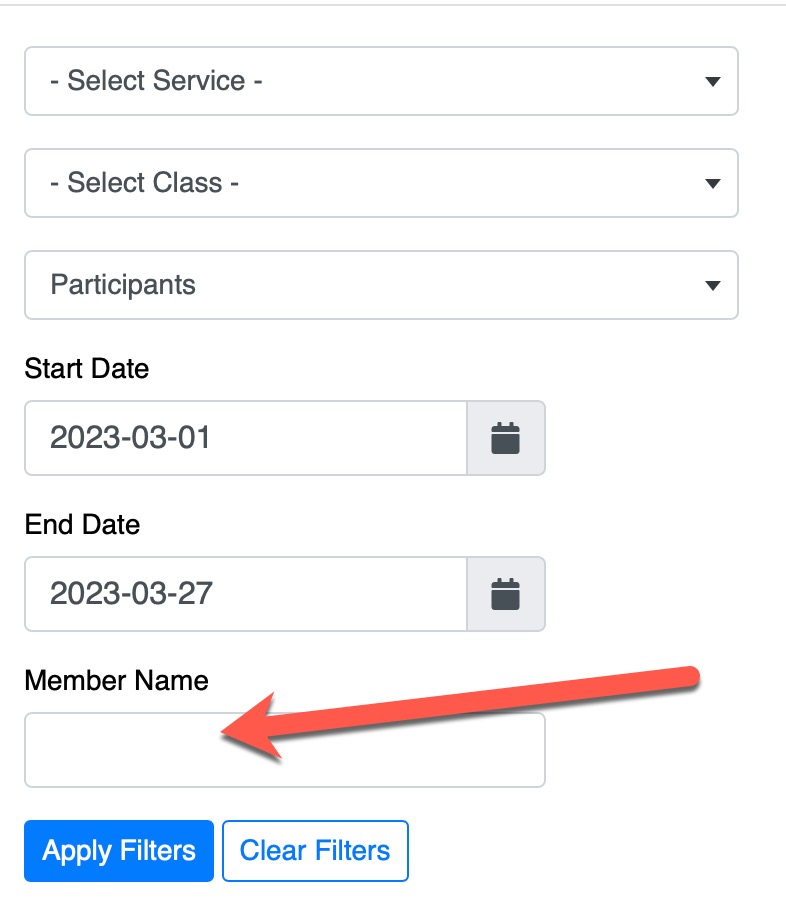
Attendance Reports: Member Filter Added
You can now filter the individual tab results by entering a member filter name.
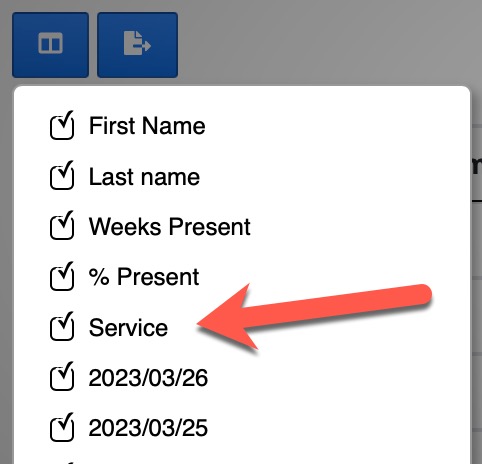
Attendance Reports: Service name Column
You can now display the service name next to the name of the participant and it will also be displayed if the reports are exported.

New Filters Added
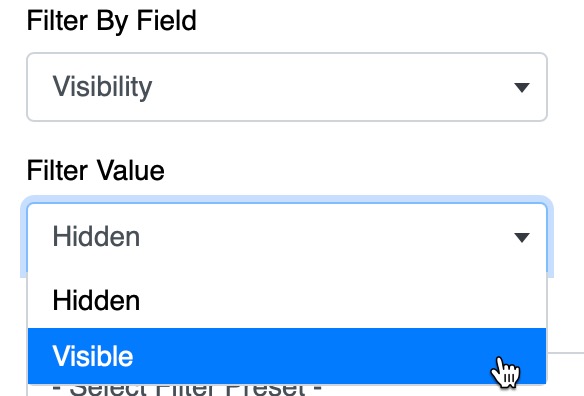
Visibility filter added to the Members List filters:
This will show you the visible/hidden members and display their visibility in the account status if they are hidden
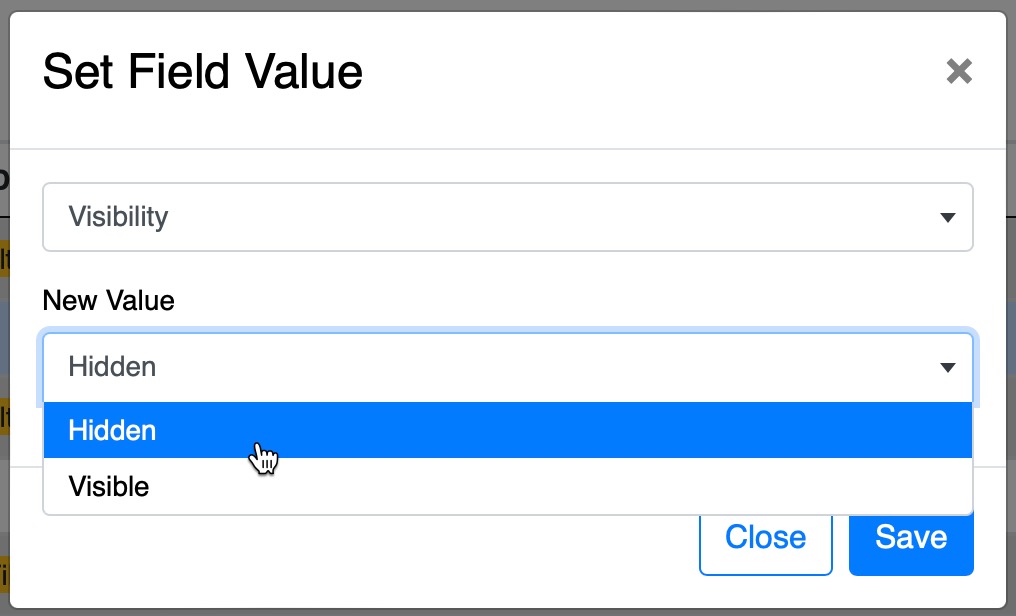
New Set Field Added
You can also set the visibility field manually. This is great when you want to exclude some members from your list and quickly find them and revert their visibility status thanks to the filters value.
Service Level Attendance
The ability to take server level attendance has been reworked for better performance (admin must give permission and also set the event setting for this feature)
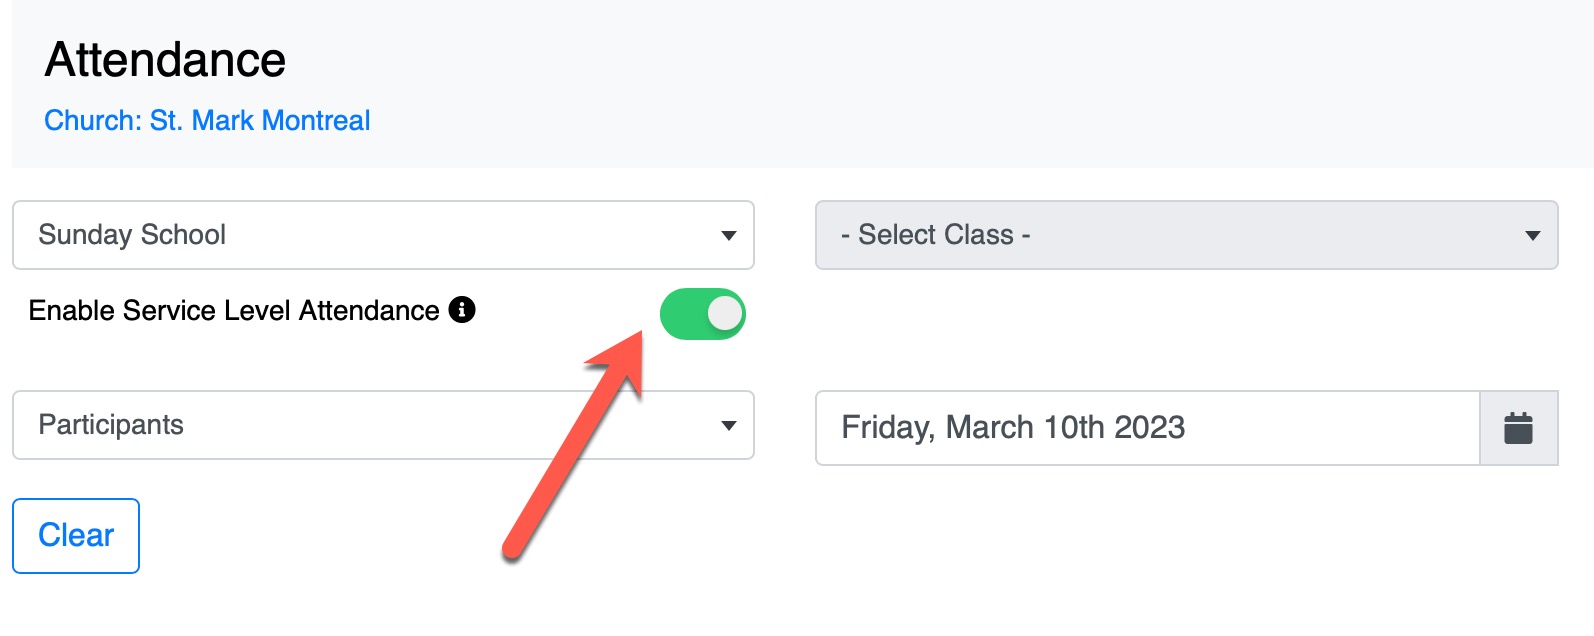
One Click Attendance
You now only need to click on the attendance button on each participant to save their attendance for the selected date!
You can see a visual spinner icon on the button until the attendance is saved

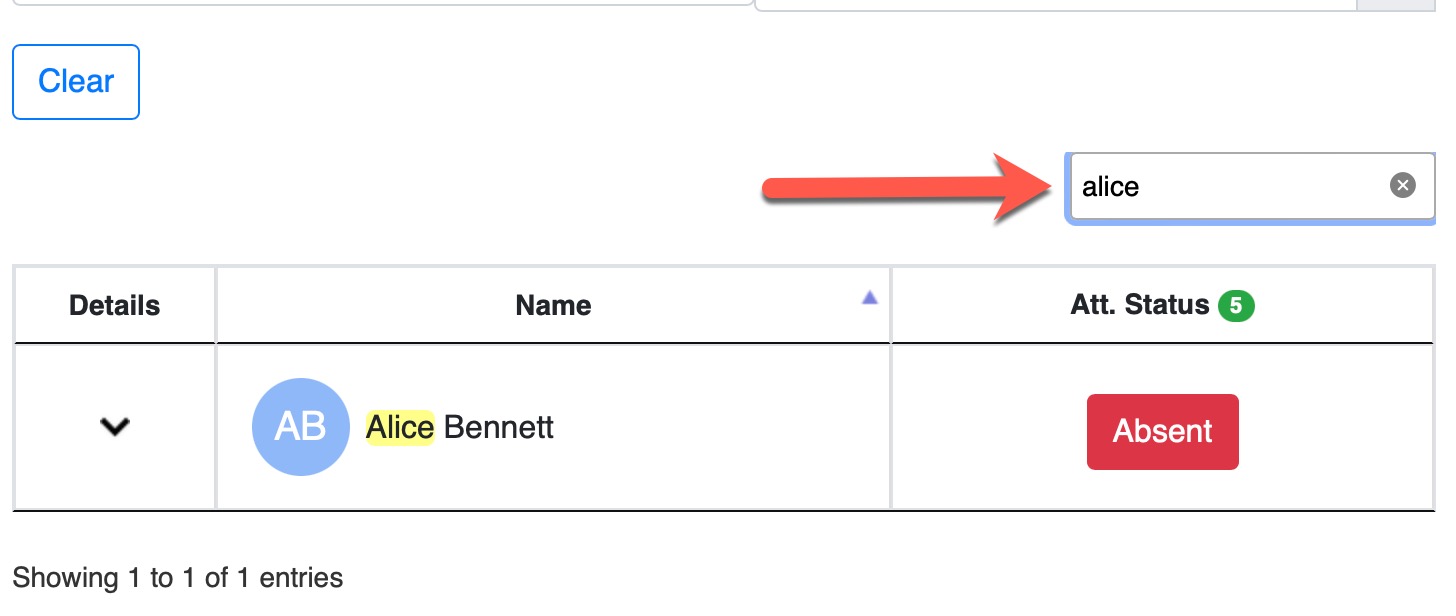
Search Attendance List
You can now search the list of attendance by any of their profile values to quickly filter and find the name you are looking for.
Back to Top button
To make it easier for long attendance lists we added a new "Back to Top" button at the bottom of the attendance pages. The button will appear as soon as you start scrolling and will take you all the way to the top of the page when clicked.
**This button will start to be implemented in all other pages of the system
Attendance Reports Dates Columns
We are very happy to bring you the newly redesigned individual attendance report page to display columns with each date and the corresponding status!
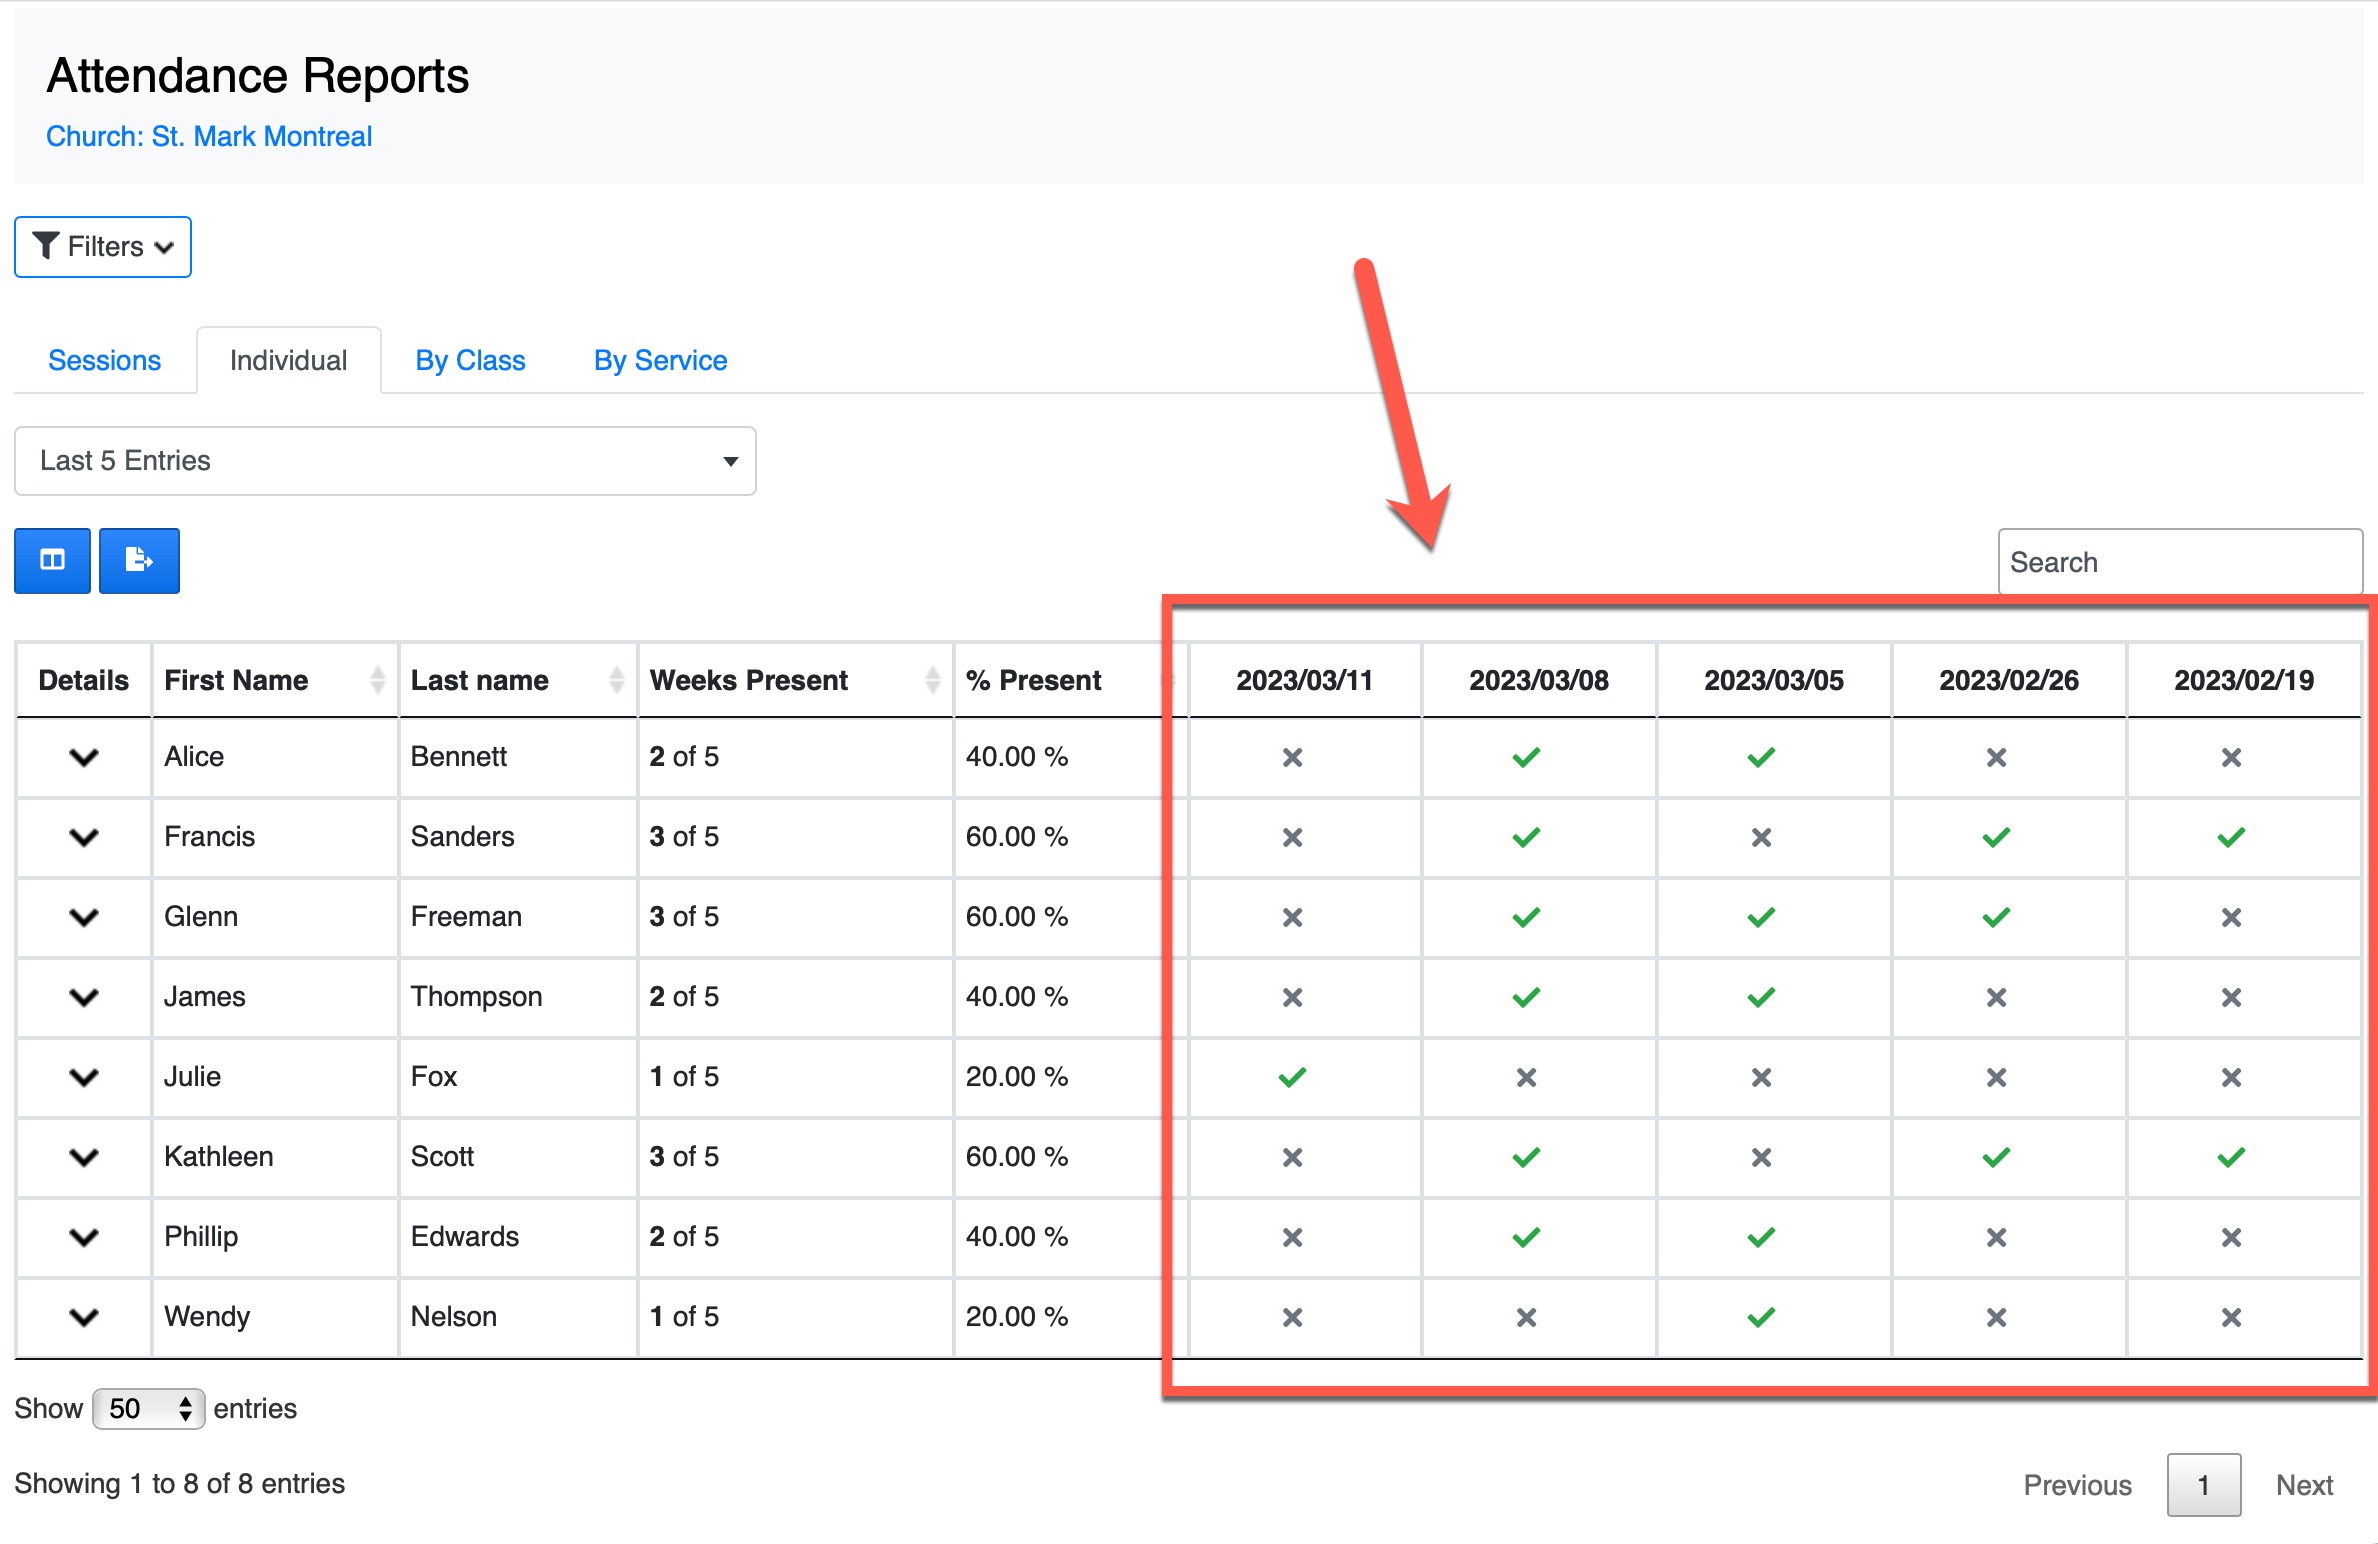
This displays in a much more user friendly and cleaner way the attendance of every individual of the selected service/class
Export to Excel Individual Columns
Like above, you can also now benefit from having every attendance date in its own column with the corresponding status in the excel export of the report.

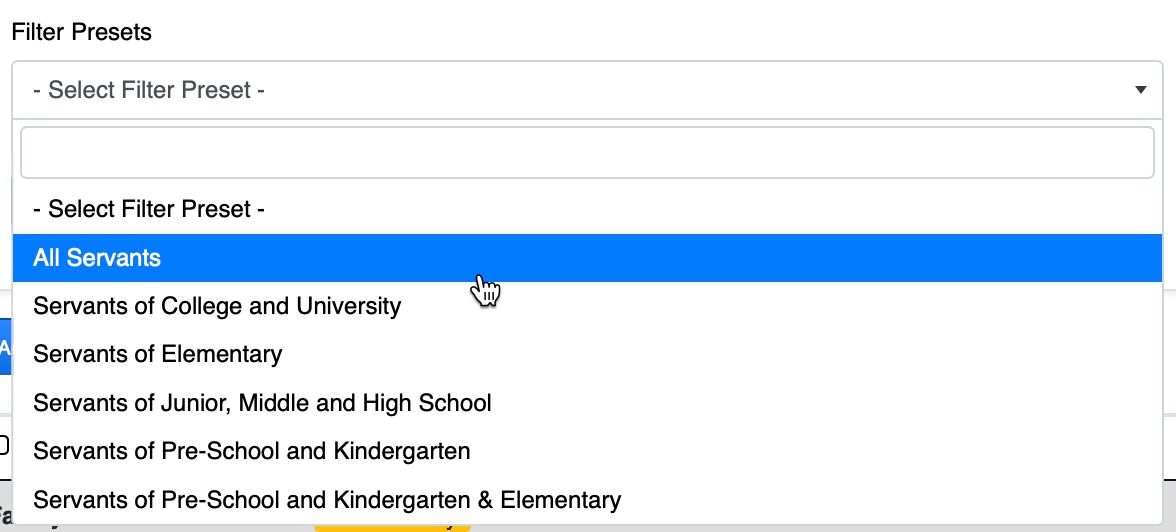
Members Filter Presets
You now have the ability to run filter presets on the members list table. This feature allows you to quickly filter the database with some predefined search parameters.
The presets will be updated frequently and you can ask for new ones by opening a support request.
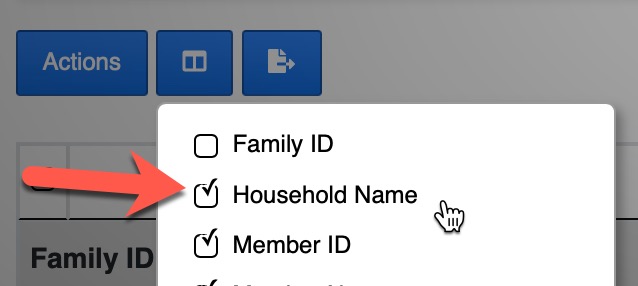
New Columns Added
You now can show/hide 2 new columns in any members list table across the system: Household Name and Custom Flag
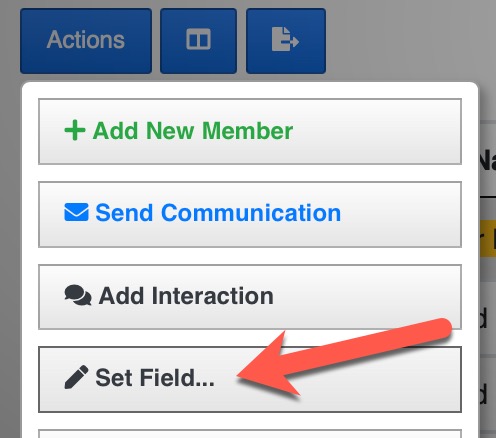
By default, the household name is a combination of the family heads names. You can edit this by using the Actions -> Set Field feature. These columns can only be edited by UnityApp Admins.
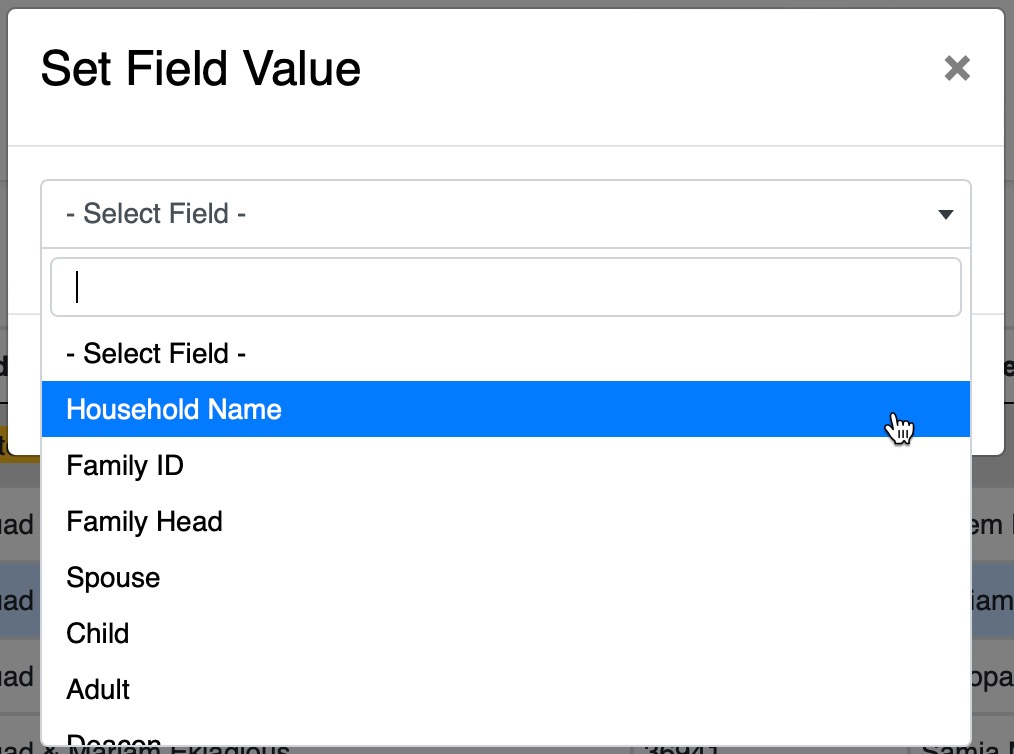
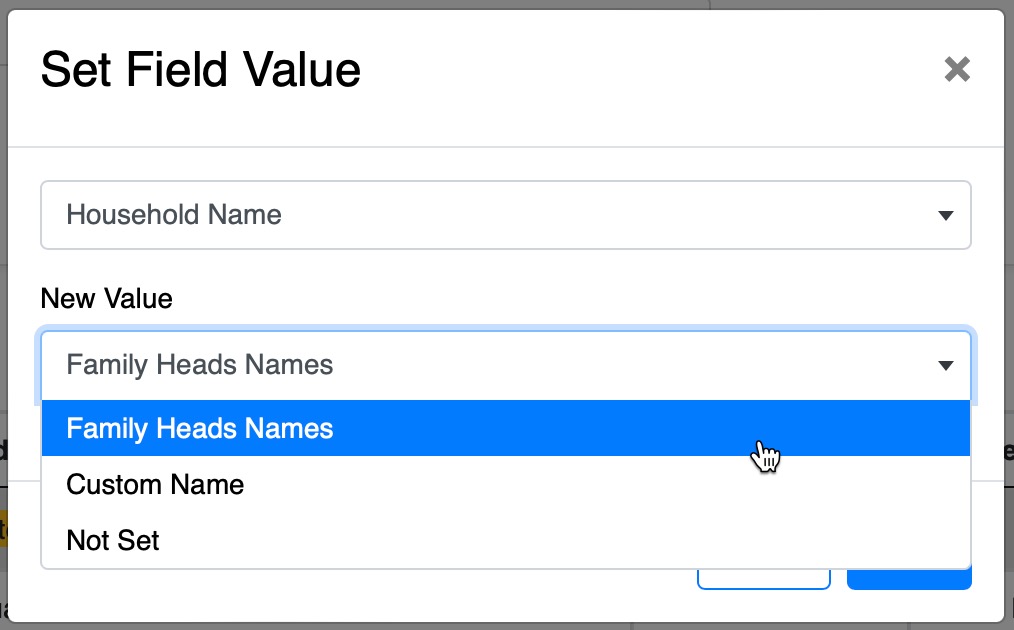
New Set Field Options
In the previously released feature "Set Field" under the Actions button of the Members list table, you had only the ability to change/set the gender. Now you have a multitude of fields that you can set for one or multiple selected members
These are the newly added options:
- Household Name
- Family ID
- Family Head
- Spouse
- Child
- Adult
- Deacon
- Family Relation
- Custom Flag
Character Encoding
The members names and address with special accented characters or apostrophes have been cleaned up and should properly display in all tables. If you find any names with strange or unreadable characters please report it by opening a support request.
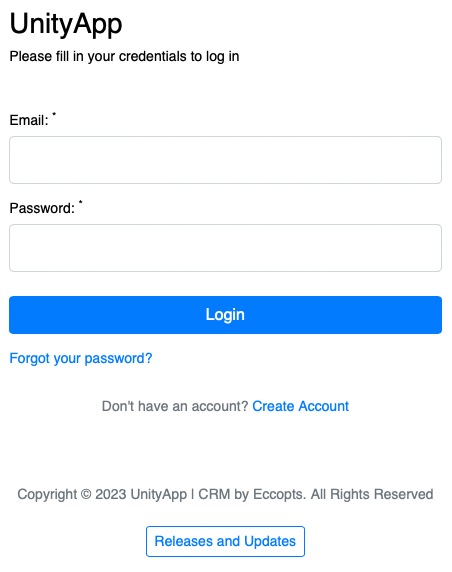
We have redesigned the login screen to follow the app theme.
Also this gives a new access to anyone to follow the updates and releases of the UnityApp without logging in by clicking on the button at the bottom of the screen
Newly designed interface of the interactions view which gives you access to multiple features such as:
- add/edit/delete comments
- progress indicator
- button at the top for more actions
- interaction activity log
- sorting button
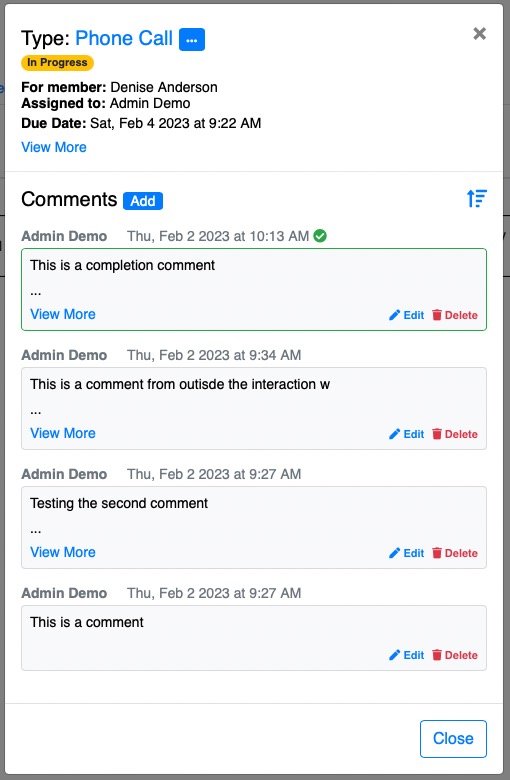
Naturally this also removed the interaction summary view in the interactions table and replaced it with a View button instead to open this window with all the details you need.
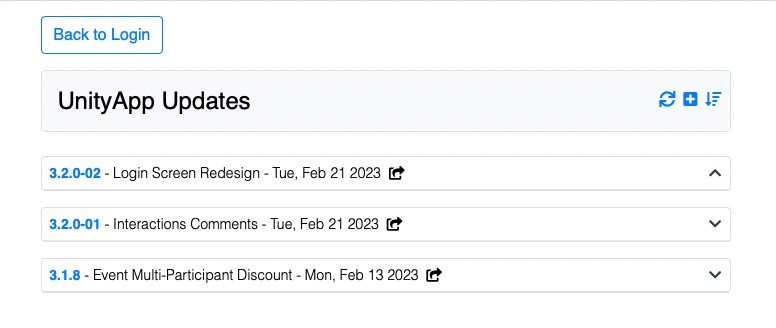
We are very happy to present to you the newly designed UnityApp Releases and Updates page. (see attached image)
Features:
- new modern design
- sorting and expanding option buttons
- share link to this specific update button
- accessible for everyone without logging in the system
- auto scroll to the linked update
- auto highlight to the linked update
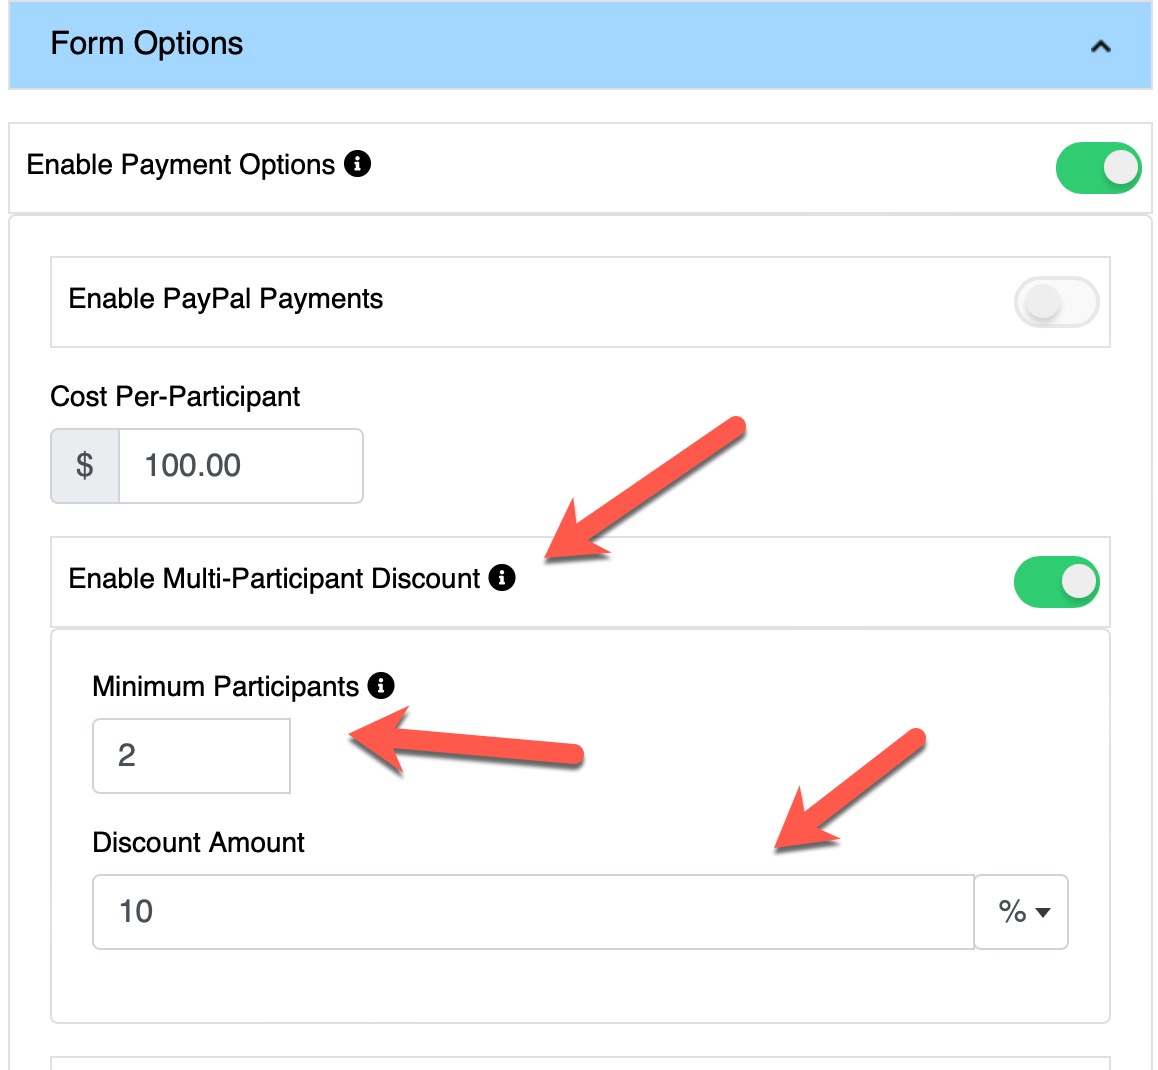
You can now add a discount for a specific number of participants of an event from the same family.
